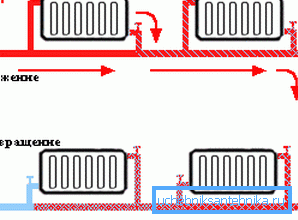
Connection diagrams of heating radiators - consider the
One of the most important aspects in the process of heating design is the installation process, which directly affects the performance of the equipment. But many owners of apartments and country houses do not always correctly carry out this process, which leads to constant repair. In this article we will consider only the correct connection of the radiator to the heating systems.

Instrument connection options
Perhaps, it’s worth starting with the ways of laying heating pipelines, which is why the connection pattern of the radiator directly depends on the heating.
There are two ways of laying pipelines for heating:
- Monotube - wherein the coolant is fed through a pipe to the radiators of heating, fixed successively one after the other and, having washed them, returns to the source of heating. As a rule, at 20-30% of the length of the route is already considerably cooled coolant.
- Twin tube - consisting of two independent pipes: the supply and return, and in this case, the coolant involves a parallel connection of heating elements.
Modern battery designs are mostly equipped with four possible pipeline installation points (two upper and two lower). Therefore, connecting radiators to various systems is possible in several ways.

One way connection
The most common way to install a heating system can be called a one-sided option when it comes to apartment buildings.
This scheme of connecting a heating radiator provides for the connection of pipelines on one side of the device:
- The supply pipe is usually connected to the nozzle at the top.
- Reverse is fixed at the bottom position.

Note! With one-sided connection of the radiator with the change of the places of the supply and return circuits, the loss of heat transfer of the system up to 7% is possible.
The one-sided layout of the battery pipeline necessarily includes a jumper connecting the “flow” and “return flow” in front of the device. Dismantling this jumper with your own hands is extremely undesirable, since it can disrupt the operation of the entire central heating system.
The heat transfer coefficient can also reduce the unjustified increase in sections of the device, more than 12-15 pieces due to the weakening of the heating of the remote area.
Diagonal connection
For products with the number of sections exceeding 15 pieces, the diagonal connection scheme of steel radiators will be the most optimal.
According to this scheme:
- The supply pipeline is mounted to the device at the top, on the one hand.
- Diverting at the lowest point, on the other hand.
The coolant, being distributed from the top down and diagonally, ensures uniform heating of all parts of the radiator. Violation of the principle of supply and return connection may entail a decrease in heating power from heating products by 40-50%.

Note! For maximum effect, a diagonal connection is used in two-pipe heating systems.

Bottom connection
An acceptable scheme for connecting radiators in a private house is the lower arrangement of pipes. The process consists in connecting pipelines from different sides of the device at its lowest points. Possible loss of battery power in such a connection scheme of 12-14% can be adjusted by installing air valves through which air is removed from the system.
It will also help to increase the efficiency of heating with lower radiators - the installation of a circulating pump heating.
Tip! It is recommended to install shut-off valves in the places where the devices are connected to pipelines. This will allow to carry out repair work or dismantle and replace the failed battery without shutting down the entire heating system.
The nuances of installing and connecting radiators
Regardless of what the fixing scheme was chosen pipes with batteries, there are a number of rules for the installation of devices, by adhering to which you can create an effective heating system.

The installation instructions for radiators recommend the following:
- Batteries should be installed directly under window openings, or near door openings (in private homes) - since these parts are the main sources of heat loss.
- When installing the battery, it is necessary to adhere to the normative distances from the device to the appropriate structures:
- At a height of about 100-120 mm from the floor.
- The distance from the wall is 20-50 mm.
- Below the window sill 100 mm.
We advise you to listen to the recommendations of experts, because the cost of oversight in installation and connection - reducing the efficiency and cost of heating your home.
Conclusion
We hope that the above information will help you understand and install the heating system devices correctly and without any problems. After all, if everything is done properly, then you can not spend money for many years and not think about the upcoming repairs, costs and time, which is better to spend on your family and rest.
In the presented video in this article you will find additional information on this topic.