Do-it-yourself heating stoves: all the main stages of work
Despite the fact that in our high-tech century there are many varieties of modern heating systems and appliances, stove heating is still popular. It gives natural “living” warmth, its construction is quite simple and practical.
A well-built stove is capable of becoming a real family hearth, uniting all households around it and bringing coziness and comfort into a home. Our article is dedicated to how to fold the heating furnace yourself.
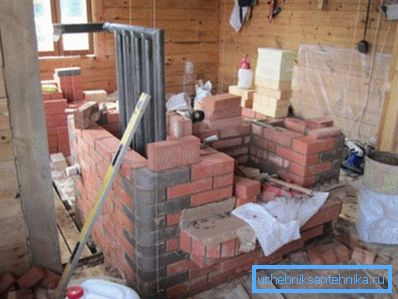
Note! You should do this only if you have experience in masonry and at least know the theory of the construction of heating appliances. If you do not possess the necessary knowledge, entrust the work to professionals.
Varieties of heating devices
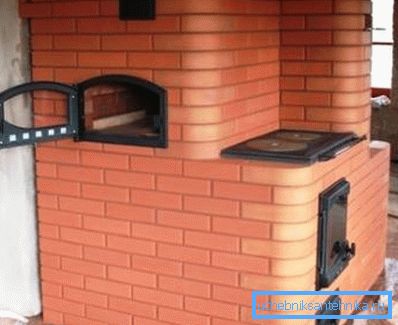
There are several main types of brick stoves for their functional features.
Functionality
- Heating units are built only to heat the building. They are put the fastest, because their construction is the simplest.
- Heating and cooking stoves are very practical and convenient. They not only heat the house, but also make it possible to cook food. To do this, they are equipped with a hob, and sometimes the oven.
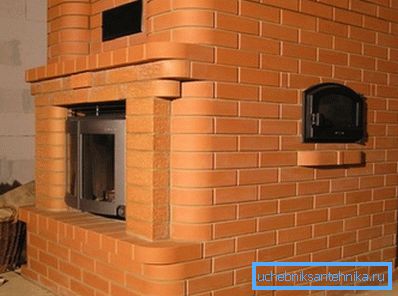
- Fireplace stoves are compact, therefore they save space. At the same time they provide efficient heating and a special comfort in the house. In addition, industrial analogues, for example, heating furnaces of Bavaria, are units of long-burning and do not require frequent stowing of fuel.
The shape of the units can also be different. There are square, round, rectangular, triangular (angular) devices. This gives you the opportunity to choose the option best suited for the characteristics of the room.
Note! It does not matter what type of unit you choose, one of the basic requirements is its complete fire and sanitary and hygienic safety. When laying the stove it is necessary to follow this very carefully.
Design features
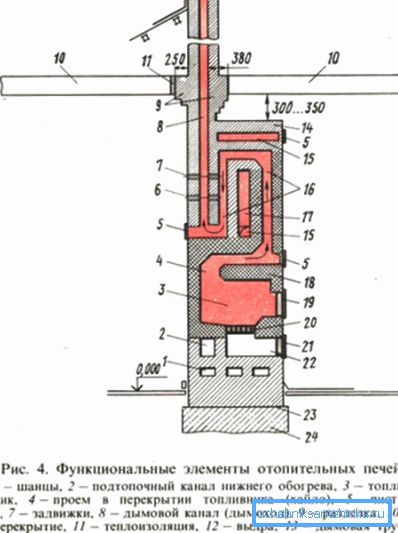
The design of the heating furnace is very simple. Its body consists of a fuel chamber, an ashpit and a chimney.
For units with a hob, a cooker is added to this list, sometimes an oven and a tank for heating water.
- Fuel chamber is the main node of the heating devices. It should contain the maximum possible amount of a particular type of fuel in order to provide the device with maximum performance.
Dimensions of the furnace are different, it depends, firstly, on the type of fuel used. For example, under the firewood, this construction site should have a height of 40/100 centimeters. The required performance of the stove and the desired amount of a one-time fuel bookmark also matter.
The instruction warns that the fuel chamber needs to be put exclusively of fire-resistant bricks. Moreover, the thickness of its walls should be no less than half a brick.
- The main purpose of the ash pan is to collect the ash and supply air to the fuel.. It is placed directly under the grate and, as a rule, is equipped with a door with a latch. Typically, the height of the ash chamber is equal to three bricks.
- The chimney is a unit designed to discharge combustion gases from the stove to the street.
Note! When designing the device and drawing up the drawings of the heating furnaces, please note that it is undesirable that the chimney has many twists and turns. They increase the resistance to the movement of combustion products. As a consequence, the heating efficiency decreases.
The location of the unit and the basis for it
Thinking through the furnace heating with your own hands, correctly select the site for the installation of the device.
- If the unit is placed in the center of the room, its heat output will be higher. He will be able to heat the air immediately from four sides, evenly giving the room heat energy.
- When a wall section is selected for the device, by the way, such a solution is most common, then the convection flow of street (supply) air coming from the doors and windows will move more actively around the room. Due to this, the ventilation of the dwelling will improve.
- The laying pattern of the heating furnace must take into account the location of the door of the combustion chamber. Here it should be taken into account that it should be convenient, so that it would not be necessary to carry fuel, dirty ashes and soot through the whole room.
- With regards to the base under the stove, it must be concrete. If the floors are made of this material, the task is simplified. If the base is wooden, then under the device you need to pour a separate foundation. In this case, the foundation must be calculated on the load not only from the stove, but also from the walls of the chimney.
Installation of the stove
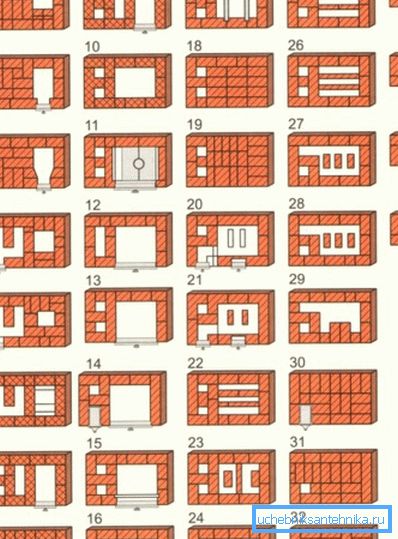
Further on how the heating furnaces are laid.
Preparation of masonry mix
In order for the heater to work properly, to be durable, safe and reliable, first of all it is necessary to make high-quality masonry mortar. It is prepared from refractory chamotte clay and quartz sand.
Preparing the mixture is quite simple.
- First, take the required amount of chamotte clay and fill it with water. So she soaks.
- Next, it is necessary to pass through a sieve, then mix with water until the consistency of clay "milk".
- Lastly, the required amount of quartz sand is added.
- The result is a strong, viscous and durable masonry mix.
When the installation of heating furnaces occurs, a well-made solution is the key to the quality of the device. Otherwise, the cost of mistakes is very high. The unit will not function efficiently, it may happen that it will not last long and just collapse.
Stages of construction of the device
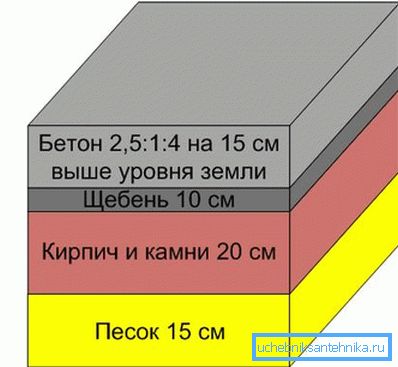
Begin laying the heater should be after 28 days from the date of pouring the foundation under it. That is how much time is needed for the complete crystallization of the concrete stone. Competent schemes of heating furnaces should take into account this circumstance.
During this time period it is necessary to purchase all the necessary materials: doors, grate, chimney pipes, cooking surface, etc.
The installation of the unit can be divided into the following steps.
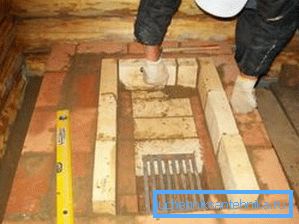
- First of all, an ash chamber is put in and the lower part of the first of the caps (with a roll). At this stage, the usual sand-clay mixture is used, which has optimal characteristics for this kind of work.
- In the brickwork at the same time should install the door ash. It must be fixed with galvanized steel wire.
- A grate grate is mounted above the ash chamber.
- Then you can start laying firebox. Inside, it is laid out with chamotte blocks laid in a quarter of a brick ("on the edge"). The solution at this stage is already made of chamotte clay and quartz sand.
- At the same time, the door of the combustion chamber is inserted into the masonry and fixed with wire, as well as with a plate of steel having a thickness of 5 millimeters.
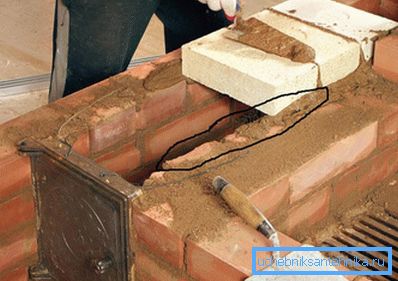
- At the level of the 12th row of bricks, the firebox overlaps.
- Then set the hob with rings. It should be mounted using a bubble level so that it is located strictly horizontally.
- In the left side of the unit, the installation of the first hood continues, and installation of the channel for the summer chimney begins.
- The walls for the cooking chamber should begin to raise after the installation of tiles. On the left side continue to put the bottom cap.
- In the corner (internal) of the cooking cavity, the valve is installed for the summer running, which is used for melting the stove.
- At the level of the 20th row of bricks, it will be necessary to close the first of the caps, as well as the cooking chamber.
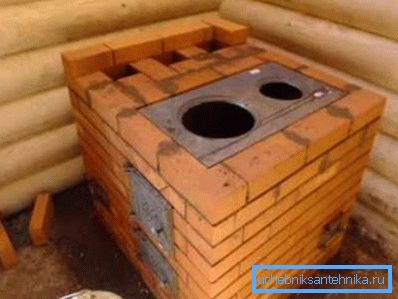
- Do not forget to leave holes in the masonry for the summer course, the lifting channel, as well as the vents for the cooking chamber. In this case, for the blocks it is necessary to put supports from metal corners. So the design will be more durable and reliable.
- The portal of the cooking cavity is best blocked with chimney doors hinged variety. It is desirable that the doors were equipped with inserts made of heat-resistant glass. Then you can control the burning of fuel, in addition, to admire the aesthetics of open fire.
- Having blocked the lower of the hoods and the cooking chamber with two brick rows, you can proceed to the installation of the upper hood.
- Do not forget at the same time, at the most convenient points, leave the cleaning holes with doors to remove soot.
- The walls of the upper cap should be placed almost to the top of the wall. Further, the upper part of the unit is overlapped with two brick rows.
- To improve the insulation of the device, the gap between the lintel and the upper part of the unit must be filled with insulation, such as basalt wool.
- When putting a heating stove with your own hands, do not forget about aesthetics. So, on the perimeter of the top of the stove, you can lay out a decorative belt.
- Next is mounted chimney pipe.
Note! The best option when the chimney is laid out of brick. An exhaust pipe made of asbestos cement or metal may burn through during operation.
Conclusion
Independent installation of a heating stove is quite complicated. However, a completely doable process. The main thing at the same time is to strictly adhere to the used procedure of the heating furnace, do not rush, and also take into account all the safety requirements of the unit.
Video posted in the article will help you in your work.