Floor radiators: methods of power and heating, installation
Heaters will not always be something quite normal for a room, in some cases they have to be hidden or decorated, for example, floor radiators for panoramic windows should not be noticeable, and at the bottom they are almost invisible.
Such devices may differ from each other not only by the configuration or method of fastening and the source of energy consumption, but also by the way of heating the room - this could be water, oil or hot air. To install such devices at home, you need to understand all this, which we propose to do, and in addition we want to show the video in this article.

Much about floor radiators
Power and heating methods
- For space heating instruction allows the use of a variety of well-known or little-known heaters., but we are in this case interested in those devices that are mounted on the floor or embedded in the floor. Such units can be autonomous (portable), that is, not attached to the base, or stationary and fixed to the floor or wall.
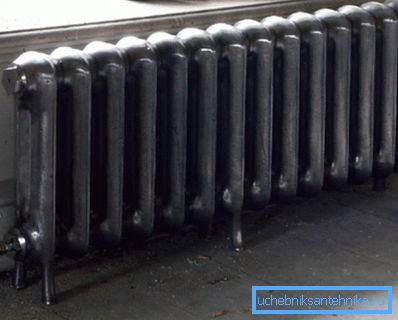
- Electricity and gas (for convectors) can be the energy source for heating such appliances, but oil, water or hot air can already be used as a heat carrier.. For example, floor electric oil radiators of heating are always autonomous, but a similar device that is heated by water will definitely be stationary.

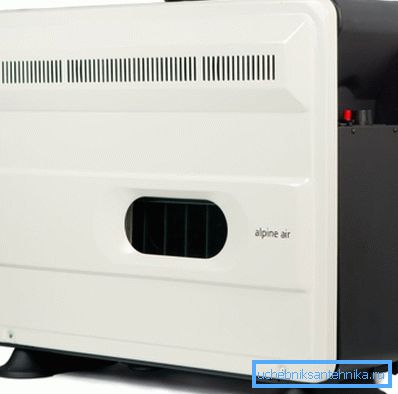
- It is also possible to call stationary and gas convectors of heating, which are installed not on the wall, but on the legs, although they have a relative free zone of movement, thanks to a flexible connection hose (the price of floor and wall models is almost the same). It is also possible to attribute a warm plinth to stationary appliances, which are not located on the wall, but on the floor, where water acts as a coolant, and its efficiency is equal to the usual radiator circuit.

- The number of heating devices we are considering also includes floor-mounted floor-mounted radiators - they are also considered stationary, and water or hot air acts as a heat carrier.. But such units are more used in large public buildings, such as cinemas, supermarkets, exhibition halls and medical institutions.
Installation Features
Note. Whether it is a water, oil or electric floor radiator, if it is installed permanently or for a long period, then it is placed under the window. The fact is that the warm air, rising up from the device, creates a barrier for the penetration of cold streams, which are moving inside the room from the glass.

There are several main reasons for the need to install floor heaters, it is:
- Stained glass in the building;
- A window made as a showcase;
- Panoramic window;
- Sill too low.
Also, the reason for the installation of such devices on the basis may be walls with a weak lining, for example, they may be made of plasterboard, but at the same time you do not know where the profiles are and you have no place to fix the brackets.
However, it does not harm, but rather contributes to the unimpeded distribution of heat - warm air rises from the bottom up and the room thus receives more heat in its lower part.

Among the low heating devices there is such a wonderful arrangement as a warm plinth, as in the photo above, it looks similar to the usual one, only its height is 10-15 cm, and on the surface there are holes for air circulation.
Heating here occurs with the help of water, that is, it is the most common water circuit, only its channels are hidden by a decorative lining, which is fixed in the lower horizontal corner of the room. The total area of the entire system is equal in power to the capacity of the radiators that could be installed here.

For fixing, you will need floor fasteners for radiators, which can be of three types, these are:
- U-shaped metal arc, as in the top photo;
- "Fork", where the device is profiting on protruding teeth (such brackets usually come complete with a radiator, so that there is an exact match);
- “Chain” where the locking element consists of links resembling a bicycle chain.

Imagine that you need to install a floor-mounted bimetallic radiator with a bottom connection, therefore, first of all you expose the heating pipes so that they can be easily connected to the device.
To do this, the unit is installed in its original position, not screwing it to the base, and fittings are fitted - as a rule, such connections are made by polypropylene and there is a slight gap, which can block the errors, but it is better not to allow them.
After marking and soldering the pipes, install the non-screwed device to its original position and screw the fittings without sealing - this will allow you to clearly mark its stationary location.

Now you need to mark each hole on the brackets with a marker, where the mounting dowel will be screwed in - usually on each leg of the fastener there are from 2 to 4 pieces, and note that the longer the radiator, the more fasteners you will need.
Of course, if the floor is wooden, then the fasteners are simply screwed with screws, but for ceramic tiles and just concrete screeds, you will need to drill holes and insert plastic dowels there so that they match the mounting holes of the bracket. To connect the system, first fix the radiators fixedly, then pack the supply and return fittings on them and only then carry out tests, that is, open the water in the system, filling the circuit with it.
Note. When installing such radiators with your own hands on a wooden floor, in some cases, in order to avoid overloading the lag, the devices should be additionally fixed to the wall. But this applies only to weak structures, where lags have an unreliable base.
Conclusion
By and large, embedded or floor radiators are not used so often - the urgent need for their use arises only in special cases (we mentioned them in the article). However, if such a need arose, then nothing changes with regard to the power consumption of electricity or the power of the boiler - everything remains in its place.