How to build a greenhouse with heating: practical tips and
In this article we will talk about how to make heating in the greenhouse with your own hands using the available materials. The theme of arranging an efficient and safe heating system in a greenhouse intended for all-season use has been relevant at all times. But right now, when greenhouses are used for commercial purposes, equipping this structure with high-quality heating is of particular importance.
Are you dreaming about harvesting several times a year? It turns out that to make this dream a reality is not so difficult. It is enough to find out how to make heating in the greenhouse, to get everything you need to carry out these works and the optimum microclimate for growing the crop will be provided.
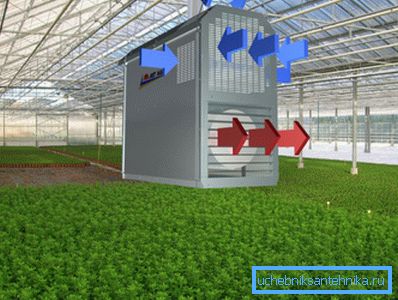
Methods of heating structures covered with polycarbonate
Heating soda and garden buildings covered with polycarbonate is of several types.
Consider the most common modifications of heating, which can be arranged with your own hands without the participation of qualified professionals:
- Water heating system based on solid fuel boiler pipe and radiators - This is the best option for country greenhouses of medium and large size.
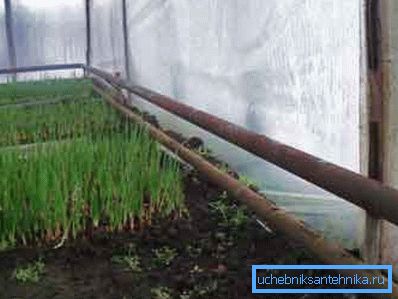
The advantage of this solution is operational safety and cost effectiveness. Solid fuel boiler, without a source of open flame, does not pose a danger to the greenhouse and the same can be said about the pipeline and radiators.
By purchasing a solid fuel boiler of small capacity, you will be able to maintain in the closed space a long-term temperature of about + 10 ° C with minimal energy consumption.
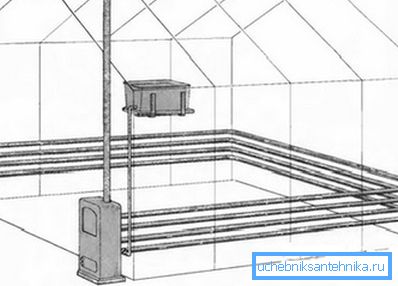
The only significant drawback of such a system is the impossibility of automated control of temperature parameters and remote control of heating equipment.
- The water heating system without radiators is based on the use of a pipeline laid in the ground at some distance from the intended place of breakdown of the beds..
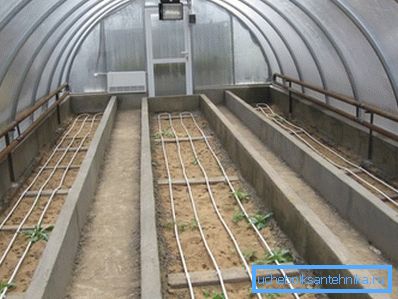
In fact, this system is a logical continuation of the previous version. In this case, a solid fuel boiler is also used, but the pipeline should be made from metal corrosion-resistant pipes, which are characterized by higher thermal conductivity in comparison with polymer analogs.
The heating system with the laying of pipes in the ground is a kind of “Underfloor heating”, which is commonly installed in residential premises.
Important: The implementation of the first and second schemes assumes the need to arrange a safe heat-insulated chimney, which does not lead to the melting or ignition of the polymer coating of the greenhouse.
- If you are faced with the question of how to heat a greenhouse cheaply, you can use a wood stove such as "potbelly stove".
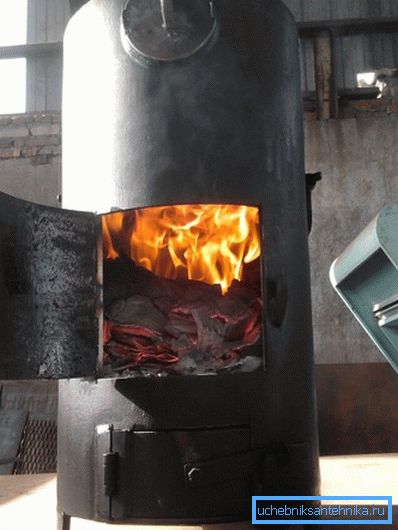
The advantage of this furnace is the ability to maintain long-term temperature while consuming a limited amount of energy. As a rule, one wood bookmark lasts about 8 hours of heating. That is, flooding from the evening, until the morning you can not worry about the fire went out, and all the plantings froze.
The chimney to this furnace is built metal. Fire safety in this case is achieved due to the gap between the surface of the chimney pipe and the polymer coating. The gap, in turn, is sealed with a layer of thermal insulation, such as, for example, mineral wool.
- Biofuels application (compost or manure) - this is the only acceptable solution for use in greenhouses covered with plastic wrap.
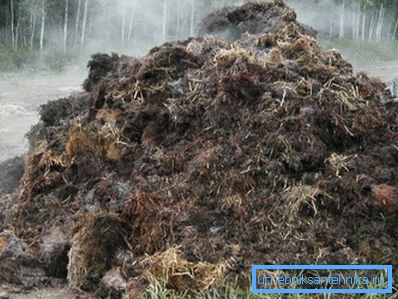
Compost, in the process of decomposition and decay, emits a certain amount of heat, which is released into the environment. Thus, if you correctly select the required amount of biofuels, you can create a microclimate in the greenhouse that is suitable for growing most of the plantations that are resistant to autumn frosts.
Making oven
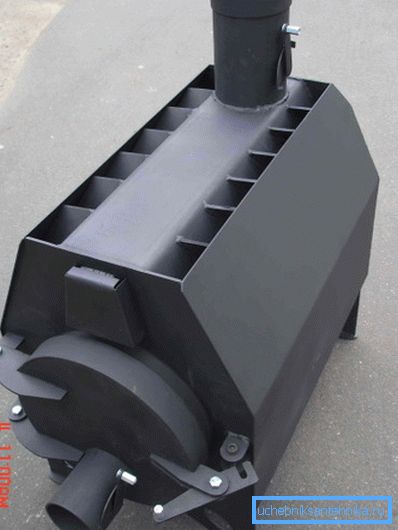
Currently, in most specialized stores you can buy ready-made heating boilers that can be used to heat greenhouses. But, the price of ready-made solutions may seem high. Therefore, we will try to make a simple heating part with our own hands from improvised means.
Important: Before you properly make the heating in the greenhouse, you need to take care of high-quality sealing of the seams between the sheets of polycarbonate or between the glazing. If this is not done in a timely manner, the heat will simply evaporate.
Consider the features of the manufacture of affordable devices for heating garden structures, covered with polycarbonate.
Potbelly stove with his own hands
The traditional potbelly stove is one of the most simple heating devices for which assembly materials will be needed and a simple tool for metal processing.
The design of a potbelly stove consists of such elements as:
- firebox;
- ashpit;
- grate;
- chimney.
There are several varieties of such a furnace in accordance with the configuration. For example, there are modifications in the form of a box, there are devices in the form of a barrel, etc. Regardless of the configuration, the device is characterized by good performance, while the choice of shape is explained by the features of the production material used.
For the manufacture of the unit used sheet steel with a thickness of at least 3 mm. If a structure in the form of a metal box with legs is assembled, firstly a framework is welded from a steel corner, onto which steel sheets are then fastened.
Sometimes, to simplify the task, you can use improvised means, such as for example an old gas cylinder, which has lost its previous tightness or is simply not needed.
Consider how to assemble a stove based on such a blank.
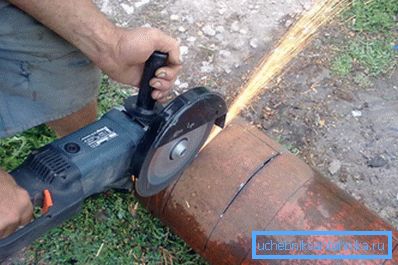
The instruction for making a potbelly stove is nothing complicated:
- In the upper part of the cylinder, we cut off the valve and weld a continuous sheet of metal, which, if necessary, will function as a plate.
- In the middle of the cylinder cut a square hole for the hatch of the combustion chamber.
- We cut the door itself out of a piece of sheet steel so that the edges of the hatch go about an centimeter beyond the perimeter of the cut-out opening.
- Hatch welded to the usual door hinges, which, in turn, welded to the container.
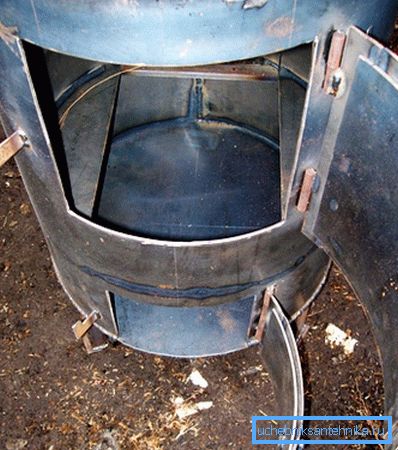
- In the lower part of the construction we weld the inlet connection or we make a flap hatch combined with an ashpit.
- At the top of the unit, weld the exhaust pipe to which the chimney can be attached.
- Immediately above the inlet pipe welded grate, which will serve as a support for fuel and a device for screening out ash.
Fuel selection
Currently, various stoves are used to heat the interior of greenhouses. All of these units operate on different types of fuel.
As a rule, firewood, dried branches left after cutting trees in the garden and sawdust are used as fuel for low-cost stoves. Less commonly, coal is used as fuel, special pellets (granules) or briquettes compressed from waste.
All of these types of heating oil have their obvious advantages and disadvantages:
- Special briquettes, despite the fact that their price is high, emit more heat when burning than ordinary firewood, and therefore they can be put into the furnace in a smaller volume.
- Regular firewood, brushwood and pruning left after cleaning the garden, despite the low heat generation and rapid combustion, are low and accessible to almost every summer resident.
- Coal is more expensive than wood, but such fuel burns an order of magnitude longer and hotter than wood.
- Dry sawdust, as a rule, is used for kindling, as they light up quickly and quickly burn out. However, if desired, sawdust and shavings can be used as low-cost fuel, but will have to stock up on large amounts of fuel.
Conclusion
So, now we know how and what to heat the greenhouse used for all-season operation. It remains to prepare all the necessary materials and assemble the heating unit that will meet your needs and features of the greenhouse.
There are questions that need clarification? More useful information you can find by watching the video in this article.