How to calculate the number of radiator sections: standard,
In this article we will learn how to calculate the number of sections of a heating radiator. Moreover, we consider how to shorten the heater in length or vice versa, how to increase it. The topic of the article is of considerable interest, as the correct selection of the dimensions of the heating device allows you to create optimal conditions for comfortable living in a given room.
Of course, the heating intensity of heat carriers can be controlled by thermostats, the price of which is high. But, unfortunately, the installation of such devices is justified to a greater extent in autonomous, rather than in centralized systems. Moreover, if the length of the battery is chosen to be shorter than necessary, it will not be easy to straighten out the situation with the thermal head.
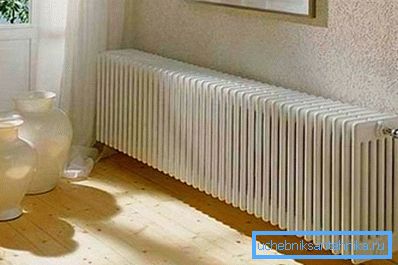
In this situation, the only effective solution would be to correctly calculate the number of sections of radiators.
Criteria affecting the counting
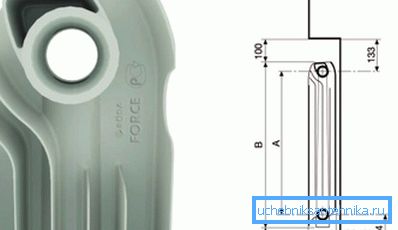
Before calculating the required number of sections of the radiator, it is necessary to determine the criteria that may in one way or another affect the result of the calculations.
Among these criteria, we note the following:
- Room area, as in order to heat a large room, heating devices with impressive standard sizes will be required;
- Ceiling height, as the higher the ceiling, the more heat transfer will be required from radiators;
- The distance that the sill protrudes above the battery. The greater this distance, the greater the power needed to achieve the necessary convection parameters;
- The distance from the top of the battery to the edge of the sill and the distance from the bottom edge of the heater to the floor;
- Type of material used in the manufacture of the heater, as different metals and alloys differ in different thermal conductivity parameters.
The online calculator for calculating the number of sections of radiators is a software that, processing the entered data, provides average results.

But, unfortunately, most of the above criteria online application does not take into account. Therefore, in order not to use the averaged data, we will try to do the calculations with our own hands.
Standard Calculation Method
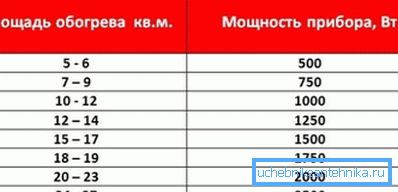
How to calculate how many sections of radiators you need? There are several more or less effective ways to conduct calculations.
Consider the standard way:
- In accordance with the standards given in the SNiP, in order to heat 1 m? Battery premises should operate at a power level of 100 watts. Only in this case, you can count on a comfortable climate of living;
- For calculations, the following formula for calculating sections of radiators can be applied: S * 100 / P. Here P is the power of each radiator segment (parameter is measured in watts), S is the area of the room (measured in square meters);
Important: If most of the walls in the room are external, then when calculating, we use the increase factor, which is 1.2. Thus, the resulting number of segments will need to be multiplied by 1.2 and the result will be rounded up to the nearest whole number.
- If the installation of heaters is performed in a room with a ceiling height of 3 meters or more, more heat transfer will be required to ensure normal convection. Therefore, the previously proposed formula will be irrelevant;
- In this case, it would be advisable to apply the following formula: S * H * 40 / P. In this formula, S is the area of the room (measured in square meters), P is the power of each segment (measured in watts) and H is the height of the ceiling (measured in meters).
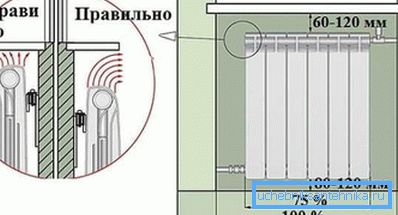
In order for the calculation of the number of radiator sections using the previously proposed formulas to be correct, the battery must be installed as follows:
- From the bottom of the heater to the floor, the distance should be not less than 8 and not more than 12 cm;
- The distance from the riser to the heater must be at least 30 cm.
Approximate calculation method
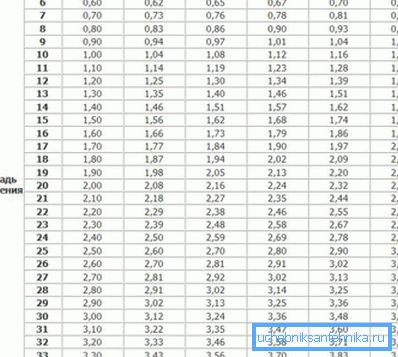
Consider how to calculate sections of radiators using a simplified method. Based on the averaged parameters of serial batteries, it can be assumed that in a room with a ceiling height of 2.5 m, one segment can heat an area of no more than 1.8 m ?.
Therefore, the calculation instruction is as follows:
- Multiply the length of the room by the width and get the area;
- Next, divide the resulting number by 1.8 and find out how many sections are needed in the room;
- If the room is large and there are several window openings, divide the resulting number by the number of openings and find out how many radiators and with what sizes you need to install in the room.
Important: The approximate method of carrying out calculations is fraught with inaccuracies, since it does not take into account many factors that could affect the degree of heat transfer. Therefore, this method is rarely used. The result obtained from an approximate calculation should be rounded to the nearest whole number.
Volumetric calculation method
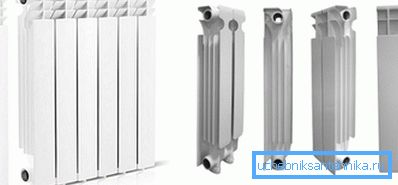
Using this method, you can independently perform the calculation of sections of radiators. First you need to calculate the volume of the room. To do this, consider the area and multiply it by the height of the ceiling.
According to statistics, one segment of a medium-sized battery (power up to 200 W) can heat up to 5m ?. Thus, we consider the volume of the room and divide it by 5. As a result, we get the number of radiator sections we need.
Heating devices presented on sale can have not only a sectional, but also a panel construction. How, in this case, determine the parameters of the radiator?
In fact, everything is not so difficult:
- Perform the calculation of the sections of the radiator according to one of the above schemes;
- Further, the resulting number is multiplied by the width of the section (on average 9-10 cm) and we get the length of the heater;
- After that, we select the panel battery in length by 10% more than the result obtained during the calculations.
How to shorten or ramp up the heater in length
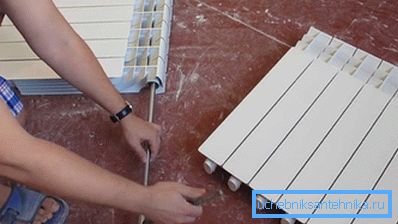
The design of all sectional batteries is similar, regardless of the materials used in their manufacture. The assembly of the sections together is performed using special metal nipples.
Nipples are a type of fitting made in the shape of a hollow cylinder, on which there are external threads on both sides. In the middle of the nipple is installed elastic polymer gasket of suitable diameter.
For cast iron batteries, a nipple with an outer diameter of 30 mm is used, and for bimetal and aluminum with a diameter of 25 mm. Twice half of the nipple is screwed into the adjacent segments.
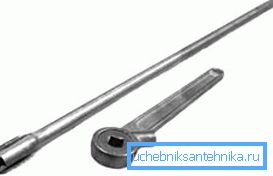
In order to shorten or, on the contrary, lengthen the battery, a special key is needed. Inside the nipple there are special grooves for which the key clings during the installation process.
Since nipples for cast iron are 5 mm larger than nipples for bimetal and aluminum, the keys have different size of the working part. That is, for cast iron, the key is larger, and for bimetal and aluminum, a key with a smaller size of the working part is used.
Externally, the key is a metal bar at one end of which the splines are welded in the form of a cross, which fit into the grooves on the nipple. At the back end of the key, the head is welded with a hole for the collar or with notches for a wrench.
Important: Today you can buy homemade keys, but it is better to use the tool factory production. On the factory tool, along the entire length of the rod, there are risks, the distance between which corresponds to the width of the segment.
The instructions for disassembly and assembly of radiators are as follows:
- Insert the key by the working end in turn in the upper and lower inlet, for as many cuts as for the segments we plan to shorten the heater;
- Feeling grooves with a key, turn the nipple counterclockwise;
- Extension is performed in reverse order. Pre-hand screw the nipple into the inlets of the battery and put on the gasket;
- Next, we lean against the nipples section;
- Insert the key and turn the nipple so that it is screwed into the stackable section. The fact that the nipple has taken the right position can be understood by the risk and by the increased effort on the collar.
Conclusion
Now you know how to calculate the required number of sections and how to assemble a battery of the right size. More useful information can be found by watching the video in this article.