How to change the radiator: the choice of heating devices,
This article focuses on the materials and methods used to replace heating appliances in a city apartment. We will address the problem of choosing the batteries themselves and all the additional elements of their strapping, necessary for the most comfortable operation. In addition, we will highlight some organizational issues - in particular, the areas of responsibility of the owner and the housing organization.
Legal regulations
First, it is worthwhile to stipulate a couple of moments that are not related to the technical side of the problem.
Often in print and on legal forums the question is: Who changes the radiators in the apartment ?.
We hurry to answer it:
- If the apartment is in municipal ownership, the entire responsibility for the state of the heating system (including the internal appliances) lies with the management organization.. However, it has the right to independently decide on the degree of wear of the device and the need to replace it.
Useful: as a rule, the replacement of batteries is carried out during the overhaul of the house in all apartments at once. Minor faults are eliminated without replacement: intersectional leaks are treated by replacing gaskets; cold sections become hot after flushing the heater.
- In a privatized apartment, the owner is responsible for the condition of all her property.. In an emergency, the team (local housing organization or city emergency service) will eliminate the leak, drowning out the liner, but will not begin to engage in the replacement of the device or its repair.
Can the owner change the heating radiators independently, without coordinating the replacement with the management organization? Yes, there are no restrictions here.
This work can be done by a mercenary team or by the owner himself with two reservations:
- Responsibility for the damage caused to neighbors in the flooding of their apartments is also fully borne by the owner of the property. That is why, after any operations related to the violation of the tightness of the heating system, pressure testing is required.
- The power of the new heater cannot exceed the capacity provided by the project by more than 15%. Otherwise, your apartment will be heated at the expense of your neighbors: the heat flow allowed through the riser is limited.

Why do you need it
And in fact, why change the heating devices?
It is practiced in the following cases:
- If the heat transfer of the old device is insufficient to maintain the normal temperature in the room at the peak of cold weather. The temperature in different rooms of the apartment is regulated by the current SNiP and must be at least:
| The room | Temperature, C |
| Living rooms | 18 |
| Living rooms in regions with the coldest five days a week -31C and below | 20 |
| Kitchen | 18 |
- If corrosion or erosion contained in the coolant suspension makes further operation of the device impossible. In this regard, plate radiators of the Soviet type are the most typical: after 7-10 years of work in the heating circuit, they begin to leak massively.
- If the appearance of old batteries does not fit into the design of the room.
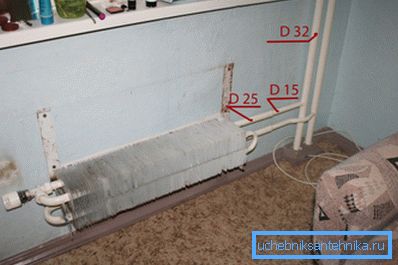
To clarify: the problem of appearance is solved by mounting various boxes and screens. However, they significantly reduce the heat transfer of batteries, limiting the movement of convection currents.
Go shopping
So, what will we change the old battery for, and what additional materials will we need?
Radiator
The best choice for the DH system will be bimetallic radiators with a maximum working pressure of 25 kgf / cm2.
Please note: bimetallic sections for the sake of cheaper prices are often supplied only with steel cores in vertical channels; the collectors remain completely aluminum. Our choice is cores, which completely exclude the contact of the heat carrier with the aluminum shell.
Why precisely bimetal?
There are two reasons for this.
- High probability of water hammer. A torn off valve of a screw valve, a dropped gate valve or simply excessively fast filling of the circuit can, under certain circumstances, lead to a short-term pressure jump to values of 20-25 kgf / cm with a nominal pressure of no more than 5. What happens in such conditions with instruments designed for more sparing mode of operation - it is not difficult to guess.
- In addition, the steel core eliminates electrochemical corrosion of aluminum. The fact is that this metal forms a galvanic couple with copper: when aluminum and copper electrodes are placed in the electrolyte, a constant weak current arises between them.
Ion transfer leads to accelerated destruction of aluminum. If someone from the housemates has installed a copper liner in his house, this will greatly shorten the life of the aluminum battery in your home.
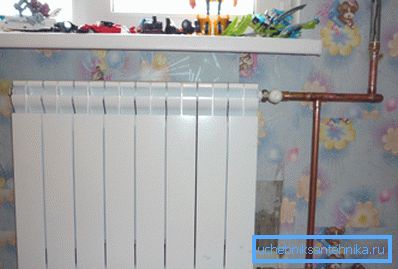
Against the background of traditional cast-iron and steel radiators, bimetallic radiators are distinguished primarily by high heat emission per section, which is up to 205 watts. The price of domestic-made appliances starts from about 500 rubles per section.
Pipes
Here the same main selection criterion - strength.
Paired with bimetallic batteries can be used:
- Black steel pipes on welded joints.
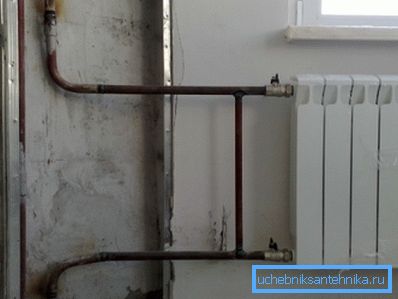
- Galvanized pipes on the threads. In this case, welding is not used because it violates the protective zinc coating in the weld area, destroying the main advantage of galvanizing - corrosion resistance.
- Stainless corrugated pipe. Their advantages against competitors are extremely simple installation using cheap hand tools and the flexibility to do a very approximate adjustment of dimensions. Corrugated stainless steel bends with a turning radius equal to its diameter.
An important point: if you install a bimetallic radiator instead of a cast-iron radiator, having the same center distance between the manifolds (500 mm), the liner can not be changed. Of course, if they are not damaged by corrosion.
Valves, fittings
Battery strapping may include:
- A couple of ball valves to completely disconnect from the circuit.
- Valve and throttle. This kit allows you to manually adjust the heat transfer device.
- Valve and thermal head. The latter makes the heat transfer adjustment automatic: a constant temperature will be maintained in the room.
To connect bimetallic batteries to the new eyeliner, it is most convenient to use American women - fittings with flare nuts. They greatly simplify the installation and disassembly of devices, reducing the time required for these operations to one or two minutes.
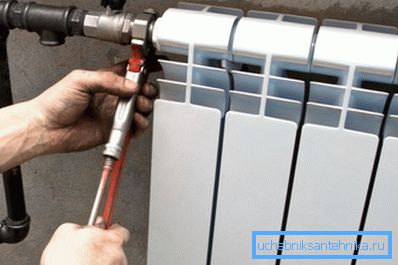
Dismantling old battery
Cast iron radiator
Instructions for dismantling the cast iron battery is as follows:
- We reset the strut or shut off the valve on the liner.
- We unscrew both lock nuts with a gas wrench No. 1 or a wrench. Carving on the liner - right. We drive the nuts to the end of the thread and clean it from the winding.
- We give and drive both radiator plugs. To do this, you need keys number 2 - number 4, depending on how much stuck traffic jams.
Tip: if the effort turns out to be insurmountable, preheat the end section collectors with a building dryer or a blowtorch. Its thermal expansion will serve you well: the cork will break loose with minimal effort.
- Remove the radiator from the old brackets.
- Inspect the liner for corrosion. If they are in good condition, a new battery can be connected directly to them. If necessary, you can shorten the thread with a hacksaw or grinder and increase the liner through a pair of taps and drifts.
Convector
- Drain your eyeliner.
- Cut them in a convenient place for mounting the threaded connection grinder or your own hands, using a hacksaw.
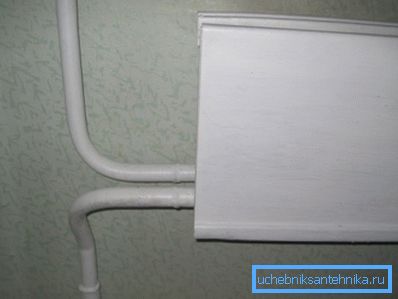
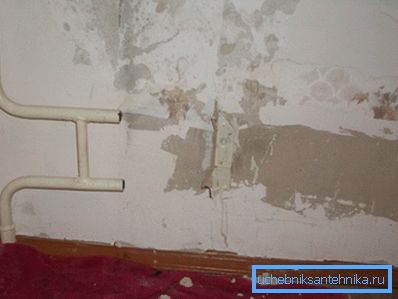
- Using a chisel to mount the convector, remove the nails from the wall and remove the device.
Installing a new radiator
Without replacing or increasing eyeliner
How to change the radiator without changing the liner - it is easy to guess: all the operations we have done before are performed in the reverse order. New plugs and locknuts are used; standard gaskets are used for sealing the plugs, flax with paint or polymer thread-sealant for lock nuts.
With the replacement or extension of liner
Let us analyze this operation on the example of mounting the battery on a corrugated stainless steel.
- We remove the outer chamfer on the sections of the eyeliner and cut into them short (5 threads) threads.
- Mark up the point of attachment of the brackets at the rate of one point into three sections. We mount the brackets and post a new battery.
- Podmotav new threads on the liner, we wind on them fittings - adapters.
- The second pair of adapters is screwed into taps or American.
Attention: if there are shut-off valves or chokes on the liner, the jumper must be installed to ensure constant circulation in the riser.
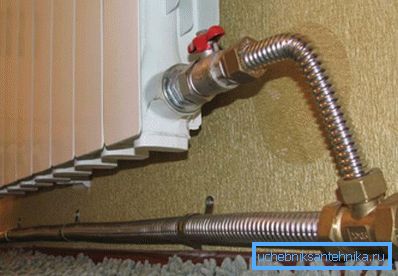
- Cut the pipe to size and compress it in the fittings. When flying eyeliners over half a meter, they are attached to the wall clamps.
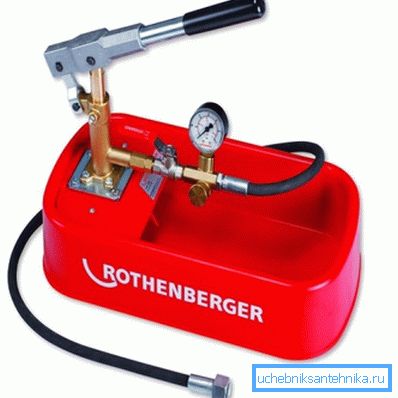
- Check the device under pressure.
Conclusion
We hope that our material will help the reader in repairing home heating equipment. Of course, something fell out of our attention: in a small article it is impossible to touch on all possible problems and nuances of work. More information can be found in the video in this article. Successes!