How to connect a heating radiator correctly: types and
If you do not know how to properly connect radiators, then you should not take up this type of work without familiarizing yourself with the basic rules and recommendations. In this review, we will consider the main types of communications, describe their features, and describe how to install correctly without outside help and attracting specialists.
This process is very important, and any mistakes can lead to big problems afterwards, so do not rush to get to work until you understand this topic.
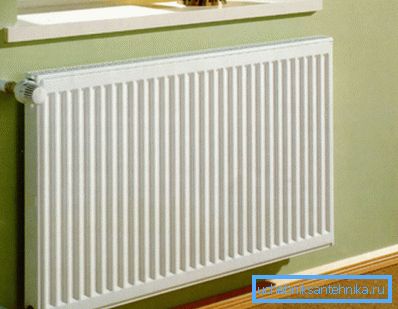
Types of radiators
First of all, you should purchase heating elements, currently there are four main options on the market, we will consider each of them:
| Cast iron | The traditional version, which has been used for over a hundred years. Of the advantages, high reliability and long service life of the elements can be distinguished, among the shortcomings is the large weight of radiators, the unattractive appearance and the need to periodically paint the surface, besides, this option has the lowest heat dissipation |
| Steel | A good option, the main advantages of which are affordable price and good heat transfer performance, the structures can be made in two versions - in the form of tubular and panel structures. The disadvantages include corrosion of the material in the absence of fluid in the system and low resistance to hydraulic shocks. |
| Aluminum | One of the most popular options today, which has a lot of advantages: low cost, high heating rate, good performance properties and an attractive appearance. The disadvantages are the high demands of the system on the quality of the coolant and the need to periodically release each radiator. |
| Bimetal | The design is a frame made of steel or stainless steel pipes, and the outer part differs from high-strength aluminum alloy. Thanks to this design, the products are very strong and durable, the service life of such radiators is from 30 to 40 years. The only significant drawback is the very high cost. |
Note! Choosing a specific option, we recommend to consult with experts, especially if the work is carried out in an apartment with central heating. Sometimes only a certain option can come up.
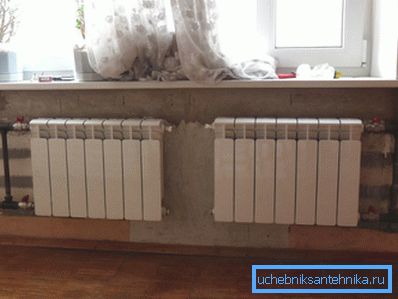
Connection Features
Before you connect radiators, you need to choose the optimal scheme, since this factor is very important. It is also important to carry out work in compliance with all the requirements of the technology so that all connections are reliable.
Pipeline Connection Diagrams
We will consider four main options, since they are the ones that are used most often and have proven themselves well, although each of them has its own characteristics:
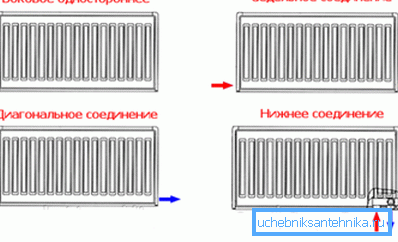
- Side-to-side connection option It is very often used in city apartments, it has a good reputation and allows the construction to work with insignificant losses of rated power. The advantage of summarizing communications on the one hand can be considered as an advantage of this option; it is especially convenient in the branches of the system.
- Diagonal scheme It is considered to be the most rational and effective specialists, as this option allows you to distribute the coolant temperature evenly over the entire surface of the radiator. The supply pipe is attached to the upper axis of the structure, and the output is attached to the bottom, it improves the circulation of fluid and reduces the load on the feeding equipment.
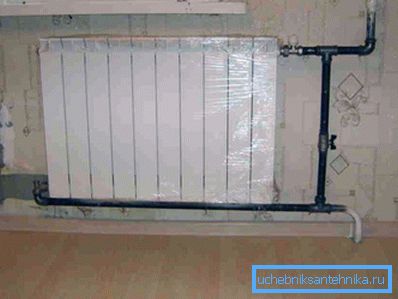
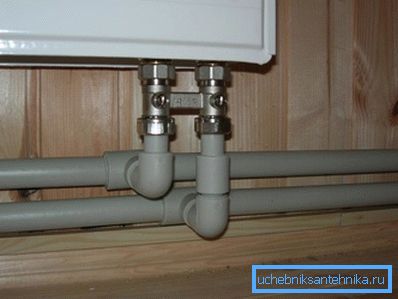
- If pipes run along the floor, then the simplest solution will be a lower connection, when both the input and output lines are connected to the lower axis from opposite sides. In this case, the heat loss will be 12-13%, so it is recommended to add one edge to the radiator to compensate for this factor.
- Bottom connection used in cases where the pipes are under the floor and are displayed at the installation site of the radiator. The most important advantage of this solution is the complete absence of pipes in the room, which is very important when implementing some design projects. Of the disadvantages, you can indicate significant heat loss (up to 20%), so an additional one is added for every five ribs.
Recommendations for the work
Now we will consider how to connect the radiator correctly:
Note! Do not forget before starting work to drain the water from the system, if it is a flat, then the best period of repair will be summer, when the coolant comes down, and you do not have to contact public utilities on purpose.
- First of all, it is necessary to dismantle the old radiator, if any. There is no need for accuracy, as the compounds are often rusty and they will just have to be torn off.
- When doing your own work, do not forget to take care of purchasing sealing materials - flax and special paste.
- Then it is necessary to close the extra holes - the cap is screwed into the lower one, and the Mayevsky crane, which will later be used to remove the radiator, twists in the upper one. The thread is compacted with flax - it is wound along the edge, you need 5-6 turns, with winding on the right-hand thread in a clockwise direction, and on the left-hand thread - against.
- It is necessary to estimate the location of the radiator, then mark the place where you need to attach the brackets. Instructions for carrying out these works are simple: a hole is drilled into which the bracket is screwed, then you should check the position of the battery using a level, with the distortions the holders need to be slightly bent.
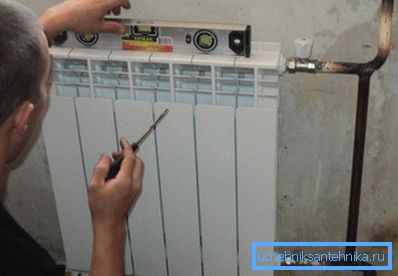
Note! To ensure reliability, each radiator is mounted on three brackets - two at the top and one at the bottom, for large width radiators it is necessary to add one element to each row.
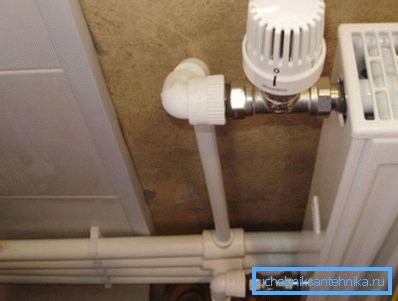
- Now let's figure out how to connect a heating radiator, usually a tap is placed between the pipe and the battery so that if necessary you can cut off the structure and remove the product for repair or replacement. The crane is connected in the same way as traffic jams: flax is wound and the element is carefully screwed.
- To improve the performance of the system, we recommend installing a thermostat on each radiator; it will allow you to adjust the temperature in the room, but in order for the design to work as efficiently as possible, a special jumper, called a bypass, is placed in front of the battery. You can choose a system that will regulate the temperature of the time of day and days of the week, which is very convenient.
- The final stage of the process is to check the quality of the work performed. To do this, the system is filled with liquid and all the joints are carefully checked for leaks, if everything is normal, the work can be considered successfully completed.
Conclusion
It is up to you to decide which radiator connection is best for your home, it is important that it is done correctly and all connections are reliable. The video in this article will tell about this process in more detail and will touch on some nuances that should not be forgotten.