How to connect radiators in a central or autonomous system
In this article we will look at current ways to connect radiators and tell about the features of their implementation. The topic of the article is of considerable interest, since the expansion of the range of heating equipment on the market implies the need for its correct selection, installation and operation.
But, before telling how to connect a heating radiator, it is necessary to determine the types of heating systems and the features of their application.
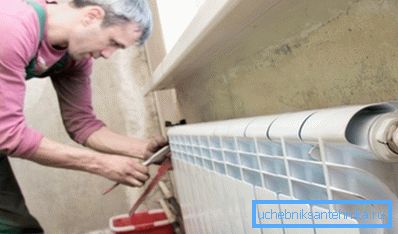
Types of systems in which heating batteries are integrated
To understand the principle of connecting the battery with your own hands, you need to have a general idea of the system in which this device will be operated (see also the article Copper heating radiators: features, technical characteristics and installation procedure).
Currently, there are two types of heating systems in operation throughout the world:
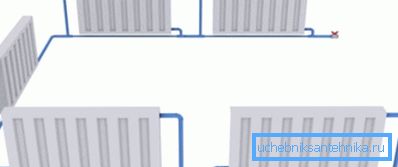
- Single-pipe system, as a rule, is used in multi-storey apartment buildings. The principle of operation is simple - heated water circulates through one pipe, passing through a certain number of batteries.
Systems of one pipe type are the simplest in terms of the device and, as a result, the price of their realization is low. But this solution has one major drawback - the inability to control temperature indicators in different rooms independently of each other.
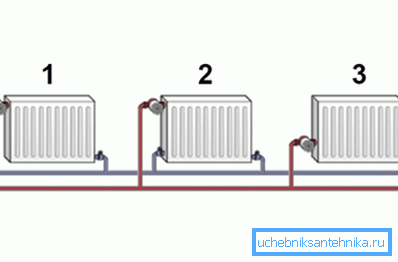
- The two-pipe system is more complex in the device, but along with the heat transfer, corresponding to the design design norm, allows you to set the optimal temperature parameters for each individual room.
As a rule, such heating is implemented in low-rise buildings. The principle of operation of such a system is that all batteries are connected in parallel, due to which it becomes possible to regulate the temperature in each of them separately.
Features of the coolant circulation
Determining the best options for connecting radiators it is necessary to take into account the characteristics of the circulation of the coolant in the system. Currently, two schemes are used: forced and natural circulation.
With natural circulation, there are no special connection requirements, and a lower or upper connection can be applied, depending on where the expansion tank is located in the system.
A more progressive is the forced circulation scheme, in which the coolant moves through the system due to the difference in the location of the boiler and batteries, and due to the use of a circulating pump. Consider how to properly connect radiators in a system with forced circulation.
Current connection methods
- A one-way method of connecting radiators involves connecting to one supply section (supply pipe) and return (discharge pipe). In this case, the flow is at the top, and the return is at the bottom. This solution ensures uniform heating of all sections in all batteries.
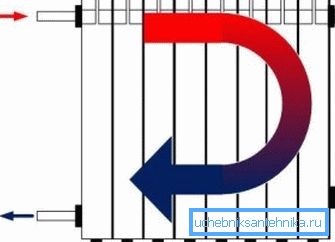
This solution is considered to be the most rational for use in single-story residential buildings where medium radiators are used (up to 8 sections).
Important: Structures with a large number of sections require the use of other methods that can prevent the possibility of heat loss in large batteries.
- You can apply a heating radiator with a bottom connection. Such a solution is important if part of the pipeline is hidden under the floor covering. Thus, from under the floor go pipes that are attached to the radiator at the bottom or bottom on the sides.
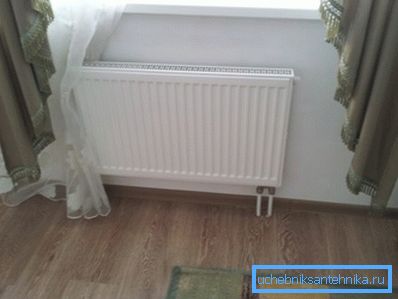
The advantage of this method is the low-profile pipeline. The disadvantage of the lower connection is low efficiency, since the heat loss with such a connection can be up to 15%. As a result, the top and bottom of the battery may heat up unevenly.
- If the question is how to connect radiators to minimize heat loss with a large number of sections, you can apply the cross (diagonal) method.
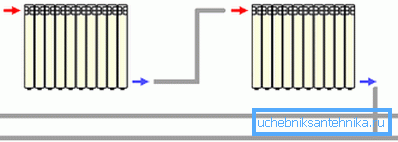
The correct connection, in this case, is the following: the feed is attached at the top of the radiator, while the discharge pipe is located on the other side, but at the bottom.
This solution has an obvious advantage, since all sections above and below are heated almost evenly. When cross-connecting heat loss is not more than 2%.
Choose accessories for installation work
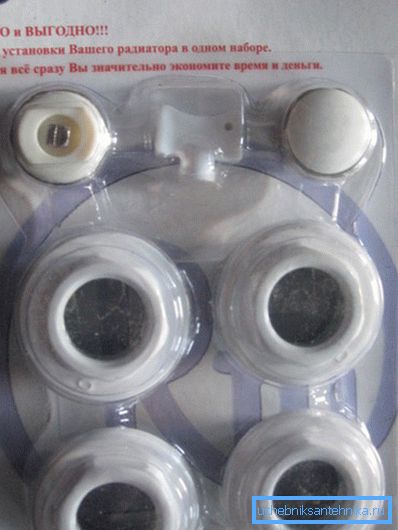
After we have decided on the ways of connecting pipes to batteries, we will consider which fittings for connecting radiators to be the best choice.
The valves and components are selected and purchased in accordance with the type of heating equipment used and in accordance with the wiring diagram.
The standard installation kit for heating systems includes the following list of components:
- futorki in the amount of 4 pieces;
- Mayevsky's crane;
- screw plug;
- Paronitovye or silicone gaskets;
- wall and floor brackets;
- Adapters are required if the diameter of the pipeline is different from the diameter of the inlet on the battery.
Consider how to properly connect a heating radiator.
Recommendations for installing a radiator
Decided on the choice of one of the previously listed methods? It remains to proceed with the installation (read also the article Electric Radiators: Main Types and Features of Operation).
Installation instructions depend on the use of radiators and pipes.
- We work only with the use of a special tool. For example, for an even cut, cut polypropylene or metal-plastic for mounting connecting fittings should not be a hacksaw, but a special pipe cutter.
- Before you install the brackets and hang the battery, make sure that the wall is tight and strong.
- Installation of radiators (even aluminum) should not be carried out alone, since the weight of these structures is considerable.
- If the connecting fittings have sealing rubber, the use of fum-tapes or tow is not recommended.
- It is necessary to screw the fittings into the holes of the batteries with a medium force so as not to disrupt the thread.
Important: At the end of the installation, the connections are wiped dry and the system is filled with water for a test run. At the place of connection, we keep a dry napkin, and then we look if there is moisture on it.
Conclusion
Now that you know how to connect the heating radiator, you can proceed to the purchase of necessary materials and installation work. Have any questions?
Look for more information in the video in this article.