How to disassemble a radiator: features of disassembly of
The need to disassemble the heating battery may arise for various reasons, for example, if the junction of the sections began to leak or a crack appeared on one of the ribs. In most cases, you can save the device by removing the damaged edges or sealing joints. Below we will take a closer look at this operation, which will allow the radiator to return its original efficiency.
General information
Not so long ago, only cast-iron radiators were used in heating systems, however, at present, the choice of heating devices has expanded significantly, in particular, aluminum and metal batteries have appeared. Moreover, each of their views has its own structural features, respectively, the process of disassembling them looks different.
Therefore, below we will look at how to disassemble radiators with their own hands of all the most common types.
Tip! To clean the device from scale and other contaminants, it is not necessary to disassemble it. There are special liquid formulations that cope with the task qualitatively.

Disassembly
Instruments
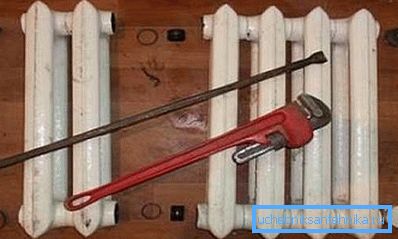
Before disassembling the batteries, you need to prepare the following tools:
- Keys for disassembling batteries - 1 inch for bimetallic and aluminum devices and 5/4 for cast iron.
- Plumbing wrench;
- Blowtorch;
- Spanner.
Cast iron
Regardless of the type of radiator, before disassembling it, it is necessary to shut off the flow of coolant, drain all liquid from it and then dismantle it. As a rule, cast-iron radiators are hung on hooks-brackets. Therefore, for dismantling it is enough to disconnect them from the pipeline, for this purpose you should use a plumbing wrench.
Further work is carried out in the following order:
- Before dismantling the cast-iron radiator, it is necessary to prepare the workplace - a flat platform covered with oilcloth or tarpaulin. The apartment can perform this operation in the bathroom.
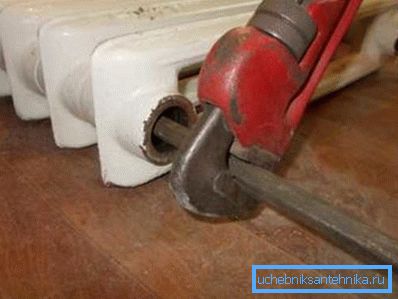
- Next you need to remove the plugs. The difficulty lies in the fact that they can have both left and right threads.
- Then a special radiator key is inserted into the hole, and the nipples that connect the sections are unscrewed. The key, as a rule, can be purchased in stores that sell other plumbing tools. It must be said that it is often not easy to disassemble sections because of the “sticking” of nipples and sections. In this case, the joints are heated by a blowtorch in a circle, after which it is much easier to break the threads and separate the sections.
- After that, the sections are cleaned of scale, rust and old gaskets. If necessary, you need to update the thread.
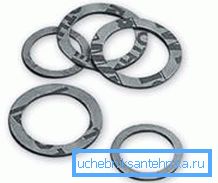
In some cases it may be necessary to replace the nipples. To purchase a suitable nipple, you should take an old one with you as a sample. As a rule, the price of components for cast iron radiators is low.
- Next, the joints can be smeared with heat-resistant sealant, as well as put new gaskets, and assemble the section in the reverse order.
Tip! In parallel with the work described, you can correct the number of sections, for example, install additional ones or vice versa - remove unnecessary ones. In the case of the addition of sections, it is necessary to install additional brackets.
The process of disassembling the cast iron battery is completed. Now, you can paint it and put it in place.
Aluminum and bimetallic
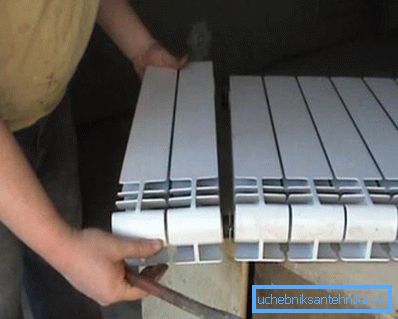
Now we will consider how to disassemble an aluminum radiator of heating. It should be noted that the following information applies to bimetallic devices, as they have the same design.
The disassembly process is a lot like working with cast iron radiators, however, there are some nuances:
- Smaller nipples, respectively, other keys are used for them.
- Bimetallic and aluminum devices, as a rule, are new products, respectively, considerable effort is not required to break the threaded connections, as is the case with cast-iron devices.
- On the front side of the caps there is a designation of the right or left thread.
- Possess much smaller weight, than pig-iron analogs.
All this greatly simplifies and speeds up the process of assembly / disassembly. The only work should be done carefully so as not to damage the paint. To do this, before disassembling a bimetallic radiator or an aluminum battery, you need to cover the pad with rags.
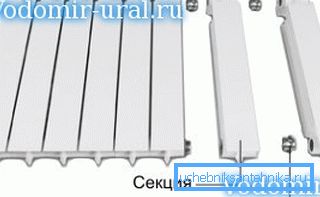
Note! Between the sections of modern devices installed metal gaskets. After disassembly, it is extremely important to clean them and wipe them so that they are perfectly smooth, as the tightness of the joints depends on it.
It should be noted that many models of aluminum devices are non-separable. Of course, they can be disassembled, but it will not be possible to assemble them. Here, in fact, the entire instruction for assembly and disassembly of radiators of various types.
Conclusion
The process of disassembling radiators is quite simple, however, difficulties may arise with cast-iron batteries, due to the “sticking” of parts. But, if you adhere to the above recommendations, to cope with the task within the power of every home craftsman. The only thing you need to have all the necessary tools, which are listed above.
Get more useful information on the voiced topic can be from the video in this article.