How to install heating radiators with your own hands:
When performing the next apartment renovation, many homeowners sooner or later need to completely or partially replace the heating system, one of the most important components of which is a water radiator. It consists of a set of flowing water channels through which the heated coolant circulates, ensuring the process of heat exchange between hot water and ambient air.
During operation, the flow channels from the inside gradually overgrow with salt deposits and become clogged with rust particles, so from time to time such devices require a complete replacement.
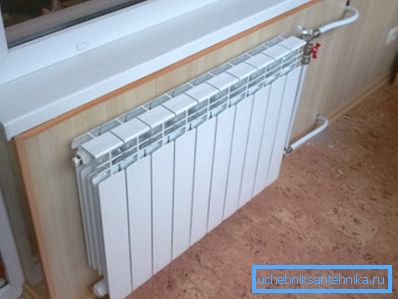
Features of installation and connection of radiators
Currently, you can find a large number of compact and lightweight radiators for sale, which, if necessary, any apartment owner will be able to replace with his own hands using the usual set of household tools, without resorting to the help of professional plumbers.
As a clear guide, this article provides an illustrated instruction that will detail the process of self-replacement of heating radiators in a residential apartment.
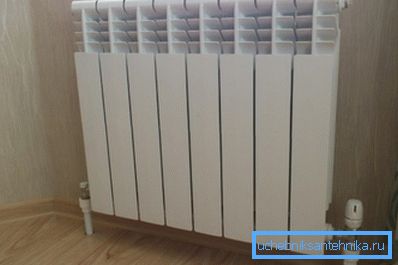
Preparing the installation site
Before installing radiators, completely shut off the water supply to the system.
If there is a shut-off valve near each battery, this can be done right in the apartment, and if there is no such possibility, it is necessary to close the common shut-off valve of the entire riser, which is usually located in the basement of a residential building.
- Making sure that there is no pressure in the system, it is necessary to dismantle the old batteries, after which each inlet pipe should be prepared for the installation of stop valves;
- Assemble a new battery from the required number of sections and prepare temporary supports for it. In order to know how to install radiators on the wall under the window, follow the recommendations below;
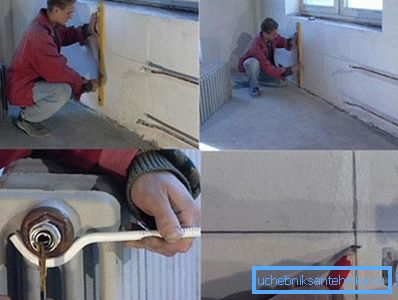
- Measure the total length of the subwindow niche and draw a vertical line strictly along the center, then find the center of the longitudinal axis of the radiator and set it opposite the drawn line;
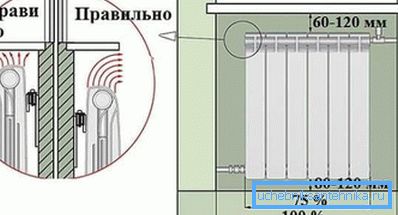
- On the level on the wall, draw a horizontal line located at a distance of 60-120 mm from the bottom of the sill, which will correspond to the upper border of the battery;
- According to the drawn lines, install the radiator on temporary supports and carry out the markings on the wall, indicating the place for fixing the mounting brackets. At the same time, it is necessary to make sure that the distance from the battery to the floor is at least 85-120 mm, and the distance to the wall is about 35-50 mm.
Tip! After the common shut-off valve is shut off, a sufficient amount of heat transfer remains on the upper floors of the filled heating system, so before dismantling the old battery, you need to prepare appropriate empty containers to collect the draining water.
Select the type of connection to the system
In modern residential heating systems, several types of water battery connections are used, each of which is used depending on the specific conditions.
In order for each homeowner to have an idea of how to properly install radiators in his apartment, the three most frequently used connection options will be listed below.
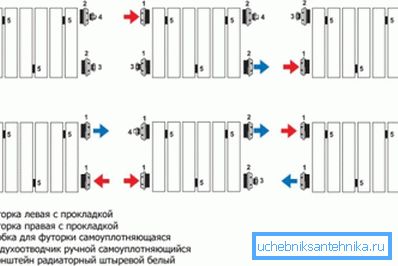
- One-way lateral connection provides the best heat transfer, but is only suitable for single radiators, consisting of no more than 12 separate sections. In this case, the coolant supply is connected to the upper inlet and the outlet to the lower outlet on one side of the battery;
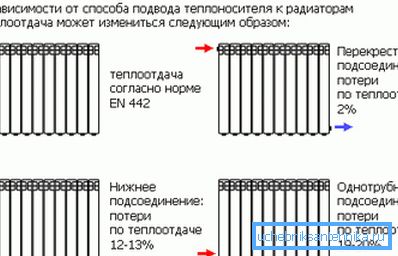
- Diagonal or cross connection method allows you to consistently connect in one line several radiators for heating a large room. In this case, hot water is introduced through the upper nozzle on one side, and the output through the lower nozzle on the back of the battery;
- Bottom connection method allows you to hide all communications under the baseboard or in the underground space, however, this significantly reduces the heat transfer radiator. In this scheme, the heated water enters the lower nozzle on the one hand, and comes out of the lower nozzle on the other side of the battery.
Tip! It is recommended to install a mechanical thermostat with a temperature controller at the inlet of each battery. At first glance, the price of this device may seem high, but its use allows for more efficient use of heat, and thereby reduce the average annual heating costs.
Assembly and installation of radiators
In many hardware stores, you can buy a whole battery of a selected type and size, which is already assembled from the required number of sections and is completely ready for installation, but before you install the heating radiator yourself and connect it to a water system, you need to equip it with a set of valves.
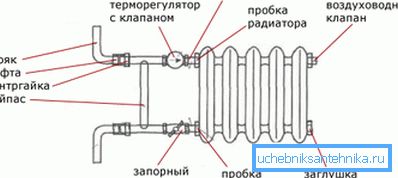
- Depending on the chosen wiring diagram, twist the two through-plugs (futorki) to the required openings of the radiator, which will be used to connect the inlet and outlet connections;
- Wrap the third through plug (futorka) into which the upper hole is located along the upper coolant, in which you need to install a Mayevsky valve necessary to release the accumulated air, and wrap a blind plug into the remaining free hole;
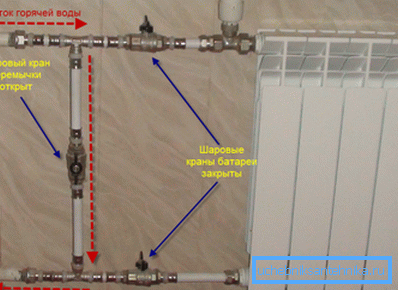
- Install a single ball valve on the supply and return pipelines, and in front of them, with two tees, mount the bypass with a shut-off ball valve that needs to be opened during shutdown or disassembly of the battery;
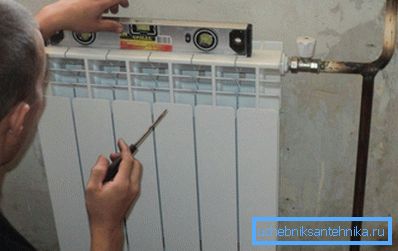
- According to the previously made marking, mount the bearing brackets on the wall, install the radiator on them and fix it with the help of the standard fixture that is supplied in the kit;
- When mounting brackets by level, it should be borne in mind that the edge of the battery on which the Mayevsky air vent valve is installed should be slightly raised;
- Connect the inlet and return valves with a connector “American” with a flange and a cap nut to the corresponding bushing on the radiator;
- Making sure that the connection is correct and finally tightening all threaded connections, you need to open the inlet tap on the riser, as well as the ball valves on the pipelines, and fill the system with coolant;
- If there is autonomous electric or gas heating, make a test run of the system, and let it work for some time at maximum conditions, then carefully check for leaks.
Tip! When assembling all threaded connections, it is imperative to install rubber or silicone gaskets, which are included in the standard installation kit for connecting water radiators, which can be purchased at any hardware store.
Conclusion
The replacement of batteries in apartments of high-rise buildings is best performed in the spring-summer period, after the end of the heating season. Since at this time there is no pressure of hot water in the heating system, the risk of getting burns is completely eliminated and the likelihood of flooding of his and the neighboring apartment with water decreases.
Carefully reviewing the attached video in this article, you can get a visual guide for installing and connecting household water radiators.