How to install the heaters yourself
The high cost of installing radiators by specialized companies is often controversial. Therefore, there is only one way - to make installation yourself. In this case, you do not need special knowledge and skills, quite basic enough. Especially this approach will be in demand when installing autonomous heating, and if you have to connect to the main riser of a multi-storey building, you will need maximum care.
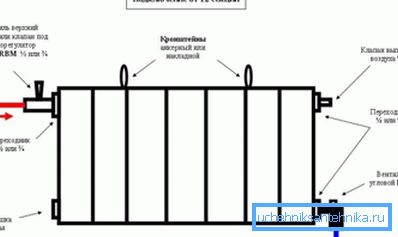
Principle of operation
It is possible to install heating radiators without the use of narrow tools and special skills. Consider all the details:
| Material | Which installation to use will mainly depend on the batteries themselves, for:
Modern batteries from innovative materials are allowed to be installed on any surface, for example, from drywall. However, the price of some of these models is very high, so for the average consumer it can become a very heavy load. |
| Characteristics of radiators | The replacement of radiators is carried out in accordance with their operational features:
Properly selected product parameters for your heating system will allow you to use their full service life. |
| Installation options | When installing, observe the height of the radiator above the floor and the distance from it to the wall. The instruction recommends - from 50 mm in both cases, then the air circulation will be the most acceptable. |
| Training | Before starting the installation process, draw a diagram of the placement of heaters in the room and apartment (house). |
Tip: aluminum sections should be used for autonomous heating, in this case there is no large coolant pressure. For multi-storey buildings should be used bimetallic or cast iron.
Tool
Not every house keeps the necessary keys and accessories, so you will have to purchase or rent some of them from your friends.
We recommend preparing the following, which will help to perform the installation without any problems:
- screwdriver;
- hammer drill or hammer drill;
- drill with pobedit soldering;
- pliers;
- building level.
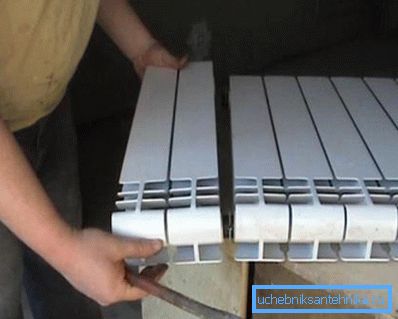
In the process of buying a radiator, make sure that the heating sections are assembled, since a special key must be used to connect them. Acquire it specifically would be inappropriate.
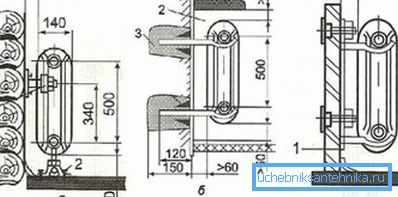
Dimensions of radiators
Before buying heaters, you must correctly calculate the number of sections on each of them. Only in this case, you can create an acceptable indoor climate. Each room has its own dimensions, but in order not to be confused, it was decided that the standard height is 2.5 m. If in your case it is smaller or larger, take an amendment to this parameter.
There is also a formula by which it is possible to approximately calculate the optimal size of radiators - for each 1 m2 of area, 1 kW of product power is required. You should add 30% to the received figure to balance the calculation, if you have a corner room in the house and there is more than one window in it.
Tip: take into account when calculating that 1 section of aluminum radiator is approximately equal in power to 2 cast-iron sections.
Assembly process
Installation of heaters in the room is as follows:
- Pack correctly all items., including plugs, nuts, "American" and Mayevsky taps designed for air discharge from batteries.
- Remove old radiators if they are replaced with new ones.. In this case, be sure to turn off the water in the main riser, especially when it comes to an apartment building.
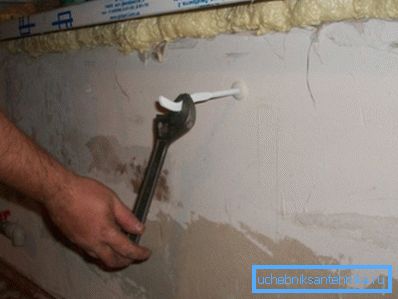
- Install the pre-assembled radiator on the wall. When performing welding, you can install 2 mounting brackets, for polypropylene pipes and fittings they should be at least 3. If the radiator has 5-6 sections, we recommend making 2 fasteners on the top and 1 on the bottom. For a battery with 10 or more sections above, you must install 3 fasteners, and below - 2.
- Use the building level and find the optimal location of the heater.
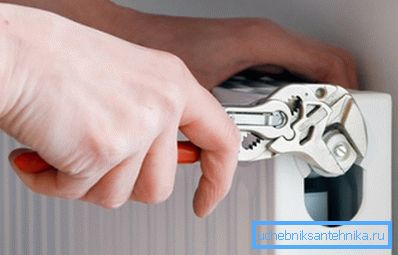
- Determine the places where plastic will need to be connected to the iron riser.
- Cut the thread on the riser of the heating system.
- Scroll on them the necessary elements.
- Pay attention to pressure testing, i.e. Before starting up the system, check its tightness.
- Check the quality of the work performed visually..
If the elements of the heating system are not properly connected, the flow in these places will be visible. To avoid such problems, we recommend tightening them with torque wrenches of appropriate sizes.
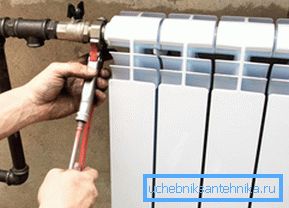
For example, when installing a bimetallic or aluminum heating radiator, it is necessary to put a valve on each of them to release air; when tightening it, the force should not exceed 12 kg. In this case, it is better to use a torque wrench.
Conclusion
The installation of heating radiators is one of the most serious moments in the installation of the system. The comfort and coziness in the room depends on their correctly selected sizes and quality of the connections of the elements. During operation, follow the accuracy and consistency of action. The video in the article will help you find additional information on this topic.