How to lay a warm floor under the laminate
It is known that modern floor laminated coatings do not provide the level of thermal balance that is achieved using classic wood. That is why the laying of such coatings is often accompanied by the arrangement of a special heating system under them (the so-called underfloor heating), which can have the following designs:
- water heating system;
- electric heating, implemented using a special cable;
- electric heating using an infrared source.
In this article we will analyze how to lay a warm floor under the laminate with your own hands, consider the options for installing an infrared film and heating cable, as well as show photos and video instructions.
Foundation preparation

In order for any of the selected options to serve for a long time, it is necessary to make efforts to ensure that the level of the floor is as close as possible to the ideal. If everything is already ready, then you can proceed to the practical part of the installation of heating elements. Before you start taking any action, you need to analyze the following points:
- What is the height of the ceilings. Will it be possible to raise the floor or lower the floor level. In an apartment or on a balcony, you can only go down to the level of an existing screed, to concrete slabs. In a private house, if it does not stand on a pile foundation, you can go deeper to the desired value.
- Removes all old flooring. It is better to knock down the tile using a perforator. Cleaning is done all the territory. Any nodules or glue residues are removed.

- In the case when it was decided to leave the existing tie, it is important to assess the level drop across the entire plane. For this perfect laser level. It is necessary to project a line on the walls, measuring the distance to the floor from it using a tape measure (this operation can be carried out using a water level. A mark is put on one of the walls, and then transferred to all the others. Measurements are made from them.).
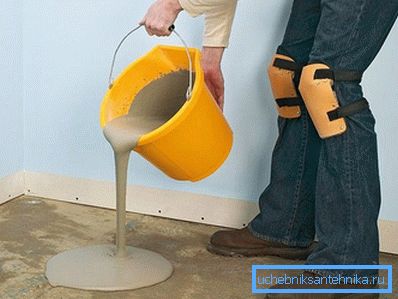
- If you find that the difference in values does not exceed 10 mm, then self-leveling mixtures are best used to compensate for it. In order to work with them took place at the required level, it is important to respect the proportions that are specified by the manufacturer. After dilution, the liquid simply spills onto the floor. In this case, all the gaps should be pre-sealed, so that the solution does not go away. After pouring the entire area is covered with a needle roller or notched trowel. This removes air bubbles. If the difference is more than 30 mm, then it will be necessary to fill the cement-sand mixture. In this case, you can also use the previous version, but the cost of such work will be much higher.

- When the ceiling height does not allow raising the floor even higher, then using a perforator or a jackhammer, the old screed is removed. After the required layer has been removed, a rough floor is made. For this purpose, lighthouses are set up on concrete slabs. You can use special tools, instead of them fit metal pipe trimming. The guides are arranged in the course of laying the future screed. At first one element is exposed. To this end, the height marks of the future screed are applied to the walls. You can use the recommendations from the previous step. Further, with the help of the construction level, the plane is transferred to the guide. To fix it well over the entire length, lining is made of the solution. After he grabbed, you can place the next one along the exposed strip. Further, the intervals between the marks are filled with the prepared mixture and, based on the rule on the beacons, is carried out. At the same time it is important to ensure that there is no empty space under the tags, otherwise the coupler will subsequently squeeze and all the work will be ruined.
- After three weeks after full maturation and drying of the poured foundation, you can proceed to the next stage of installation of the selected floor heating option.
Thermal floor based on infrared film

The warm floor of any of these types not only makes it possible to warm up the surface of the coating, but also the air inside the room. But the realization of each of them has a different cost and hassle. That is why, before laying the warm floor, you should decide on the type of heating system. For example, consider the advantages of IR film:
- ease of installation of heaters of this type, which do not require the preparation of a special tie (mandatory in the case of water and cable heating);
- reliability and durability of the material used;
- the admissibility of laying laminate immediately after laying the film IR, which is mounted on a rough base "dry";
- low power consumption.
- no need to lift the floor.
Before laying the film warm floor, be sure to need to stock up on all the necessary elements for its arrangement.

Before purchasing a kit, it is necessary to accurately calculate the area covered by the system, which allows determining the required quantities of infrared film, reflective material and a special protective coating that is laid over the heater.
It is necessary to proceed from the fact that the reflective material is laid over the entire area of the floor, and the infrared film fits only in areas free of furniture.
Are included in the package of the equipment of a film heat-insulated floor:
- thermostat;
- temperature sensor (sensor);
- special thermally reflective substrate;
- thermal film.
In addition, for the work you need ordinary scissors, pliers, a screwdriver, a knife and adhesive tape for gluing film.
Heater Mounting

Installation of the system begins with a special substrate of polyurethane foam, then we do:
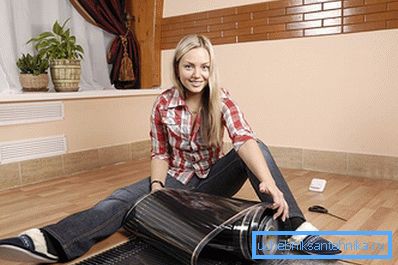
- Stripes of heat-reflecting film are laid over the entire surface of the floor (working surface up), which are securely fastened with special tape.
- Then they proceed to the laying of the infrared film itself, which is laid only on the areas free from furniture, indented from the walls about 10 cm. (The layout of the heating elements, indicating the locations of the furniture, should be prepared by you in advance). Advice and the fact that cutting the heating film is allowed only in selected places marked on the material with a dashed line with a scissors sign.
- After that, the individual heater strips are placed on the substrate at a distance of at least 5 mm (but not more than a centimeter) from one another.
- In addition, to connect infrared heating strips along their entire length copper wire is laid with a cross section of about 1.5 mm2.
- The film is connected to the power supply equipment by means of special contacts inserted in the middle of the conductive bus and clamped with pliers. After this, the connection points must be protected by strips of bitumen insulation, which is included in the scope of supply of a heated floor.

After connecting the film go to the installation of the temperature sensor, which provides automatic adjustment of the heating mode of the system. To do this, at a distance of 20–25 cm from the wall with a thermostat fixed on it using a perforator, a strobe is prepared to a depth of about 2 cm. Then the sensor itself is placed into it, which should have direct contact with the insulating substrate.
Upon completion of installation of auxiliary equipment, produced in accordance with the instructions attached to the kit, it will be necessary to check the warm infrared film floor for its performance.
During the test, it is necessary to make sure that when the power is supplied all the IR film strips heat up. And only having made sure that all its elements are working, you can proceed to the installation of the laminate coating, closing the heating system with a special heat insulating film.
Based on heating cable

Typically, this option is used under the tile, because it provides better heat transfer. But its laying under the laminate is also possible. Before proceeding with the installation, it is important to determine what type of heating cable will be used.
- Standard or resistive. Stacked can be single-core and two-core. The latter is more convenient, since the circuit in it is already closed and the end will not need to be returned to the connection box. For ease of installation, the manufacturer puts the wire in special mats.
- Self-regulating. This cable will automatically maintain the required temperature even in those cases when its laying passes under the surfaces of different material. It is much more expensive than the previous version.

The installation method and sequence of actions for these two conductors will be the same. In order to calculate what length is required, you need to know the floor area. Subtract the need for stationary items. Further the approximate scheme of laying is drawn. The step at which the individual turns will be located is determined by dividing the area by the cable length, and the result is multiplied by 100.
- If there is a cold room under the floor, then additional warming is required with foam sheets or foam panels. In this case, you will have to delve into the screed, if there is no opportunity to raise the level. When there is confidence that everything is well insulated and the surface is qualitatively aligned, then you can proceed to the next step.
- A thorough cleaning of the area. It is necessary to get rid of all pebbles or other elements that could later damage the cable insulation. For these purposes it is better to use a vacuum cleaner.
- Apply a layer of primer composition. This is necessary to remove debris, strengthen the surface, and improve adhesion with the future screed.
- This step is performed according to your wishes. A layer of polyurethane foam tape with foil is laid over the entire surface. Sheets are joined together with reinforced adhesive tape.
- The sensor is installed and the place for the thermostat is prepared. The latter should be located at a convenient height, but not lower than 30 cm. A groove 20 mm wide is cut in the wall, on the floor, at a distance of 50 cm, exactly such a recess is made. In it the corrugation, soldered from one end is located. It has an indicator. Signal wires from it are brought in a box where the operating element will be installed.
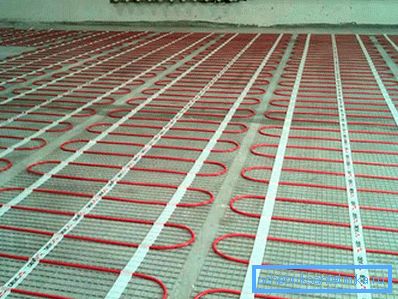
- If the option was chosen in the mats, then you can start their laying. If it is necessary to unfold the web, the backing net is cut with ordinary scissors. For a cable without a mat, it is necessary to prepare special plate holders. They are screwed to the floor with dowels and screws. The step between them should be 50? 100 cm.
- A cold supply cable is wired. It connects to the heating, twisting is sealed with a shrink tube and fixed under one of the brackets of the plate.
- The cable is mounted according to the drawn scheme with the calculated step. During this work, it is better to put on slippers with a soft sole on the feet so as not to damage the conductor.
- At this stage, you need to check the resistance and compare it with the recommended. Also in the passport the cable laying pattern is entered. Next is the connection to the thermostat its installation in place. Some manufacturers allow the inclusion of the entire system for a minute to test its performance.
- Next, the screed is poured. Its thickness should be at least 3 cm. At the same time, make sure that all the voids under the cable are filled. If you are laying a substrate of polyurethane, it is necessary every 30? 40 cm to make a slot-window size of 10? 15 cm. It is necessary that there was a setting with the main layer.
- After complete drying of the filled layer (usually it takes 3 weeks or more), you can turn on the floor.

There is another very interesting option that can simplify the installation of cable floor heating. If your floor is well insulated and a perfectly flat screed is poured in, then you can proceed as follows. A plan is drawn according to which the cable will be laid. The facing flooring is removed, the surface is cleaned. The picture is transferred to the floor. With the help of the grinder or wall chaser, the grooves are cut out according to the diagram. Their depth should be such that the conductor lies flush. Next is the laying, connection and finishing.
Water floor heating

Water-heated floor can also be laid in several ways. To heat the carrier can be used as an installed boiler, and a special riser in the case of central heating. There are products in which the carrier is in sealed tubes, and its heating is carried out using conductors laid along the entire length. For laying under the laminate is the ideal solution polystyrene and wooden. Their advantages are:
- no need to fill the screed from above;
- the best thermolysis thanks to aluminum plates;
- low weight - ideal for weak floors;
- fast installation in comparison with a usual heat-insulated floor;
- prepared laying pattern.

Before you begin, make sure that your floor has a flat surface and that the difference is not more than 0.2 cm per 1 m2. The sequence of actions will be as follows:
- The whole area is carefully cleaned. Apply a coat of primer.
- After complete drying, the hydro-barrier is laid in the form of a polyethylene film. Be sure to observe the overlap between the 10 cm canvases. The seams are glued with adhesive tape. The wall is turned onto the height of the future heater.
- Along the perimeter of the wall, a damper tape unfolds.
- The next step will be the installation of insulation plates. They must be with special bosses or grooves. In some cases, grooves are provided for fixing them together.
- Top mounted special metal plates. They have a groove where the pipe will be laid. It is necessary to press the plates so that they are fixed between the projections of the insulation. They should be arranged according to the chosen pipe laying step.
- The box is mounted, a collector is installed in it and the main supply is made from a boiler or other source.
- In one of the valves of the supply manifold connects the end of the pipe. After that, it is laid in the grooves, according to the selected pattern. It is important to remember that you need to start from the outer walls, so that near them was the highest temperature.
- The second end is fed to the discharge manifold.
- The system is being crimped. To do this, it is filled with water and the pressure with a tool designed for this purpose rises to 10 atmospheres. In this state, the entire structure is left for one day. If after checking everything is in order, then you can move on.
- From above the film or a layer from the made foam polyurethane keeps within.
- Next, sheets of gypsum fiber are mounted. They will give greater stability to the whole structure, and will also be the basis for finishing flooring.
In the case of an electric version of a water heated floor with a closed circulation. The sequence of actions will be exactly the same. The only caveat is the installation of the temperature sensor, which is included. It is usually necessary to locate it in close proximity to the pipes. In addition, you will need to take care of the supply of additional cable from the switchboard. Its cross section should be sufficient for full load. It is also important to provide a good machine.

Thanks to the information provided, you can choose the option that will be the best solution in specific conditions. Try not to save on the components. Ideally, the service life of such a system is 50 years or more. It is important to remember that the contour of the pipes should not consist of segments, everything should fit in one strip. In emergency cases, it is allowed to use a permanent connection, which is done using a special crimping tool.
Video
Watch the video about installing Caleo under floor heating under laminate and linoleum:
This video shows the process of laying a warm water floor under the laminate: