How to make a warm floor of polypropylene pipes
Not so long ago, warm floor was considered a sign of luxury and is very rare. However, in our time it is quite ordinary heating system, which can be arranged in a dwelling even with your own hands. In this article we will look at how to perform a warm floor using polypropylene pipes, as they are an affordable and high-quality material.
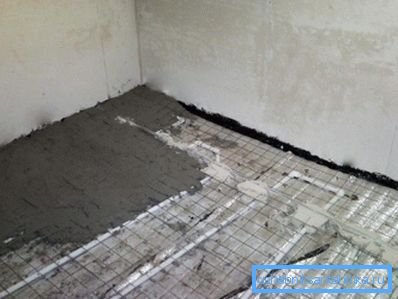
Polypropylene pipes system warm floor
Material Features
Polypropylene pipes are widely used in engineering systems for various purposes:
- Heating;
- Water supply;
- Drainage.
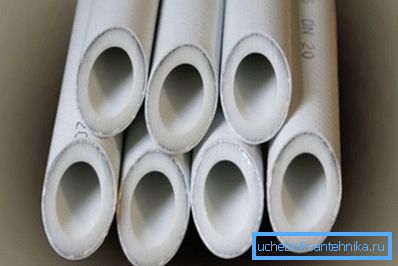
Due to their characteristics, they are suitable for use:
- In all types of soil;
- In the walls under plaster;
- In the channels;
- In the clear, etc.
Among their advantages are the following points:
| Joint tightness | It is achieved thanks to the technology of connecting the elements of the pipeline, which consists in their welding with a special soldering iron. Moreover, it is very simple to use a soldering iron, and the process of welding takes several minutes. |
| Mechanical strength and elasticity | This property is due to the frost resistance of products. Even if water freezes in the pipeline, it will expand, but the integrity will not be broken. After thawing the pipeline will take the original form. |
| Low cost | The price of polypropylene pipe is significantly lower than metal-plastic and other certain types of pipes. This is especially true for connecting elements. |
| Durability | At a temperature in the system of about 75 degrees Celsius and a pressure of 7.5 atm., The pipeline will last without repair for at least 25 years. However, at a working temperature of 95 degrees, the life will be slightly reduced. |
Note! Polypropylene has a large coefficient of thermal expansion. Therefore, for a warm floor, especially under the screed, it is necessary to use pipes reinforced with aluminum or fiberglass.
Alternatives
It should be noted that polypropylene is not the only inexpensive material that can be used for heating systems. For example, an excellent option is a polyethylene pipe for floor heating.
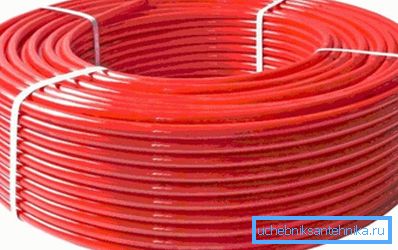
More recently, the word "stitched", relative to pipes, has caused builders to have rather unpleasant associations with the not-very-strong construction with a longitudinal seam. However, the product in question is not sewn, not by sheets, not by parts or pipes, but by molecules. Links of ethylene molecules create a three-dimensional network with strong bonds.
In addition to the fact that the pipe for a warm floor made of cross-linked polyethylene has good strength, it expands less under the influence of high temperature than the polypropylene analogue.
Another popular option is the use of plastic pipes, however, as mentioned above, they are slightly more expensive than polypropylene. In addition, in places where the fittings are threadedly connected within metal-plastic pipes, scale often occurs.
Thus, it is more expedient to choose from polyethylene or polypropylene reinforced products.
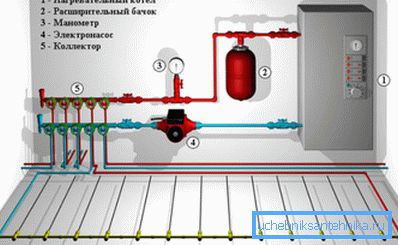
Floor heating device
Heated floor is a pipe laid on the floor, usually in the thickness of the concrete screed. Hot water flows through the pipes, the source of which can be a heating boiler or centralized heating.
Thus, the process of installing a warm floor consists of several stages:
- Drafting:
- Pipe laying and connection;
- Verification of the system;
- Screed performance;
- Laying the topcoat.
Therefore, further in detail we will consider all stages.
Project creation
The project is needed to calculate the amount of materials, as well as the temperature that this heating system can provide. In addition, it is necessary to determine in advance the location of the boiler and collector.
In addition, for the scheme, you need to specify the length and diameter of the pipes, as well as other nuances of the system. Therefore, it is better to entrust the calculations to specialists so that the heating efficiency does not suffer.
The preparatory work
You need to start the system setup with the preparatory work, the instructions for their implementation are as follows:
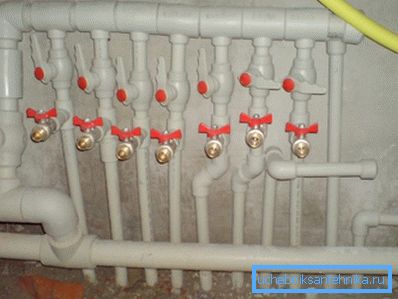
- First of all, a collector cabinet is installed in which the circuits are connected to the heating system. All the adjustment elements are also located there. It is best to place the collector on the wall near the floor.
- Next to the collector it is necessary to connect the hot water supply and return pipe.
- After that the waterproofing layer is laid on the floor. Most often for these purposes use polyethylene.
- A special damping tape is glued around the perimeter of the room to avoid cracking the screed as a result of thermal expansion.
- Then fit the insulation, which reduces heat loss.
- At the end of the work, a metal grid is laid on the floor.
Tip! As a heater, you can use a special material for a warm floor with a reflective aluminum surface.

Contouring
In order for the heating system to be effective, it is necessary to properly lay the circuits, observing the following rules:
- The standard diameter of the circuit is 2 cm.
- The length of the circuit should not exceed 80 m, while the most optimal length is 50 m. This will allow them to warm evenly.
- Contour pitch depends on where it is located. In a cold place, for example, near the door, the step should be smaller. In places where the furniture will be located, the contours do not fit at all.
Laying can be done in two ways:
- Snake;
- "Snail".
The second method is preferable, since it ensures uniform distribution of heat due to the parallel arrangement of the inlet and outlet pipes.
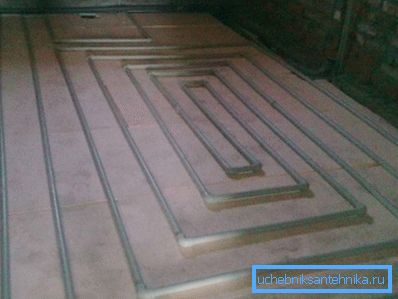
After the polypropylene pipes for underfloor heating are laid, they must be attached to the metal grid with clamps. Next, you need to connect the pipes to the circuits and fill the system with water.
This will check it for leaks.
Note! When checking the system, the pressure should be one and a half times more than the worker, but not less than 6 bar. Then, every half an hour, the pressure rises three times to the previous value.
The last time you need to leave the system for a day - if during this time the pressure fell by no more than 2 bars, then the installation was successful.
Concrete flooring
The final stage of the work is to fill the floor with concrete. To do this, you must first install a special metal beacon profile, providing with it a horizontal level, according to which the surface of the screed will be aligned by the rule.
The thickness of the screed can be 30-70 mm.

After the concrete hardens and finally gains strength, which will take at least 28 days, you can install the topcoat. This may be laminate, linoleum, carpet or other material.
Conclusion
Independent execution of a warm floor made of polypropylene pipes will allow significant savings due to the low cost of materials and the absence of costs for the services of specialists. The only thing is to strictly adhere to the above recommendations in order for the system to be reliable and efficient (read also the article Reinforced concrete pipes - features and application).
From the video in this article, you can get more information on this topic.