How to make heating: 4 stages of self-design
One of the most difficult engineering networks of a residential house and city apartment is the heating system. The necessary equipment and services for its installation are very expensive. But if you know how to make heating with your own hands, you can save a lot by doing most of the work yourself.
The instructions below will provide you with invaluable assistance.

Stage 1. Selection of components
How to make heating? The easiest way is to use the services of special construction crews that have both extensive experience, special equipment, and skills to work with it. But this method has a big drawback - the price. The services of hired workers are quite expensive and not everyone is willing to part with such a large amount of money.
The second option is homemade heating. Despite the fact that climatic engineering networks are one of the most difficult to design, all stages of work can be done by yourself or with the help of a partner. In this case, you will not pay the labor of hired workers.
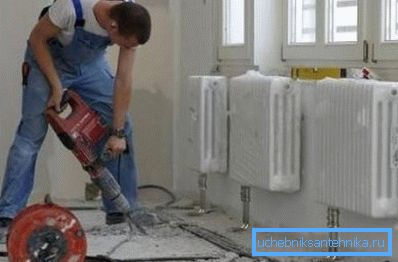
Unfortunately, it will not be possible to completely equip the heating of the dwelling, because before you make the heating system yourself, you should purchase the necessary equipment, materials and tools.
Tip! In order not to spend money on the purchase of expensive power tools (soldering iron, grinder, crimping apparatus, and so on), which, moreover, it is unlikely you will need in the future, it is recommended to rent them. This service is provided in most large hardware stores.
Boiler
Both the home-made heating system and the climate network made by the plumber builders cannot do without the main element - the boiler heating the heating medium, which then flows through the pipes and radiators installed in the rooms.

Regardless of the variety, any heating unit consists of two main parts:
- combustion chambers in which this or that fuel is burned, producing a certain amount of thermal energy;
- heat exchanger through which coolant circulates, receiving thermal energy through the walls.
Tip! There are single-chamber and two-chamber boilers. The second, in addition to heating the house, heat the water, which is then used for domestic needs.
The existing heaters are described in more detail in the table.
| View | Description |
| Gas | Such boilers are used for the installation of autonomous heating systems most often. This is due to their quite affordable cost, ease of use, cheap fuel and some other factors. But for those who are looking for the answer to the question of how to make a heating system with their own hands, this option will not work. Installation of gas equipment should be carried out only by specialists of a gas company who have appropriate permits. |
| Fuel oil | Used very rarely. Usually installed in cases where the main plot is not connected to the land plot. The advantage of the boiler - in the convenience of operation. After installation and commissioning, it works completely autonomously. But choosing such a unit, you will have to decide not only the question of how to do the heating correctly, but also other problems: where to store the diesel fuel, how to equip it heated, how to clean the burner, how maintain the device and so on. In addition, the cost of diesel fuel is quite high, and to make the heating system economical will not work. |
| Solid fuel | One of the common options for heating houses located in non-gasified settlements. In their combustion chambers, you can burn various fuels: firewood, coal, peat, special granules, and so on. The minus of use is the need to constantly add fuel. Pyrolysis wood burning boilers of long burning are more convenient, but their cost is one of the highest on the market. |
| Electric | Excellent devices that can heat large areas of the house. Perfect for home craftsmen who work according to the principle: DIY heating. Before installing them, you do not need to obtain permission and invite specialists. It is only necessary to make sure that the wiring in the house and main power lines will withstand the power of the unit. A huge minus of their use is the high cost of electronic carriers. |
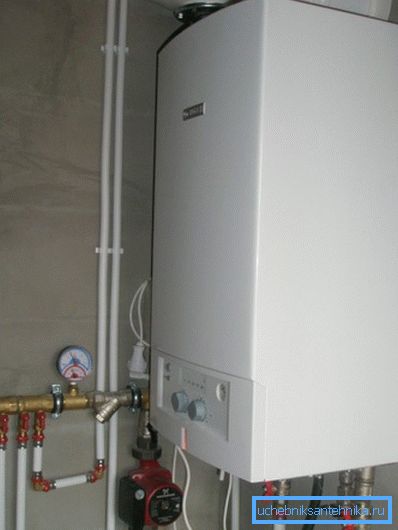
Tip! Although it is too expensive to use electric boilers, they are often installed as an additional or backup circuit. For example, heating the room during the day using a solid fuel boiler, you can use electric to maintain a comfortable temperature at night.
As for the residents of city apartments, they have to be content with heating, where the coolant is supplied centrally. And its quality often leaves much to be desired.
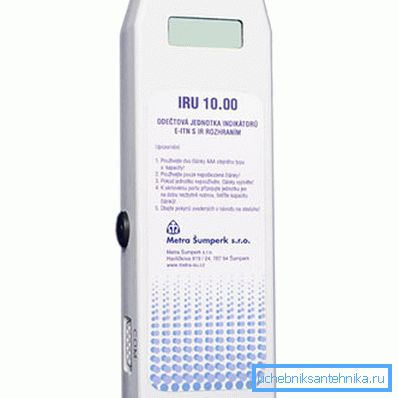
To save money and pay only for the supplied amount of heat energy, it is recommended to install heating cost allocators in the dwelling. They will say exactly how much heat you consumed and how much money you need to pay for it.
Pipes
To deliver the coolant to radiators that heat objects and air in the room, you need pipes. There are a huge number of them.
The following types are most common:
- steel;
- copper;
- stainless steel;
- polypropylene;
- from the sewed polyethylene;
- metal plastic.
Note! Almost all homemade heating systems are made of plastic pipes. They are easier to transport, assemble in place and connect with each other. It is only necessary to choose the right material based on the project of the climate network.
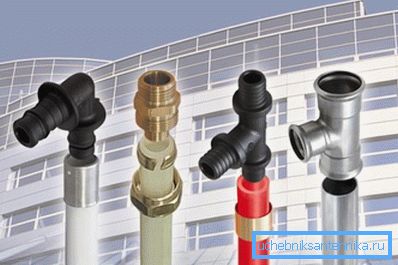
When choosing and buying pipes it is necessary to consider:
- power of the heating equipment installed in your house;
- the method of laying the main and supply pipelines (can be open and hidden - under the floor screed or in the walls);
- the method of organizing the coolant current in the system (distinguish natural - under the action of gravity, and forced - using circulating pumps);
- the temperature to which the coolant warms up (most polymers can not withstand more than 95 degrees Celsius, in this case it is necessary to mount the steel);
- pipe laying scheme.
The last point is very important. Before you do the heating, it is imperative to decide which heat transfer circuit will be used.
There are three:
- Single pipe. One pipe is used. It is laid in the form of a ring over all the rooms, and then radiators are attached to it in a series or in parallel manner. The main advantage of this solution is cost effectiveness (after all, a minimum of parts and accessories will be needed).
As for the cons, there are a lot more of them here:
- the inability to accurately regulate the volume of coolant and the temperature in each battery - if you install a thermal valve on the nozzle, it will limit the flow of water not only in one radiator, but also in all elements mounted further;
- uneven heat distribution - batteries installed closer to the boiler heat better than the farthest ones;
- impossibility of repair - in case of breakage or leakage of one of the batteries, it cannot be cut off from the common circuit, replaced or repaired without stopping the operation of the entire system.
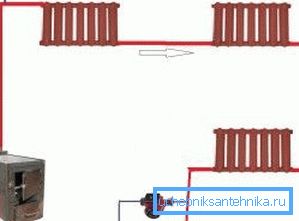
Bypasses help to partially offset the shortcomings. These are sections of pipes of smaller diameter connecting the inlet and outlet pipes of radiators. Using them, you can install a valve at the inlet and disconnect the battery from the system. The consumption of materials at the same time will increase insignificantly.
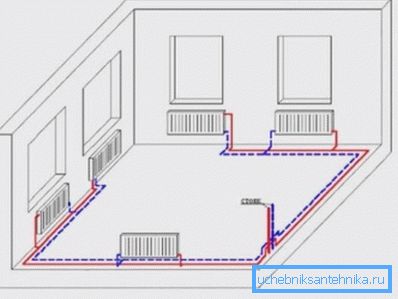
- Twin tube. In this scheme there are two pipes: one coolant is supplied to the batteries, the other flows back to the boiler. More efficient and expensive way to organize heating.
The positive aspects of using the two-pipe scheme are obvious:
- using manual or automatic valves, you can adjust the temperature of each radiator, achieving the most comfortable microclimate;
- thermal energy transferred by the coolant is distributed evenly;
- If the battery leaks, you can close the shut-off valve and dismantle the damaged element for repair or replacement.
The two-pipe system allows you to organize several heating circuits: for the first and second floor, for radiators and underfloor heating, for living rooms and bedrooms, and so on. In this case, a hydraulic distributor for heating is used — a pipe with smaller nozzles that controls the flow of water.
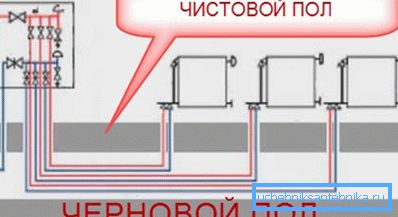
- Ray. The most flexible and versatile system. In this case, the coolant enters the distribution cabinet where the collectors are installed. With the latter using a pair of pipes (supply and return) connect all the batteries in the house.
Using the radiation system, it is possible to regulate the microclimate in the house from a single point, and in any way to organize the flow of coolant.
However, this heating scheme has several features that prevent its wide distribution:
- installation requires a huge number of pipes, because from each radiator you need to conduct a pair of pipes to the manifold;
- only hidden laying of highways is possible, since it is unlikely that it will be possible to make large plumes of pipes aesthetically pleasing;
- in a beam system, efficient flow of the heat carrier can be organized only with the help of pumps.
Having dealt with the layout of the gasket, you can proceed to the selection of batteries.
Radiators
As in the case of pipes, radiators differ from each other, primarily in terms of the material of manufacture.
In the construction use of such batteries:
- Cast iron. Differ in big weight and durability. The disadvantages include fragility and not very attractive appearance. They are characterized by high thermal inertia, so they are poorly suited for the installation of autonomous heating networks with a closed coolant circulation cycle.
On the other hand, cast iron batteries are often installed in apartments connected to central heating, where the quality of the heat carrier (both its physical and chemical composition) leaves much to be desired. It is only necessary to protect the batteries from water hammer by installing shut-off valves on the nozzles.
- Steel. One of the cheapest and most effective options for your own heating network. Batteries are inexpensive, easy to install, and look good.
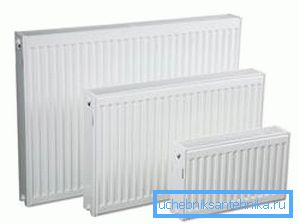
The only drawback is a strong susceptibility to corrosion. The coolant cannot be drained from the system for a long period of time (for example, in summer), otherwise rust will quickly render steel elements unusable.
- Aluminum. They are distinguished by the highest power on the market and have an excellent appearance. Given the high heat transfer coefficient, you can use a minimum of radiator sections to effectively heat the room.
Aluminum batteries very poorly tolerate exposure to aggressive elements dissolved in water. Even the slightest deviation in the chemical composition of the coolant can cause damage.
- Bimetallic. These batteries have the highest consumer properties, which is reflected in the price. They have all the advantages of aluminum radiators, but are free from their disadvantages.
The coolant in them circulates through the steel frame and does not come into contact with the aluminum heat exchanger. As a result, we have more power and no less durability.
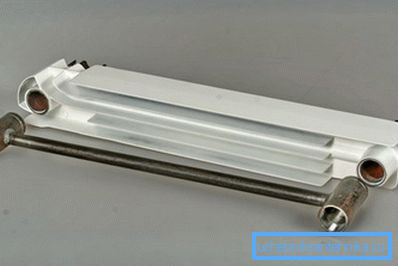
If you are not afraid of the price, you can safely buy bimetallic heaters. You will not be disappointed in the choice.
Stage 2. Calculation of system power
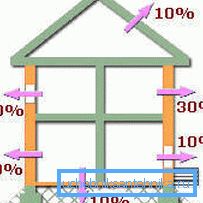
A self-constructed heating network will only effectively heat the house if the boiler is selected and installed with the required capacity. This cannot be done "by sight", otherwise the heating power of the heater may either not be enough for all the rooms in the house, or you will overpay for inefficiently burned coolants.
To determine the desired value, use the following formula:
Mto = KP * S / 10, where:
- TOP - A correction factor depending on the location where the house is built;
- S is the area of all heated premises of the dwelling.
Tip! It is desirable to add about 20% to the value obtained as a result of the calculations made, taking into account unforeseen factors: a power slump due to low gas pressure, too cold winters, the use of hot water, and so on.
Stage 3. Calculation of the coolant volume
It is equally important to calculate how much coolant is needed to fill the system.
Calculations are made as follows:
- we obtain the volume of batteries by multiplying the internal volume of each section (indicated in the accompanying documentation to the radiators) by their number mounted in the house;
- we obtain the volume of pipes by multiplying the area of their internal section by the total length of the supply and discharge pipelines in the system;
- we get the total volume of the system, adding the two previous numbers;
- we find the temperature difference of the coolant - from the maximum value we subtract the temperature of the water in the shut off system;
- we find the volume of the coolant in a hot condition (for this we need the coefficient of thermal expansion of the liquid you are using at a certain temperature - for water at 80 degrees it is equal to 5.87 * 10-four).
The obtained value is important not only when buying antifreeze or preparing the desired volume of softened water. Focusing on the amount of coolant, you must choose an expansion tank (its volume must contain at least 10% of the fluid circulating in the system).
Stage 4. Installation
So, having purchased the necessary materials and accessories, we make heating with our own hands further. The process is not particularly difficult. The main thing is to strictly adhere to the engineering project, drawn up by the architectural bureau, or personally drawn sketch.
During work, be sure to pay attention to the following nuances:
- Heating radiators must be placed under window openings so that their length matches the width of the window. This significantly reduces considerable heat loss through the windows (especially if low-quality window blocks are installed there).
- The distance from the floor to the bottom edge of the battery and from the window sill to the top should not be less than 10 cm, otherwise the air circulation will be disturbed and the efficiency of the convection heating method will decrease.
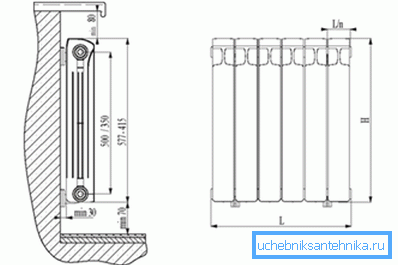
- All radiators in the room should be located on the same level. So the coolant will be distributed more evenly and the appearance of the heating elements will not bring dissonance into the interior of the room.
- The edges of each section of the battery must be vertical. Horizontal placement is not allowed.
- Regardless of the piping layout, you must install at least one coolant drain valve, which is used in the case of a complete fluid replacement.
- To avoid the formation of air plugs, at the top of each battery on the side opposite the inlet, it is necessary to fix the Mayevsky crane. It is also advisable to install air valves in difficult sections of pipelines where airing is expected to occur.
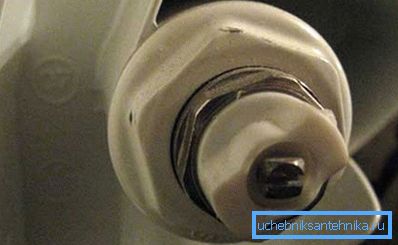
At the end of the work it is necessary to make a test run. To do this, heat carrier is poured into the pipes, after which its pressure rises slightly above the norm and the boiler is started.
The climate network should work in this mode for at least 24 hours. If leaks are detected, they must be repaired.
Conclusion
Many home masters wonder how to do it yourself: make heating, sewage, ventilation, plumbing and so on. You have already received the answer to the first question. As for the rest - see the video in this article.