How to make infrared floor heating yourself
Modern technological solutions make it possible to find fundamentally new ways of heating residential premises. Until recently, centralized or individual boiler heating systems were considered generally accessible. The technical innovation and a worthy replacement for traditional methods of heating homes, was the emergence of innovative heating methods that use the floor as a heat-accumulating and thermal radiating surface. Such is the technology of infrared floor heating. We will tell you how to make an infrared floor heating with your own hands.
Special features
First came the construction of water floors, and after a while - electric cable and rod types of warm floors. And, relatively recently, there was a high-tech development of IPO - infrared film heater. Heating floors, walls or ceilings of this design have several advantages:
- Low compared with other heating methods, energy consumption is 15–55 W / h per 1m ?, due to the high thermal conductivity of carbon material used in the construction, the use of a temperature controller to create a comfortable temperature mode and quiet operation.
- High reliability due to parallel connection of electrical circuit elements. When one heating section burns out, the rest continue to function properly.
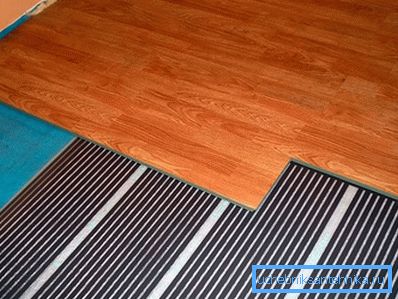
- You can cover the film structure with almost any material: laminate, wooden parquet, carpet, drywall or composite.
- Easy installation on a smooth surface, which can be done by any home craftsman who does not possess special professional skills. The absence of cuttings, laying armholes and grooves does not require the use of a special tool - perforators and wall chasers.
IPO material
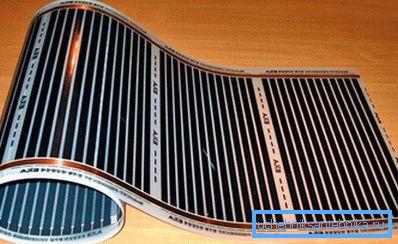
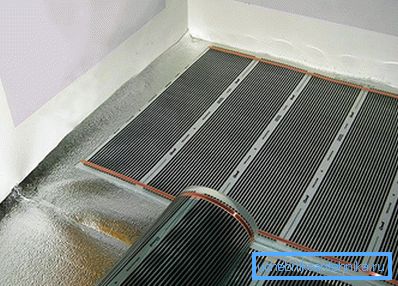
Thermal film with a thickness of 0.2–0.4 mm is used for laying the heating layer. It is sold in rolls 50–100 cm wide and up to 50 m long.
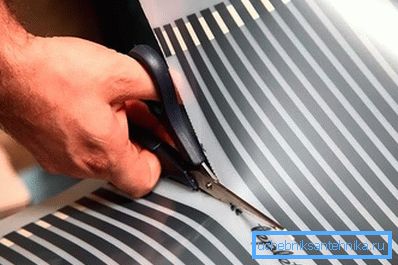
Cutting the film into mats can be done using special cut lines applied to the surface; the designation is clear to everyone, so when cutting, it is difficult to confuse them with heating strips that are strictly forbidden to cut.
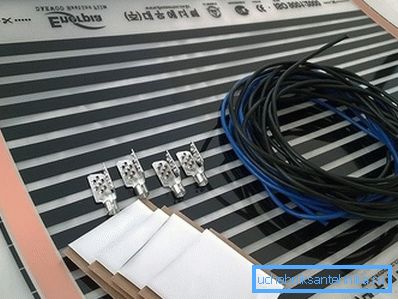
The film consists of heating elements - 1.5 cm wide strips connected by silver-plated copper tires. Inside each heating element is carbonaceous carbon paste based on graphite, which, during the passage of electric current, emits infrared radiation. The radiation spectrum is outside the visible range of the human eye. The emitter layer is reliably laminated on both sides with dense layers of non-combustible polymer with a melting point of 130 ?. It transmits ultraviolet light, and reliably protects against ingress of moisture, mechanical breakdown or electrical circuit. The area of the purchased film coating is selected on the basis of:
- Not less than 70–80% of the area of the room for the main heating.
- 30–40% of the area for heating or backup heating.
Phased installation and installation of the heating system
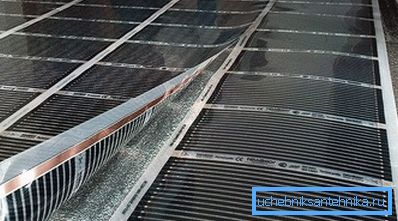
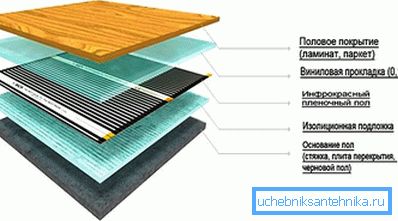
Laying is made on an even basis. Self-leveling floors are used for leveling, the permissible size of irregularities is ± 3 mm, the level is used for measurements. It is possible to level with the method of a cement-and-sand lighthouse, after which the surface must be cleaned of dirt and dust.
Next, you need to lay out a waterproofing layer of special materials or plastic film with a thickness of 50 microns.
In order to minimize heat losses, it is necessary to install heat insulation from a metallized metallized substrate, foiled polyethylene foam or polypropylene film. It fits the reflective side up. The thickness of the layer with reflective foil layer should be 3-5 mm.
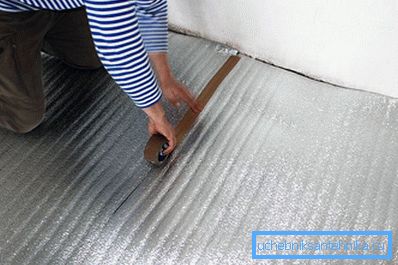
A non-coated technical cork is used if the floors are covered with ceramic tiles.
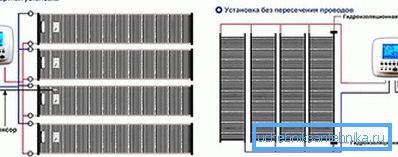
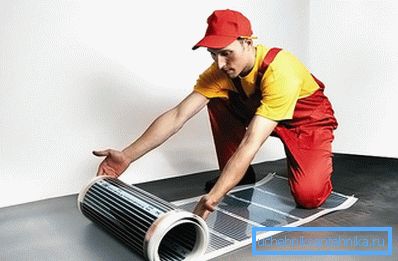
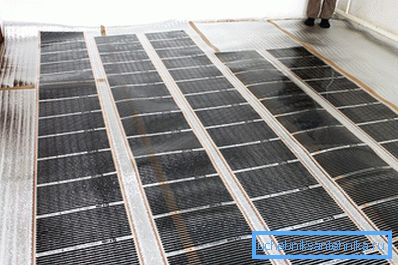
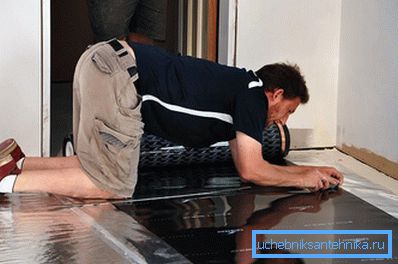
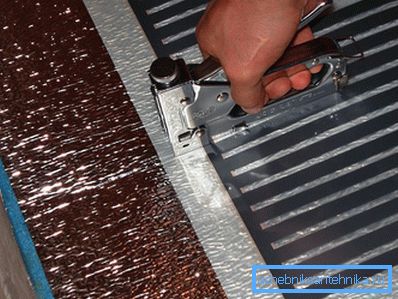
Then cut the IPO with scissors into mats of the required length according to a pre-compiled drawing, taking into account that the distance from each wall should be about 20 cm. Butt apart them at a distance of 5 to 10 mm (overlap is not allowed) so that the copper tires are at the bottom. The strips should be directed towards the wall with a socket from which power is supplied. Along this wall, in order to save, electrical jumpers are made, and a temperature sensor is also installed.
Do not allow tools to fall on the film. In order not to damage the IPO, it is better not to attack mats.
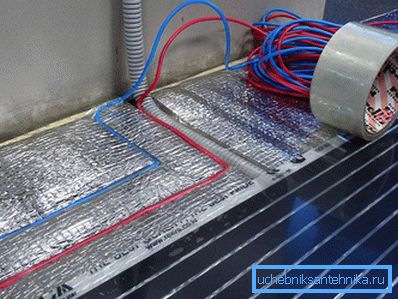
Then it is necessary to secure the joints with adhesive tape, and the places of the cut copper busbars are isolated with bitumen strips that are included in the product package.
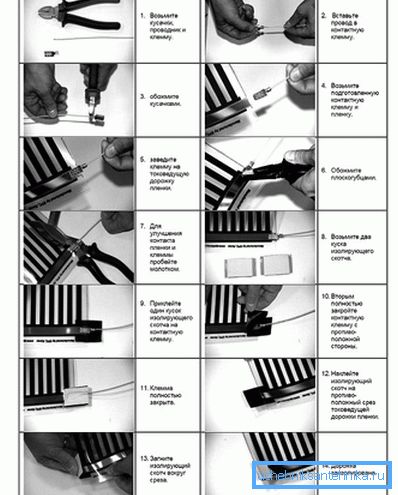
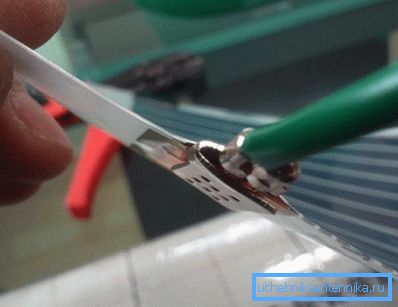
The mats in the electrical network are connected in parallel by electrical wires - jumpers with clips at the ends. Insulation is removed from the wires, the terminal shank is put on and clamped and crimped. It is necessary to correctly position the clamp with the wire on the contacts of the mats. One side of the clamp should go inside the IPO, the other should be on the copper bus outside. The clamp is pressed on both sides by pliers. Places of contact are isolated by bitumen mastic.
The diameter of the wires used is calculated based on the power consumption of the cells connected in parallel. To do this, the declared power rating of IPO per 1 m2 multiplied by the square. As a result, we obtain the total power, which is divided by the mains voltage I = P / U. For special tables, we determine the diameter of the cross section of the jumper on the magnitude of the current strength. Similarly, the diameter of the supply cable is selected. For example, to connect all the 1.5 kW mats-cells, it is enough to have a copper wire of 1.5 mm ?.
In a heat insulating coating under the film or into the floor with a depth of 1-2 cm, a tube with a temperature sensor is installed. It connects to the temperature controller. The supply voltage to the IPO is supplied through a temperature sensor, during the period of operation / closure of the circuit.
After installation, a test connection is made to the system. The mains voltage is applied to the input and the uniform heating of all the mats is checked. If there are problems, then they are eliminated at this stage. The heating system is ready for operation. Now you can start laying the finish coating. Thus, it is possible to insulate even a cold balcony or loggia, creating comfortable conditions for staying in these rooms.
Video
To supplement the knowledge of laying the infrared floor, we invite you to view the video:
A photo
