Independent installation of heating pipelines: floor heating
Now more and more often, laying of pipelines for heating a floor heating system is being used. This is due to the high efficiency and cost-effectiveness of such a structure, to which many owners of private houses are now striving.
In fact, the principle of heating is always the same, but the methods of laying and the pipe itself can be different, as, indeed, the node for heating water. But we are interested in the installation itself - the rest of the nuances will be examined superficially, and also we will show you a video clip on this topic.
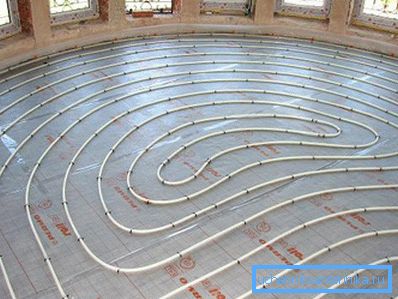
Installation
Preliminary work
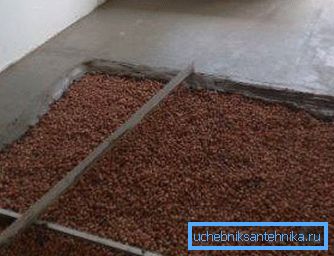
- In any case, heating pipes in the floor will be laid only on cement-sand or concrete screed.. So, you need to start with it, since you will have to wait for its final drying, which will take 28 days. You can, of course, start the installation after three weeks, but for this you have to eliminate the clips for fixing, as they are inserted into the rough base (it’s not very convenient to drill a wet coupler - the hole is broken to large sizes).
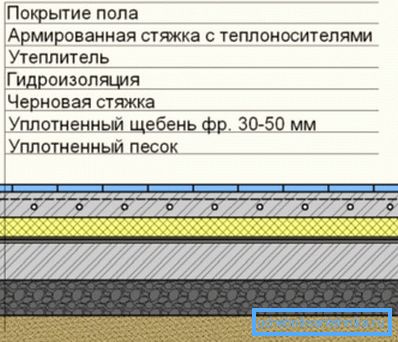
- To fill the screed, if it is made on the first floor, we definitely need insulation and the cheapest and highest quality option, is expanded clay, or expanded clay sand. Its price will be 4-5 times lower compared to extruded polystyrene foam. In addition, you will need a cut-off waterproofing, which you need to lay on a rough base, but not on a sand-rubble cushion, as some recommend it. The reason is that waterproofing prevents moisture from entering sand, crushed stone or sifting, and a dry cushion contributes to a decrease in thermal conductivity, therefore, the cut-off over it simply does not make sense!
- The reinforcement grille for the rough tie is not necessary, however, as well as for the finishing, upper tie, if the ceramic tile is used as the front cover.. But this grid is generally needed so that large cracks do not occur, and metal lighthouse profiles cope excellently with this - the pouring area is small, so the installation of the armaschet or wire remains at your discretion.
Recommendation. You should not monolith with a foundation or walls - when installing a waterproofing film, wrap it on walls above the level of the front cover (then cut off the excess). This will exclude the possibility of mutual deformation during a subsidence of the foundation, as well as serve as a break for cold bridges.
Laying of a heat-insulated floor

First of all, you should decide for yourself how you will lay the pipe - for this there are two ways - a snake and a spiral, although the first version can be performed in different ways. The difference is in the ratio of temperatures in the covered area.
So, if you lead the pipe along a certain route, and then return right next to it, as is seen in the left picture of the top picture, the floor temperature will be the same, and if the return is made as indicated in the middle, the drops will be felt under your feet. Considering that SNiP 41-01-2003 recommends a floor temperature not higher than 26? C in the sleeping room, and not higher than 31? C in the rest, the middle variant will not be too good, therefore, it is better to avoid it.
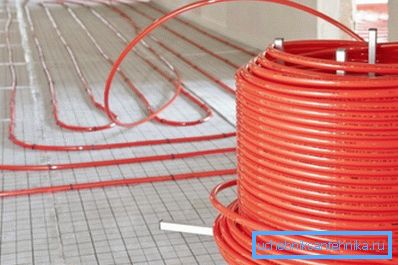
For a trunk on a warm floor, you can use either polyethylene or metal-based laminate, although for some reason it is considered that it is the polyethylene pipe that is most suitable for such installation and even the instruction in the bay indicates that this type of heating is used. But the experience and practice of such works point to a number of shortcomings in the installation of polyethylene and one of them is the impossibility of pouring the upper screed before filling the system with water (soft walls), and the connection during construction and repair work can occur much later! In addition, the cost of PE is higher compared to metal-based laminate.
Metal-based laminate is much more practical in this respect, only it has a problem on sharp bends - it can break, but there is a fairly simple way out. A steel spring 20-30 cm long is worn on the pipe, and its internal diameter must be 12 mm greater than the external section of the metal-plastic, that is, 17-18 mm. The spring is pushed through the pipe and each bend is made with its help, that is, during the process it serves as a casing.
Recommendation. When installing the floor with your own hands, avoid joints of pipes under the screed. If the floor area is too large and one bay is not enough for you, then it is better to divide this area into several wings so that all the connections are only on the distribution comb.
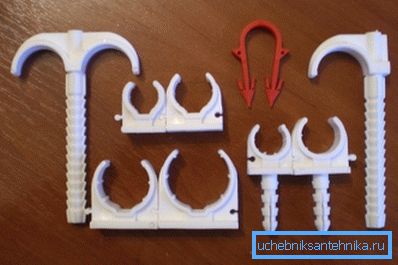
Fixing of pipes is carried out with the help of various clips, which are attached to the subfloor, both dowels, and with the help of overhead clips, which are spread on the surface in the form of a tape or a rug. In any case, the optimal distance between the pipes will be 20-25 cm, but this also depends on the thickness of the upper screed.
Heat rises in the form of a triangle with angles of 45? relative to the floor and you need to intersect the edges of this triangle just below the surface of the finished floor - so the heating will be the most uniform.
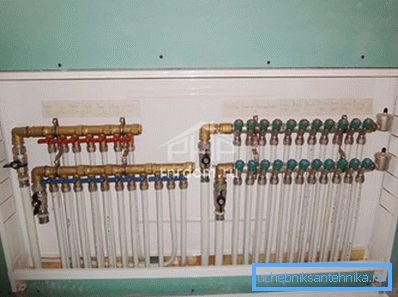
Each wing is connected to a domestic heating boiler through a comb, which are mounted either on the wall or in a specially equipped niche, as shown in the top photo. It is necessary to install a Mayevsky valve on each of the combs, since there is no drain in such a system.
Conclusion
When the laying of heating in a private house is completed, the pipes are poured with a cement-sand screed with plasticizer added there (proportions are indicated on the container). Trial run can be done in 2-3 days after pouring, but at the same time the temperature of the coolant should not exceed 25-30?, So as not to have cracks in the floor.