Installation of aluminum radiators for heating: choosing the
Aluminum batteries are much easier than conventional cast iron, so you can install them yourself, without any help. The efficiency of the heating device also depends on the correctness of its installation, so it is worthwhile to dwell on this issue.
Preparatory stage
Before you install an aluminum radiator with your own hands, you need to decide on a few points:
- make sure that the thermal capacity of the device is sufficient. It may be such a situation that the purchased battery has insufficient heat transfer due to the low temperature of the coolant at the inlet. In this case, you just need to add a few sections; how to do this is described below;
- check the size. Modern heaters transmit heat to the room not only due to radiation from the surface, but also due to convection, so that the window sill should not be too close to it;
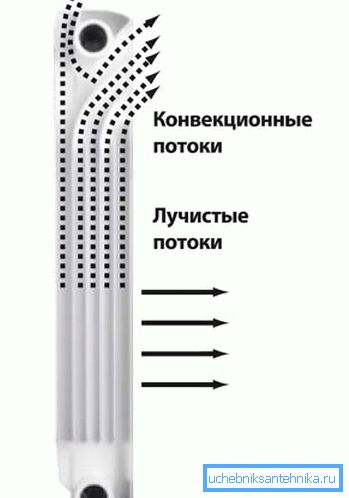
Note! The shape of the aluminum fins is explained by the fact that it is necessary to direct the flow of air from the bottom up.
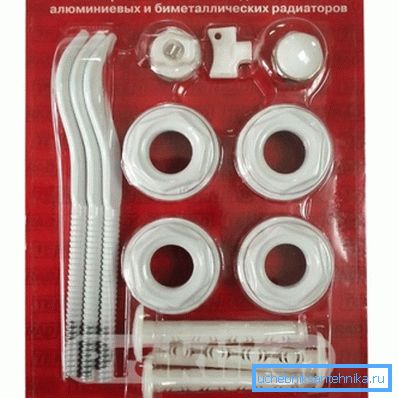
- decide on the type of fastener. In principle, the complete set usually includes fixings in order to simply hang the heater on the wall. But sometimes it is better to purchase separate brackets for floor mounting (especially since the price is cheap), this option is suitable if the battery is installed in a thin plasterboard partition or you simply don’t want to drill holes in the wall.
Select connection type
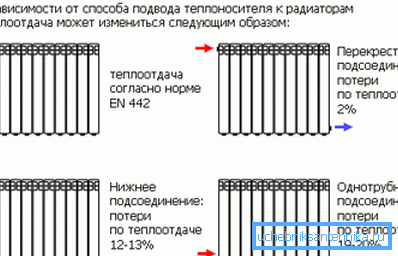
Before installing aluminum radiators, the issue with the type of connection should be resolved. The heat emission of the heating device directly depends on this.
Possible options for connecting the heater as:
- diagonal (it is also a cross) - in this case the coolant is supplied from the top of the heater, and the cooled coolant comes out from the opposite side from the bottom. Due to this, the battery warms up evenly, and the losses amount to no more than 2%;
- with one-way connection, the loss is slightly more, up to 5%;
Note! If the number of heater sections exceeds 12, then a one-way connection is inefficient. The fact is that distant sections with this method of connection will simply not warm up.
- with the lower connection (supply and return from different sides) losses amount to 12-13%;
- the lower one-way connection is the most disadvantageous in terms of the heat transfer of the battery. Losses can be up to 20%, but pipes can be hidden under the floor, so this method of connection is also often used.
Installation technology
The whole process can be divided into 2 stages - first, the fasteners for the battery are installed, and then it is simply hung on the brackets and connected to the supply and return flow. After that, it remains only to check the tightness of the connections and do not forget to close the unnecessary holes on the sides. If additional sections are required, this procedure is carried out before mounting the fasteners in the wall.
Add section
To add an additional section to the radiator, you will need 2 nipples with left and right threads on 2 sides, you also need heat-resistant gaskets for extra tightness.
Instructions for adding a section to the battery looks like this:
- the heater must be placed on the floor, table or any other horizontal surface;
- then the nipples are inserted into the holes on the radiator, while not forgetting the gaskets;
- an additional section is attached to them and turning the nipples the section is gradually pressed against the battery;
- at the same time, both nipples should be rotated gradually, literally by 1-2 turns, this is necessary so that the section does not twist and the collector metal is not deformed.
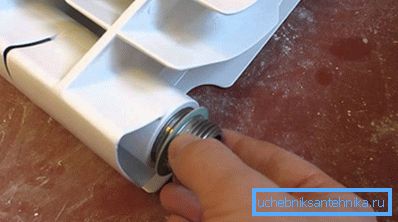
After adding sections, all that remains is to check the tightness of the joints and you can proceed to the installation of the heater.
Installation and connection of the radiator
Most often, only wall fasteners are used for aluminum radiators, their weight is several times smaller than that of cast iron, so that additional support from the bottom is simply not needed.
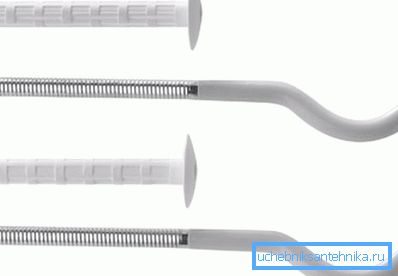
The number of fasteners depends on how many sections are in the heater, also fasteners are installed not only at the top, but also at the bottom of the device. With the number of sections up to 9, only 1 mount is installed in the upper part of the device, and 2 in the lower part. More detailed data is given in the table.
Dependence of the number of brackets on the number of radiator sections
| Number of sections | 3-9 | 10-14 | 15-20 | 21-24 | 25-28 |
| The number of lower brackets | one | 2 | 2 | 2 | 3 |
| The number of upper brackets | 2 | 2 | 3 | four | four |
As for how to properly install an aluminum radiator, the work begins with marking the mounting holes. Despite the low weight of the heater, it is best to use anchors. A hole is simply drilled under the mount, then a plastic part is inserted into it, and then a metal bracket is inserted into it with effort.
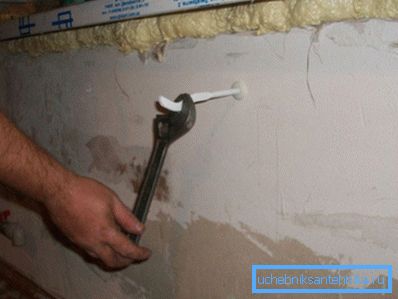
In this case, the plastic insert expands and is securely fixed due to the friction force. This is quite enough to withstand the load not only from the aluminum, but also from the heavier battery.
After that, it remains only to solve the problem of how to hang an aluminum radiator. The only requirement at this stage is to level it at the construction level. With a strong bias, the heating of the heating device will significantly deteriorate, and hence the heat transfer will be less.
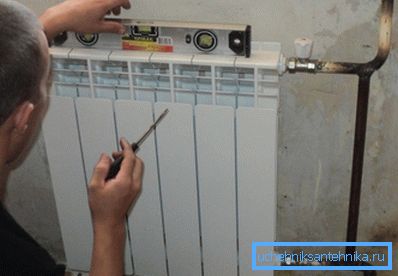
When connecting to the supply and return pipes, it is recommended to use ball valves, in order to be able to quickly block the flow of coolant into the radiator during leakage. So that the operation of the heating system is not disturbed, a bypass device (jumper) will be needed, which will allow the coolant to circulate around the disabled heating device.
Floor brackets
This type of fastening is used in cases where the wall does not have sufficient bearing capacity or because of the size of the heater there is no sense in hanging it (in the case of low radiators).
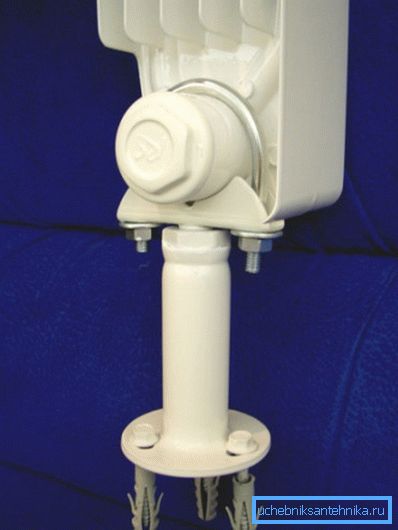
The design of the brackets of this type is similar - it is a plastic or metal leg with a wide sole (for greater stability), in the upper part there is a recess for the installation of the radiator and the fixing bracket. Sometimes, instead of the bracket used a small flexible chain (structurally similar to the chainsaw chain). Fixation is necessary so that the radiator does not fall in case of accidental contact with it.

In the case of floor mounting, the problem of how to install aluminum radiators is easier to solve. With the number of sections up to 12-15, 2 brackets will be needed, with a larger number of at least 3. The fasteners are placed on the floor, as a rule, they are fixed with anchors or ordinary screws (in the case of a wooden floor).
Floor mounting is usually used for low or medium height heaters. If the distance between the axles exceeds 500 mm, for reliability it is recommended to attach the battery to the wall on top. In this case, the fastening itself is necessary only for the stability of the heater; the entire load will fall on the floor brackets.
In conclusion
The installation process of aluminum models is practically no different from the installation of conventional cast iron or bimetallic batteries. The same types of fasteners are used, and the technology remains the same. In addition to the standard wall brackets, floor mounts can also be used, sometimes this is the only possible installation option. The proposed information will help not only to install the battery correctly, but also to choose the appropriate type of mount.
The video in this article shows the process of assembling and installing an aluminum radiator.