Installing radiators in an apartment: how to mount radiators
The heating system is one of the most important engineering networks of any home. On how correctly installed radiators and pipes, depends on the temperature in the room and the efficiency of coolant. If during the repair you decide to save money and install the radiators into the apartment with your own hands, help will be provided with detailed instructions, which you can find below.

Training
Before choosing, buying and installing radiators for an apartment, you need to thoroughly prepare.
First of all, you should find out what kind of heating scheme is implemented in your home.
Modern engineers know two main varieties:
- one-pipe heating system at home - typical of most urban apartments of the old building, connected to the centralized coolant supply system (although there are exceptions);

- two-pipe - more common in modern homes, equipped with individual boilers.

Note! Depending on the number of supply pipelines and the need to purchase accessories: fittings, filters for pipes, valves and so on. Therefore, if you have incorrectly identified the system, it may either not be enough details, or a lot of extra will remain.
Instruments
In order to install radiators was performed better, you need to use the following tools:
- torque wrenches, with which you can precisely dose the force when tightening the drives;

- sealing materials that will prevent leakage at the joints of pipes with batteries.
Necessary fittings
Let us consider in more detail what other details, in addition to radiators, may be needed:
- Bypass. Required with one pipe connection system. It is a pipe that connects the incoming and outgoing sections of the pipeline, bypassing the battery itself. It allows you to organize a more uniform flow of coolant, and also makes it possible to replace or repair a damaged radiator without stopping the operation of the entire heating network.
- Fittings. These include adapters, tees, couplings, angles, and so on. Their number and varieties are determined depending on the configuration of pipelines in the apartment and the used scheme of their installation.

- Valves. If you do not have sufficient experience in the installation of heating networks, it is advisable to purchase standard taps used for joining pipes with radiators. Modern systems with automatic or ball valves are more difficult to install and require certain knowledge and experience from the installer. When making a purchase, be sure to check that the thread parameters and sizes of valves, pipes and radiators match.
- Mounting brackets. Their design depends on your preferences, however, it is also necessary to take into account the design of the battery. For example, for cast iron products, more durable hooks are needed than for aluminum.

Tip! When choosing dowels and anchor bolts, you need to remember that they will have to withstand not only the weight of the radiator itself, but also the mass of water flowing through them. Take care of a significant margin of safety.
- Air valve (Mayevsky's crane). This necessary element is installed in the upper part of the radiator and is used to remove air plugs, which are formed after pouring the coolant into the system.
Choice of installation location
Remember that the gravitational heating system (where the fluid flow is not organized by the pump, but due to the difference in temperature and pressure of the coolant) must be mounted with a slope away from the flow of hot fluid to its output, otherwise the batteries will form air plugs all the time.
The most common place to install radiators is under window openings, since they are the sources of cold air. The heating panel must be positioned so that its middle falls on the center of the window block. This requirement is not necessary, however, the battery installed in this way will look more organic in the interior of the room.

The following conditions must be strictly observed:
- sections of pipes that bring coolant to the radiator are mounted at an incline of 0.005 to 0.01 (this means that the deviation from the horizontal for each meter of the pipeline is 5 mm);
- the minimum distance from the bottom edge of the battery to the floor is 10 cm;
- the minimum distance from the upper part of the radiator to the window sill is 10 cm;
- the minimum distance from the wall surface to the battery is 5 cm.
These numbers are important in that they provide natural convection (mixing) of air in the room. Also remember to observe the verticals and horizontals when attaching the battery.

Tip! To improve the efficiency of the heating system, you can stick a sheet of heat-reflecting material on the wall behind the radiator or cover the surface with a special compound having a low coefficient of thermal conductivity.
Mounting brackets
All modern radiators are mounted from sections. Their number depends on the material of the battery and the area of the heated room. The topic of power calculation will not be considered within the framework of this material, but you need to know that 1 m2 must be supported by one bracket.
They can be made independently from iron rods of suitable thickness or purchased in a store. Often with modern aluminum, steel or bimetallic radiators in the kit there are already parts with which they are mounted.

The mounting hardware is installed as follows:
- marking the places of drilling holes (each hook must be between the sections of the battery);
- holes are drilled (here you need to be careful not to move the drill to one side or the other);
- a dowel is inserted into the hole, after which the bracket is screwed in (some types of accessories are fixed with anchors: in this case dowels are not used).
Note! This stage of work is perhaps the most important, since it depends on the correctness of its conduct how correctly the battery will “fall” on the place provided for it.
Installation
Before starting work, shut off the heating circuit and remove the coolant from it. To do this, serve cranes, which are located either in the apartment (if your home is equipped with an individual heating system), or in the basement (in the case of connection to central heating).
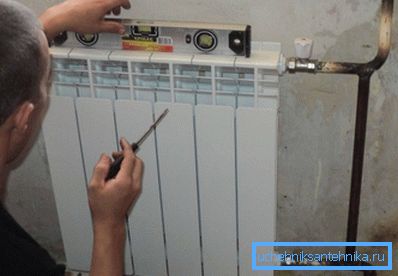
After that, it is advisable to once again check the installation of fasteners on the wall. For this is the water or laser level. Remember, in a crookedly installed battery, the coolant will circulate incorrectly, which will lead to uneven heating and deposition of salts dissolved in water.

The installation process itself is not difficult:
- the installed product is released from all plugs that prevent dust from entering the nozzles;
- in the upper part is fixed Mayevsky's crane;
- a bypass is connected (if a one-pipe heating system is used);
- the battery is hung on the brackets and docked with the piping.
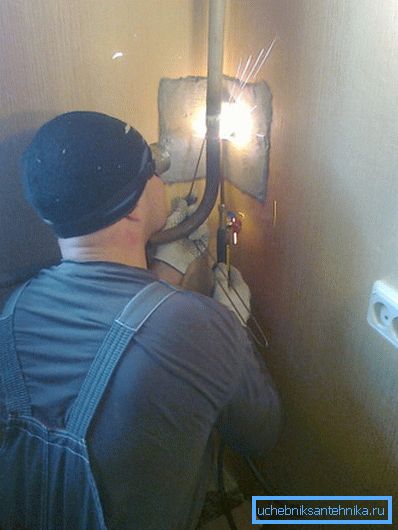
The connection is made with the help of special sleeves - sgons, which are rolled on the pipes in advance. The joints are sealed with tow and silicone sealant. Having experience in gas welding, you can weld pipes (this method is not suitable for all radiators).

Tip! If you are installing aluminum or steel batteries, it is recommended not to remove the packaging from them until the end of the construction and assembly work to avoid damage to the surface.
At the end of the installation of the batteries, the so-called crimping of the heating network is carried out. This requires a special device, the price of which is high enough to buy it for the sake of a single operation. Therefore, it is advisable to seek help from the housing office or a specialized company.
Conclusion
Heat in the house depends not only on the selected model and the quality of the installation of radiators. It is necessary to take into account many other nuances: the composition of the coolant, the presence of thermostats and so on. In more detail about installation of the climatic equipment you can learn from video which is located below.