Radiator bracket: selection criteria for mounting hardware
In this article we will talk about how to hang a heating radiator on the brackets. This topic is of considerable interest, since the overhaul in a house or apartment is often associated with the replacement of heating appliances.
But, before proceeding to the consideration of the installation instructions for heating equipment, we will find out what are the brackets used during installation.

Criteria for the selection of fasteners hardware
There are various brackets for radiators on sale and of course not all of them are suitable for the battery that you want to install. Special fasteners differ in size, configuration, method of installation and of course cost.

The choice of mounting hardware is carried out in accordance with the following criteria:
- production materials used in the manufacture of batteries;
- constructional features: panel or sectional type;
- installation type: wall or floor;
- number of sections;
- gap width between sections;
- the density of the wall on which the installation work is performed, and the load that this surface is able to withstand.
- product price.
Hardware for wall mounting

Wall mounting method is the most popular, as is widely used and is considered traditional.
The installation manual is simple: the fastener is installed in one way or another on the surface of the walls, after which the heating equipment is hung on it.
Important: The heavier the device that we plan to install, the thicker and more reliable hardware should be, which will have a weight load.

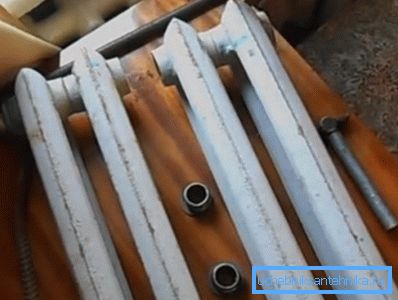
- The most reliable and most massive hardware are used to install cast iron batteries.
- Pin elongated bracket for the radiator (length up to 30 cm);
- Cast iron casting holders;
- Holders mounted on a steel strip;
- Adjustable steel holders, through which you can draw or push the back wall of the battery away from the wall, or straighten the horizontal position of the heater.
- For the installation of aluminum and bimetallic radiators are used the same holders. This is due to the fact that both categories of heaters are characterized by low weight, the same distance between the sections and a similar configuration.
Among this type of mount, we note the following:
- steel corner bracket for the radiator or its reinforced modification;
- pin bracket of steel with dowels length 120-170 mm;
- standard wall mounts with plastic lining.
Important: Some manufacturers of heaters use brackets of their own design, and therefore universal products may not be suitable in size and configuration.
Surface hardening and installation work
When deciding how many brackets you need for a radiator and what they should be, pay attention to the type of walls.
The best wall material for installation work is a concrete slab, as in it the dowels are held indefinitely. The worst wall material, in terms of installing heavy batteries, is the laying of adobe blocks.
Unsatisfactory strength characteristics are distinguished by old brick walls with a thick layer of plaster. A typical example is the so-called Khrushchev.
In such houses, without prior preparation of the mounting surface, the fastenings can temporarily leave the wall under the weight of a heater filled with water. If the surface on which the installation will be carried out, accumulates from old age, or is swollen from dampness, additional strengthening measures will be required.
The instruction of the preparatory work is as follows:
- We bring down the plaster to the brickwork under the window opening.
- We fill a plaster grid. If the layer of the original plaster is thicker than 3 cm, instead of modern polymeric grids, fasten a steel grid with a suitable size of the steel mesh.
- We prepare plaster solution from 1 part of cement and three parts of sand. Thoroughly mix the mixture with water and bring to a uniform consistency.
- Throw the mortar on the grid and align so that the surface of the cement plaster 2-3 mm did not reach the level of the original plaster.
- After complete drying of the layer, we apply a leveling plaster putty on the same level as the rest of the wall.
If the reinforcement was carried out correctly, the brackets will be held firmly for a long time.
Once the surface is hardened, you can proceed to installation work.

The instruction is as follows:
- We make measurements. We measure 10 cm from the bottom edge of the window sill - this will mark the location of the upper line of the radiator.
A distance equal to the distance from the upper part of the battery to the center of the upper side technological opening is receding from this mark. On this label we draw a horizontal line.
Measure the battery in length. We measure the width of the window sill and mark the middle.
We consider the distance from the middle of the battery to the gap between the sections where the bracket will be installed. We measure this distance on the previously plotted line. This will mark the location of the brackets.

- Install hardware. Drill holes for plastic seals. We drive seals into the holes and screw holders into them.
After the holders are screwed in, you can begin to mount the heater.
Reasons for floor mounting

As already mentioned, the wall bracket for a panel radiator or for its sectional counterpart is a traditional solution that has been used everywhere for a long time. But, in addition to installing the wall type, there is a method of mounting heaters on the floor.
The need for a floor installation can be caused by the configuration of the battery itself or the glazing features of a building object. For example, if the windows in a house or in a modern apartment are full-wall, a battery with a short center distance is installed.
Such heaters are placed on the floor with a small gap required for convection. As a result, the air in the room will warm up well, while the glazing will not be blocked by a massive radiator.
Another reason for floor mounting is insufficient wall strength. For example, if the wall is old and there is no possibility to strengthen it or the wall is made of drywall or cladded, the battery will have to be put on the floor.
Hardware for floor mounting

There are several modifications of brackets that can be used during floor installation of the radiator.
In accordance with the method of attachment, these devices are divided into the following types:
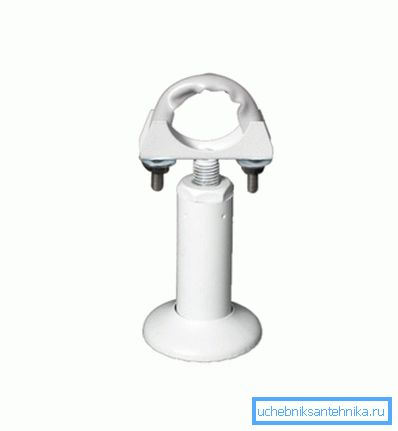
- "Chain" with the main locking element consisting of steel chain links connected to each other.

This type of floor fastener fixes the heater with a flexible grip. That is, the fixing element is thrown onto the jumper between the sections and secured in this position with bolts.

- U-shaped metal bow it is fixed in the same way as a “chain” with the difference that instead of a flexible locking element, a hard collar is put on the jumper, which is also bolted.
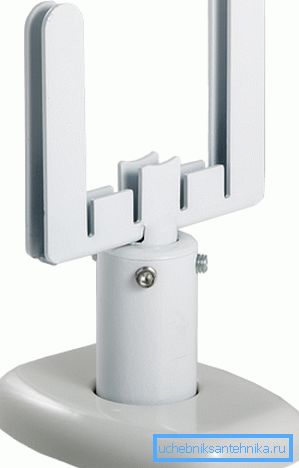
- "Fork" It is a vertical mount, made in the form of a slingshot on which the radiator is mounted.

Fixation of the heater in the “fork” is carried out due to its own weight.
Installation instructions floor bracket as follows:
- Mark up space for fasteners in accordance with the size and number of sections. The larger the heater, the greater the number of fasteners required to install.
- After the marking is done, the holes for the dowels are drilled in the concrete base. If the floor is wooden, the holders are mounted on long screws that are screwed directly into the boards.
- Holders are fixed on the floor with screws.
Tip: If the radiator is heavy floor holders can be duplicated by installing wall brackets.
Conclusion
Now that you know what a bracket is for a radiator with a dowel and how it is used for its intended purpose, it will be much easier to cope with the installation of the heating system in a house or apartment. More useful information you can find by watching the video in this article.