The order of the heating furnace: the principle of the
Laying out the hearth in a country house is under the force of, perhaps, very many people, but for this it is necessary to have a heating furnace, otherwise you can get an ordinary box that will smoke and give a little heat. There are a lot of constructions and even stove books have been written on them where the authors offer their methods. Moreover, each of them is good in its own way, and if you have to choose between them all, it will be extremely difficult.
Of course, we will not consider each of them, since we can devote a separate website to this, but pay attention only to one design, and a thematic video clip will help.
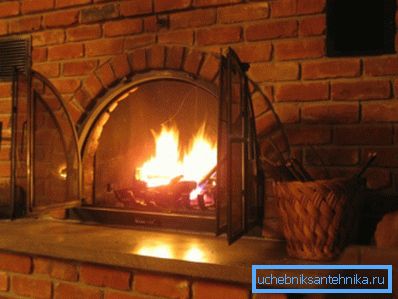
Stove heating
Note. Constructions of this type can be very different, both in appearance and in the principle of combustion. It can be cooking, combined, stoves on the side and with a fireplace. The main difference here is the duration of the furnace and, of course, the efficiency of heating.
Foundation
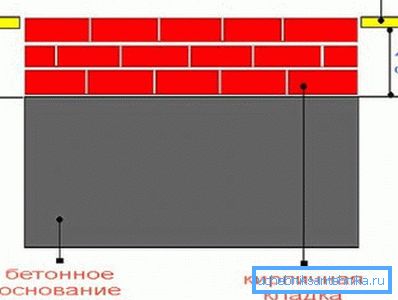
All heating structures, whether it is a heating stove with a stove bench or just a brick baking stove, necessarily need a good foundation not less than 40 cm in depth. In addition, the solution should be poured on a sand and / or crushed stone pillow, approximately 3-5 cm in height. To do this, fit concrete class B20 or B25 (brand M250 or M300, respectively). (See also the article Biofuels for fireplaces: features.)
Recommendation. In no case do not bind the stove foundation with the ribbon base of the house - keep a distance of at least 20-25 cm. Otherwise, if the subsidence is one structure can pull the other, which will cause cracking of the wall of the house or furnace.
Necessary materials and ordering
| Name of building material | Geometric parameters | amount | ||
| Brick | Single | 250x120x65mm | 250 pieces | |
| Refractory | 250x120x65mm | 110 pieces | ||
| Clay | Ordinary | - | 0.2m3 | |
| Chamotte | - | 12kg | ||
| Sifted sand | - | 0.2m3 | ||
| Doorway | For firebox | 250,200 mm | 1 piece | |
| For blew | 130140 mm | 1 piece | ||
| For cleaning | 130140 mm | 2 pieces | ||
| Valve for the viewer | 1302130 mm | 2 pieces | ||
| grate | 250,250 mm | 1 piece | ||
| Roofing material for waterproofing | - | 100m2 | ||
Required materials for construction
If you have got everything you need for the construction of the furnace, then you can get to work, only you need to buy absolutely all the materials listed in the table so that force majeure circumstances do not arise, the good is that their price is quite reasonable.
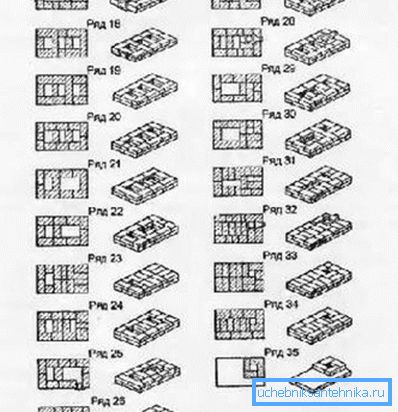
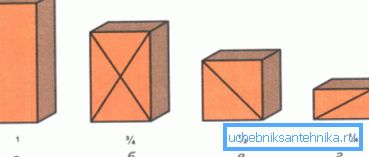
- 1 - at the corners are bricks at 3/4, but the front wall at the same time is laid out by poking at the bed. Determine the installation location of the ash pan (usually in the middle) and on two stones you cling to the upper edge (this is good to do with a grinder with a diamond disc). Now you need to fill the space between the ashpit and the front wall with sand up to the 3rd row.
- 2 - in the center of the front wall mount the door for the blower, which is fixed around the perimeter in 3/4 pieces. The rest of the series is laid out of full size.
- 3 - make laying full size, but on top of the ash pan, On the wall, without fail, install a strip of metal - the optimal size is 35040 mm.
- 4 - overlap the steel strip of the ash chamber and, besides, you lay bricks on top of the sand, which you should have fallen asleep earlier.
- 5 - the order of heating furnaces of this type on the 5th row need to install a grate, which will be above the ashpit. In addition, you will need to cut all the upper faces of the stones so that the burning coals could roll on them without delays on the grate.
- 6 - now the furnace door is mounted. Also in this row, on the back wall, there are all the slopes around, so you go out on one plane with an inclination of the bottom, fifth row
- 7-12 - the firebox is mounted on this gap in a half-stone with the obligatory dressing of sutures, both in the rows themselves and in the corners.
- 13 - for this row, you will need pieces at 3/4 - this will allow you to make an overlap over the firebox for its overlap around the whole perimeter.
- 14, 15 - laying the ceiling with your own hands on top of the fuel chamber, only in the back must leave a hole that will serve to connect the fuel compartment with the exhaust pipe.
- 16 - at this stage a cleaning door is installed, with the right side resting on 1/2 of the brick, which is put on the edge. Then, with a clay-cement solution, the fuel compartment is isolated from the upper smoke channels.
- 17-20 - the order of a brick heating furnace in this interval provides for the installation of vertical smoke channels.
- 21, 22 - here the connection of the lowering and the lifting channel occurs, also here the cutting ends, which connects these two channels.
- 23, 24 - masonry is now being laid on the overlap of the middle and rear canal.
- 25, 26 - a cleaning door will be installed here, as well as doing a turning over the chimney from the middle ventilation channel of the second tier.
- 27 - smoke channels of the second tier are settled, as required by the instructions.
- 28 - set the valve for the view.
- 29, 30 - installation of smoke channels of the second tier is carried out.
- 31 - solid masonry with overlapping inlet for the whole structure.
- 32 - the initial laying of the ceiling with the need for ligation of the seams.
- 33, 34 - ends installation of the ceiling.
- 35 - further installation of the chimney (height is determined by the height of the building). Usually the cross section of this channel is 130130 mm.
Conclusion
The variant of the furnace presented in this article is not the best - it is just one of many existing. In addition, the heating furnace must be erected in accordance with the square and cubic volume of the room. In addition, such a heater can only be designed for one room, and the whole house will be heated in another way.