Water floor heating in 4 stages
The overwhelming number of autonomous heating networks are water-based heating systems, which consist of a heating boiler, pipes and radiators. However, not everyone likes bulky and not always aesthetic batteries that are installed under the window sills and do not fit well with the interior of the room. That is why an increasing number of people prefer under floor heating.
It's not easy to do it yourself, but the result is worth the effort.
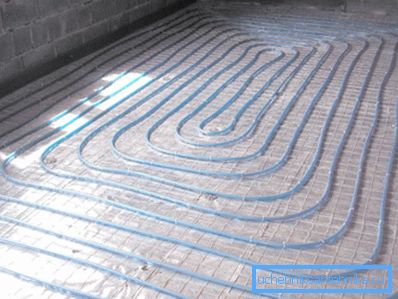
The procedure for self-installation of floor heating system
It should be immediately warned that regardless of whether you are installing the climate network in your own house or upgrading the heating in the apartment, wiring the floor heating among professional installers is considered one of the most complex building processes.
But if you have at least basic knowledge in the field of construction and repair, have the appropriate skills, then you can make everything yourself. This will help you instruction, which for convenience of perception is divided into several successive stages.
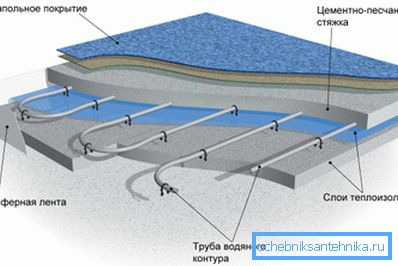
Stage 1. Preparation and insulation of the base
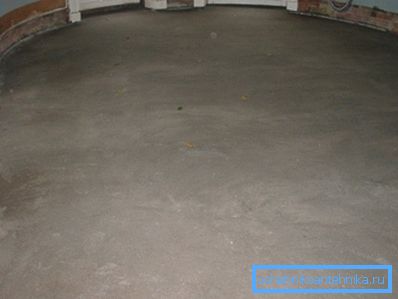
First of all, it is necessary to get rid of the old concrete screed covering the floor. It is dismantled to the floor slab or base of the floor. After that, you should make sure that the height difference of the resulting surface at different ends of the room does not exceed 1 cm. If more, it is necessary to level the base with the help of special building structures.
Then the surface is covered with a film that performs the role of waterproofing, and a damper tape is stuck around the perimeter of the walls. It will help avoid floor warping as a result of its thermal expansion after the heating system is put into operation.
Tip! If for any reason several heating circuits in the floor are used in the same room, installation of a compensation tape and between them should be provided.
The next task: protection from heat loss. It is necessary to lay a layer of heat insulator on the floor, otherwise a significant part of the thermal energy will not heat the room, but the floor between floors.
The choice of material depends on several circumstances:
- If water heating in the floor is used only as an addition to radiator, you need to use polyethylene foam, the surface of which has an additional heat-reflecting foil layer.
- In the case of installation of the described system in a city apartment or on the second floor of a house (that is, if there is another heated room under you), 3-5 cm of foam layer is enough.
- In all other cases (especially if in the house on the ground floor there is a rough floor “on the ground”), more serious measures are required to protect against heat loss.. For example, a layer of expanded clay or sheets of polystyrene foam at least 10 cm thick.
There are special insulation mats for underfloor heating. Their price is somewhat higher, but they are equipped with special brackets that will facilitate the installation of pipes in the future.
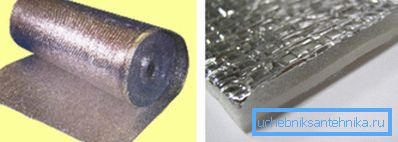
After laying the insulation is laid reinforcing mesh. It serves not only to increase the strength of a concrete screed, but also to fix metal plastic pipes to it, through which hot liquid heat carrier of the heating system will circulate.
Stage 2. Acquisition of climate system elements
At the end of the preparatory work should stock up on the necessary equipment. Floor heating system is constructed from the following elements:
| Equipment | Description |
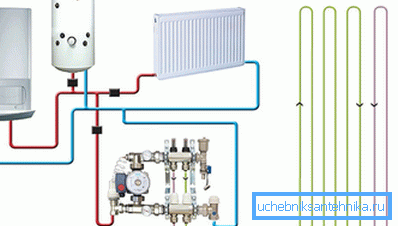
| Heating boiler | It is used to heat the coolant, which is then fed to the pipes located under the floor. They exchange heat energy with the air circulating in the room. When buying, pay attention to the type of fuel used and heater power. |
| Circulation pump | It is used to organize the coolant current over all elements of the climate system. If the warm floor is mounted together with radiators, it is advisable to provide for the installation of a pump on each circuit. So you can more finely regulate the microclimate. Sometimes the pump is built into the boiler, so you do not need to buy it separately. |
| Valves | It must be equipped with the boiler inlet and outlet pipes. Also, valves that cut off the water supply, it is desirable to install on other elements of the system. So you can easily block the access of the coolant for the replacement or repair of equipment. |
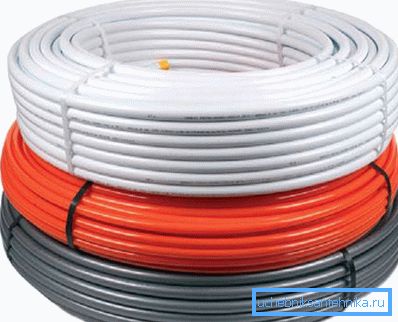
| Pipes | As a material for arranging underfloor heating it is necessary to use pipes made of polypropylene or cross-linked polyethylene. The second option is preferred, since this material has a lower coefficient of thermal expansion. Polypropylene pipes are cheaper, but it is recommended to purchase their varieties reinforced with fiberglass. |
| Collector | This element is a nozzle with many holes for pipe installation. Two details are needed: for distributing the hot coolant and collecting the already cooled water. They are often mounted in a special collector cabinet. There is also installed other equipment that allows you to adjust the temperature and volume of water, get rid of air, and so on. |
| Fittings, couplings and other fittings | Installation of the heating system can not do without the use of various accessories. It is needed to connect the various elements of the system. When buying, pay special attention to quality. From the tightness of the joints depends on the performance of the entire system. |
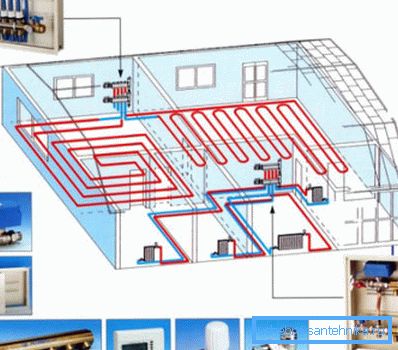
Note! For installation of the heating system, hidden under the floor, it is necessary to use pipes with a diameter of 16 to 20 mm, capable of withstanding the temperature of the heat carrier up to 95%. Otherwise, the performance of the system is not guaranteed, and repairs can cost you a fairly large amount of money.
Stage 3. Boiler installation
In order for the floor heating to effectively heat the rooms, it is necessary to take care of installing the boiler of the required capacity. It is advisable to purchase equipment with a capacity of 15-20% higher than estimated. This will help compensate for heat loss when heating the floor.
Do not forget that a pump is required to organize the coolant current. If it is not built into the boiler, take care of purchasing it additionally.
The installation of the boiler must be carried out in strict accordance with the instructions supplied with it. Remember that installation of gas equipment is carried out only by specialists after obtaining the appropriate permit.
Stage 4. Pipe laying and screed filling
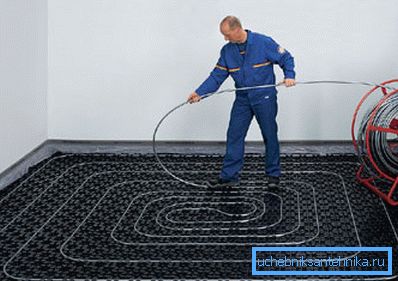
Pipelines for floor heating are fixed at the installation site using special brackets. You can also fasten parts with plastic straps to the reinforcing mesh. However, the first option makes installation easier and allows laying pipes down more carefully on the floor.
The layout process itself is simple.
Just follow some tips:
- Metal and plastic pipes are sold in the form of large skeins. You can not pull out of them the individual elements of pipelines, you need to unwind the bay gradually, as far as layouts on the floor.
- Turns should be adjusted to meet the requirements for a minimum bend radius. For most products, it is equal to five diameters of the internal section.
- If you make too sharp a turn, a characteristic strip of a lighter color is formed on the plastic pipe. This means that the integrity of the part may be compromised during operation. You cannot use this item. The entire pipeline should be replaced, since pipe fittings are prohibited to be poured into concrete.
- Pipelines that pass through walls must be insulated with foamed polyethylene shells, polystyrene foam or similar material.
- Connect the pipes to the manifold. Make sure the joints are tight, otherwise leaks may form in these places.
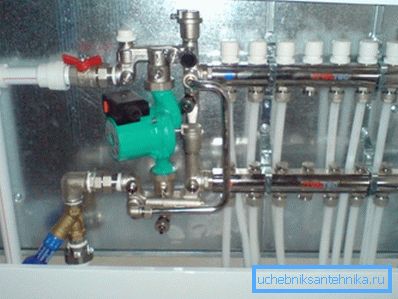
- Upon completion of installation, the system should be crimped. To do this, it is put into operation, slightly increasing the coolant pressure relative to the nominal one. So heating should work day.
During this time, all the flaws and leaks will be revealed. They need to be eliminated, after which the crimping procedure is performed anew.
When pouring pipes with concrete solution, it is necessary to take into account some features:
- If ceramic tile will be used as a decorative flooring, the screed should be made 3-5 cm thick or reduce the distance between adjacent pipes to 10 cm. Otherwise, the floor will not heat up evenly and areas of cold and hot air will be felt when walking on it.
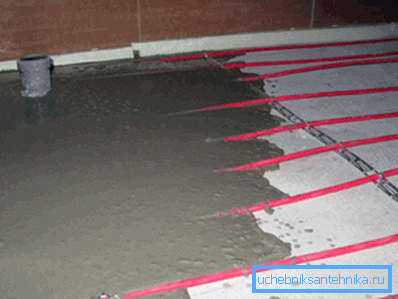
- When the floor is planned to be covered with laminate or linoleum, the thickness of the screed decreases. To prevent the destruction of concrete, you can use an additional reinforcing mesh. So you minimize the heat loss and increase the efficiency of the system.
It is necessary to turn the system into operation at the onset of the first frost, since it has a high thermal inertia. It takes about 3-5 days to warm the room temperature to a comfortable level.
On the other hand, it can do a good service. In case of emergency shutdown of the boiler, the climate network will give off the accumulated heat energy for quite a long time.
Conclusion
Clearly following the above sequence of actions, you can easily construct in your home a floor heating system that replaces classic radiators. But this is not the only way to install hidden heating elements.
In particular, in a similar way it is possible to disguise heating radiators in the floor. For more on this, see the video below.