We lay heating pipes in the floor, create warmth and comfort
Perhaps the most economical option for heating a room is heating pipes in the floor - we will discuss the pros and cons of different materials below. As a rule, this is done using either cross-linked polyethylene or metal-plastic, which is also polyethylene, only combined from two modifications - cross-linked (inside) and usual (outside).
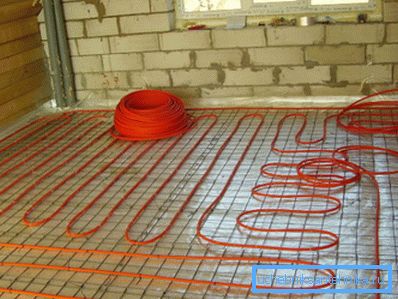
In addition to the advantages of these materials, we will also tell you about the rules for installing a floor heating system and, in addition, see the video in this article.
Floor heating system

Note. Pay attention to the upper figure - it shows how the air heats up from the radiators and the floor heating system. In the first case, the highest temperature is concentrated under the ceiling, which leads to energy waste (it is necessary to heat more to heat the room from the bottom). The second option shows how hot air, rising up, gradually cools, which is useful not only financially, but also for health.
Materials
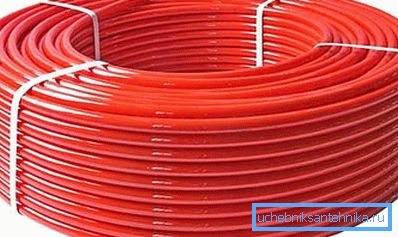
- Cross-linked polyethylene for arranging a floor heating system can withstand pressures of up to 10 bar, which is enough for any autonomous boiler and even for centralized heating (if, of course, such a connection is possible). The laying of such a pipe is carried out with the help of plastic brackets, which are attached to the coupler in the form of a tape - such a mounting device allows you to withstand the installation step clearly, which is important for arranging such a heating system. Polyethylene walls are able to withstand water temperatures up to 110? C, but the coolant never reaches such a mark, therefore, in this respect, the pipe is also completely protected.

- Also, for a water-heated floor system, metal-based laminate is used - this is the same polyethylene, only two modifications and with an aluminum foil layer in the middle. So, the top layer consists of ordinary PE, then there is glue, after it - aluminum foil, again glue and in the middle cross-linked plastic. The general technical parameters here are almost the same as those of conventional cross-linked polyethylene, but metal-based laminate has two distinct advantages - it is lower in price and the wall stiffness (due to reinforcement).
- The fact is that the polyethylene heating pipes in the floor screed must be filled with water before pouring the solution onto them so that they do not deform from the pressure above the mass, but metal plaster does not require this - the reinforcing layer of aluminum foil perfectly protects the pipe from compression. But when choosing a material, it is very important to check the foil layer - there should not be a seam there and it must be on glue. The seamless layer can be simply smooth (without a scar), or wrapped overlap.
Recommendation. You may encounter such a situation - in the store you will be offered a seamless metal laminate, but the instructions from the manufacturer will somehow vaguely illuminate this parameter. In this case, ask the seller to cut off a 5 mm pipe from the coil and divide it for visual inspection. If you are refused such testing, then you should not buy this material.
Assembly work
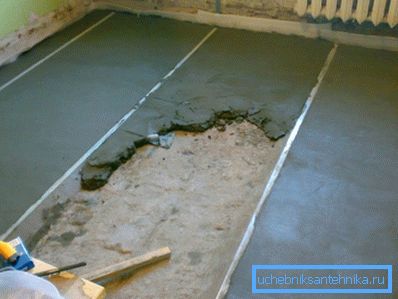
We will not describe in detail how the screed is poured in - the article is still not about that - but we still touch on the basic requirements for installing a floor heating system (they are the same for water and electric).
First of all, you need to warm the base, so as not to use heat for free, and also (especially in the private sector on the first floor) to install a shut-off waterproofing and, if necessary, you need to reinforce the lower screed with plaster mesh or even reinforcement.
Filling is done at the beacons - the base must be flat so that the pipe falls on the floor evenly, without differences in height. In addition, after pouring the bottom layer, it will take 28 days to start the installation - this will allow the solution to dry completely and you will be able to fix the brackets in it without fear that the dowel will not stick.
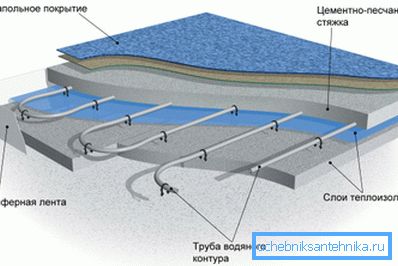
In the upper image, you can see a warm floor in the section; only here the item thermal insulation layers also implies a lower screed, and directly beneath the pipe it is best to spread foiled polyethylene foam as a warming reflector.
It may happen (especially in new buildings) that the screed is ready and it is not insulated, then in cold regions sheets of extruded polystyrene foam are placed on it, which, again, is better covered with foil, which has the ability to reflect infrared radiation.
The pipe can be laid in special brackets made for installation of heated floors, or on ordinary plastic clips, fixing them in the floor with dowels and screws.
The best pipe pitch is 15-20 cm - this allows you to evenly heat the surface, and no temperature drops will be felt on it. In order to make a sharp bend of the metal-reinforced plastic and not to damage it, a steel spring with a diameter of 18-20 mm (piece of 20-25 cm is enough) is put on top of a pipe with a cross section of 16 mm.
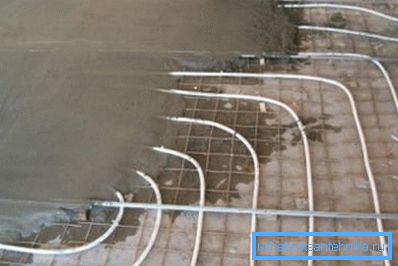
The top layer of the screed is poured in exactly the same way as the bottom one - the beacons are installed on top of the mounted pipe, as in the photo above and a solution is poured over it, into which a plasticizer is added without fail. A trial start of heating can be done immediately after pouring, but in no case should it be left on - the solution will crack due to temperature.
Conclusion
If you install a warm floor with your own hands, then you definitely need to calculate how much the pipe will go to a given area (it can be laid with a snake or spiral) so that there are no connecting metal fittings under the screed. In the case when one bay is not enough for a certain section, then divide it into two wings, thereby avoiding hidden docking (see also the article How to choose pipes for heating correctly: we understand the types of joints and materials).
Good luck!