We make a heating boiler with our own hands
Of course, the construction of a boiler with its own hands is of interest to many owners of private houses, because it is an effective way to save their own money, plus the moral satisfaction that a person gets when doing something on his own. And it is not always possible to purchase a factory unit due to its high cost, because the prices of such products do not fit into the wages of the average resident of Russia.
We will now figure out how to make such a heater with a brick heat exchanger and see the accompanying video clip.
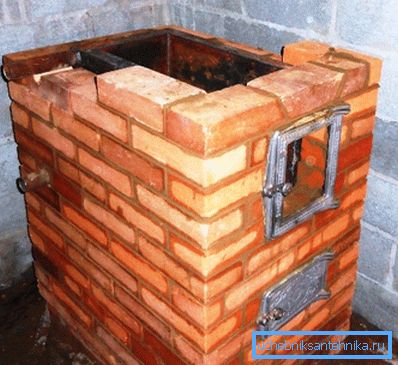
We do everything ourselves
general review
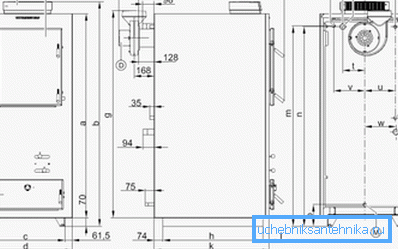
- By and large, the design of heating boilers can be very different from their counterparts, because it takes into account not only the power and type of fuel of the unit, but also its individual characteristics.
- First of all, it concerns the design of the heat exchanger, which may be from interconnected pipes, as well as pipes and containers made of sheet steel, but at the same time perform the same function, and with the same power.
- Of course, in order to make such a node yourself, you need some experience and, since only an experienced welder can cook a heating boiler (heat exchanger), then, not having professional skills in this industry, it is better to invite a specialist. Keep in mind that the seam is needed here of very high quality, because the tank will contain water that is able to seep into the gap, the size of which is less than a micron.
- If you know how to work with a grinder (angle grinder), having a heating boiler drawing in front of your eyes, you can independently prepare heat exchanger parts, and you can entrust the welding work to a professional. But it is very important to accurately observe the dimensions and proportions, otherwise the welding work will be simply impossible due to the inconsistency in size.
- Also here you need the skills of a stove-setter or at least a bricklayer - you have to erect brickwork, and, according to certain rules, since each drawings of the heating boiler have their own characteristics due to their different size.
Note. We will look at several designs that you can do either independently or with the help of a professional welder.
Option number 1
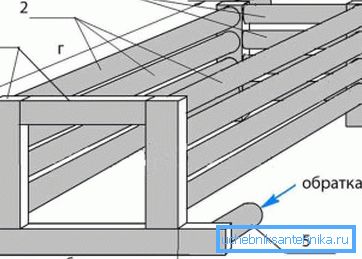
In the hollow profile to be used for vertical racks. Cut round holes corresponding to the diameter of the mating pipe - this is done either by electric welding or a gas cutter. This is carried out from two sides and at the same time, with each of them, in the side of the 60 mm profile, cut four holes with a diameter of 50 mm and four 40 mm each in the plane of 40 mm.
Also in the lower part of the structure, a round hole 50 mm in diameter is cut, from the bottom for return (cooled water) and from the opposite hole on the opposite side from the top for supplying hot heat carrier.
Note. After welding, in any case, there will be sags on the surface of the metal, but such work should be as clear and delicate as possible. Therefore, remove all irregularities in the plane with the grinder, and the internal faces of the holes, if necessary, should be treated with a round or semi-circular file.
When all the blanks will be restored to their original state, you will need a horizontally flat plane - it can even be a wooden shield, knocked out of the boards, only it is necessary to soak it beforehand with water to protect against sparks.
The instruction recommends first of all assembling (welding) the front and rear walls and only then mounting the other elements. These two panels are installed in a strictly vertical position opposite each other and, in turn, all pipes are welded, only this work is better done with an assistant so that it is possible to fix parts at a right angle.
When the frame is ready, you can brew open ends on a rectangular profile and weld the supply and return nipples discussed above. Everything - you now need to grind the seams with a grinder and check the structure for tightness by typing water in it and leaving it for 1-2 hours. In that case, if the work is done not entirely qualitatively, then you will see dark spots on the seams - these are leaks.
Option number 2
Note. If heat resistant sheet steel with a thickness of 3-5 mm is available, the installation of the heating boiler, more precisely, the installation of the heat exchanger itself can be greatly simplified.
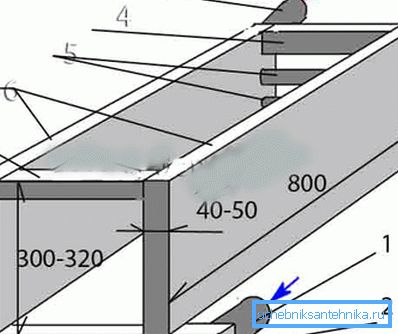
This design, in fact, does not need detailed comments, since the entire structure consists almost entirely of sheets (capacity) welded to each other, which communicate with each other through tubular profiles.
And, of course, from the front and back side there are connections for the supply and return of coolant. Despite the seeming simplicity of the product, the welding work must again be performed by a professional, otherwise there will be a risk of leakage of the seams.
Note. The dimensions of this design can be changed depending on the size of the furnace. But at the same time, the cross section of the tubular profile and the thickness of the steel sheet must remain unchanged.
Installation
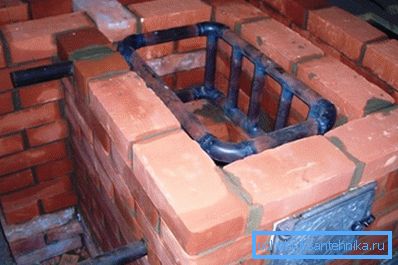
We will not focus in detail on the rules and parameters of the stove laying, since this is a rather capacious topic and it needs to be highlighted in a separate article - we will look at the general provisions.
As we mentioned above, the dimensions of the heater can be changed, but in this case, the dimensions of the stove are quite suitable for a country house or cottage, the area of which does not exceed 90-100m2 with standard (radiators) heating system. Therefore, it is necessary to take into account that in each of the heating devices there will be no more than 7-8 sections, the system will be two-pipe, and there will not be a second circuit (heated floor).
Without fail, the furnace must be based on a concrete foundation, and all parameters must strictly comply with the vertical and horizontal, that is, while respecting the angle of 90 ?. The heat exchanger must be set in such a way that its upper part is lower than the supply circuit, at least 10 mm - this is done to prevent air traffic jams in the system.
The laying of the walls, which are erected around the heat exchanger, should exceed its height by at least 20-30 mm (half a brick), and the upper part of the building is covered with a cast-iron cooking cast-iron stove, which is very convenient for summer houses and country houses. At the same time, the cast-iron plate should be an easily removable element (such as a lid) in order to provide access for preventive cleaning of soot — this greatly increases the efficiency of the unit.
Vertical construction
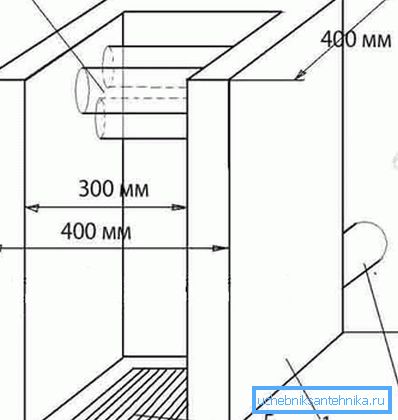
If the device of the heating boiler is designed only for the heating circuit, then you can use a vertical narrow design, where there will be either a cooktop with one hob on top, or it will not exist at all. For such a structure is used the same heat exchanger, which is described in option No. 2, only its dimensions should be customized to the size of the furnace.
Economical option
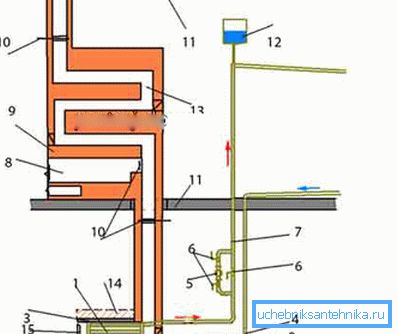
This option implies that the heating boiler will be located either in the basement or on the ground floor - this allows you to observe the difference between the bottom of the boiler and the upper cut of the chimney, which must be at least 7m!
Pay attention to the drawing - on the boiler chimney (above) there is either a stove or a heating shield, while the boiler should be just under the stove or shield. The bottom line is that the boiler chimney passes through the furnace draft system. At the outlet of the boiler firebox, a valve is installed, which is closed when using the boiler and opened during operation of the furnace.
Conclusion
We paid attention only to general provisions, how to make a heating boiler with our own hands, and even then, these are just a few of the most sought-after options. In fact, there are many different schemes and methods, and each of them is worth considering in a separate article.