How to make an inexpensive box for pipes in the bathroom: 4
Plumbing and sanitary - the necessary elements of the bathroom and toilet. But protruding tubes of various diameters and colors are unlikely to organically fit into the interior of this room. Hide all engineering communications will help plasterboard or plastic box for pipes in the bathroom. Moreover, it can be easily done by hand.
Material selection
Before you make the pipes in the box in the bathroom, you need to decide on its design and choose the appropriate material.
The latter must meet the following requirements:
- be resistant to moisture;
- have a small weight;
- be environmentally friendly and do not emit substances harmful to human health.
Most of all, plastic meets these criteria, however, you can also use moisture-proof drywall, plywood or MDF. If price is the determining factor for you when choosing a material, then there is no need to look for a better option than one or another type of plastic.
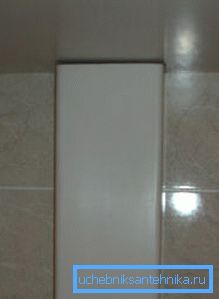
Tip! In order to ensure free access to the pipes in case of their breakthrough, it is advisable to make a collapsible box. Otherwise, to eliminate the damage you will have to destroy the structure.
Training
Most of the leaks happen at the joints of water and sewer pipes. Therefore, when designing engineering networks, it is better to do so in order to reduce the number of fittings and fittings.
If the box is installed to mask an existing system, before starting work it is necessary to carefully check the pipes and seal the joints between them if necessary.
The instruction manual for plumbing and sanitary in apartments and private houses requires that the bathroom and toilet have free access to the following elements of the plumbing and sanitary:
- fittings with threaded connection;
- stop valves;
- sewer revisions;
- filters;
- water metering devices.
Manufacturing
Step 1. Sizing
Before installing the box, you should clarify its location and determine the geometrical parameters. If the box is made non-removable, then for access to metering devices and cranes it is necessary to install revision doors. During the measurement you should not forget about the thickness of the material used and the decorative finish.
Tip! Before making the box, it is advisable to draw a sketch, where in the selected scale all its details will be indicated, as well as dimensions will be made. This will help both when purchasing the right amount of materials and when assembling the product on site.
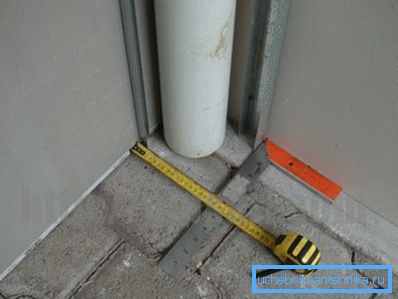
The layout of the installation site begins with the floor. Remember that the distance from the pipeline to the edges of the protective box must be at least 3 cm. After this, the dimensions are transferred using plumb or laser level to the walls and other surfaces of the bathroom.
Stage 2. Frame installation
Before installing the cladding, it is necessary to mount the support frame. For its manufacture is best to use galvanized profile. Some craftsmen make a frame made of wood, but this is undesirable, as the tree is gradually destroyed by moisture in the air.
In extreme cases, choose hardwood lumber, and to prevent the occurrence of mold and mildew, treat the parts with antiseptic compounds.
The components of the frame are interconnected with screws, and attached to the wall with dowels or anchor bolts.
The whole manufacturing process consists of several successive stages:
- First, aluminum profiles or wooden slats are fixed on the wall.. The benchmarks are the marks put on the preparatory stage.
- After this, the front edge is fixed.. Its installation is carried out with the help of corners, which are screwed to the floor or ceiling.
- Then install floor and ceiling guides. (strips between wall and front profile).
- If the length of the box exceeds 150 cm, you must additionally make jumpers. They will be required even if the width of the side face exceeds 25 cm. The distance between adjacent elements should not be greater than 100 cm.

Tip! If wooden bars were used for the frame, the cutting places should be treated with building mastic. This will protect the structure from rotting.
Step 3. Sheathing
The finished frame is better to sheathe in one piece. The use of pieces is not recommended. Work should begin with the side faces. Cutting is done so that the side faces of the parts do not protrude beyond the edges of the frame.
After that, the front part is cut. It should close the end sections of the sidewalls. Fastening is done with screws. The distance between them should not exceed 2-3 cm.
This allows you to achieve maximum structural strength. Screws need to be screwed only into the main racks of the rack; it is not necessary to fasten sheets of cladding material to the transverse elements.
To provide access to the counters and valves, it is necessary to provide inspection openings with doors. It is better to buy them in the store, but you can make them yourself. In the latter case, the material is used, which was used for plating.
It is possible to hang the door with the help of piano loops. That it did not open, fasten a usual furniture magnet.
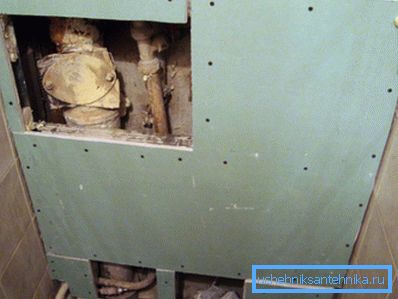
If you decide to make a collapsible box, the sheets of the finishing material are fastened with screws to the very edge and do not close with a decorative finish. Then plastic corners and baseboards are installed, which will give the structure strength. If it is necessary to dismantle these parts are removed, the screws are unscrewed and the cladding material is removed.
Step 4. Decorative finish
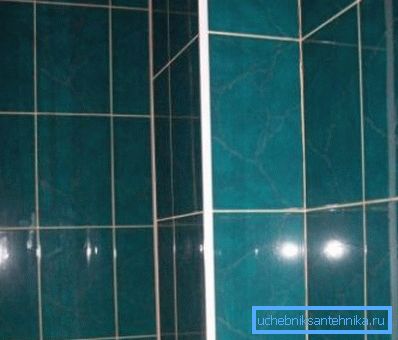
The choice of material for decoration depends on what was used for the manufacture of the structure itself. Plywood or MDF can be plastered and painted or veneered with ceramic tiles.
Plastic itself has an excellent appearance, because it does not require additional finishing.
Conclusion
By installing a removable pipe box in the bathroom, you not only give the interior of this room a finished look, but also ensure free access to the pipelines in the event of an accident or modernization. More details about the installation of various engineering networks can be found in the video in this article.