Pipe clamp: selection and installation
Communication is probably the most problematic area in modern apartments and houses. Even a carefully assembled and streamlined system, over time, can fail, which manifests itself in the form of a small leak or blatant fountains from a pipe, if the problems are serious. In both cases, the plumbing pipe clamp is the best solution for the short-term solution of the problem, which makes it possible to quickly resolve the difficulties that have arisen.
Clamps allow you to quickly eliminate critical holes in the pipes or carry out installation of communications to the walls and ceiling. Their design is as simple as possible - with the observance of the installation technology, the fastening is guaranteed to serve you for several years. In this article you will be given detailed instructions on how to install the clamp on the pipe with your own hands.

Mounting clamps
Material selection
Clamps come in a variety of sizes and designs, but all items have a spherical shape that repeats a bend in a pipe. The design of the product must contain clamping bolts that make it possible to tighten the clamp as tightly as possible around the pipe being repaired / mounted. According to the scope of application, this product is divided into fixing and repair names.
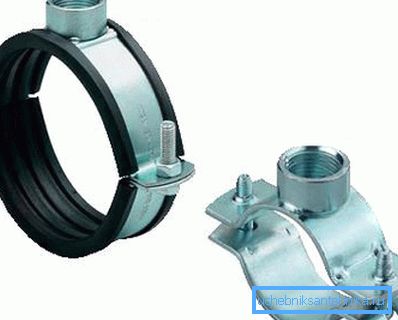
The clamp-fastener consists of a metal shell and a corrugated rubber gasket, which prevents the appearance of noise from vibration and excessive squeezing during tightening. A prerequisite for this type of product is the presence of a side mount, which is most often made in the form of a welded nut - with its help, the pipe is mounted / suspended on a wall or ceiling.
Clamps for repairing leaks have a wider metal sheath and a solid rubber gasket that seals the leak on the pipe. There are also specialized products for tapping an additional branch into the water supply system - it can be used to create a branch without a welding machine. The only condition for its use is the absence of strong pressure in the system.
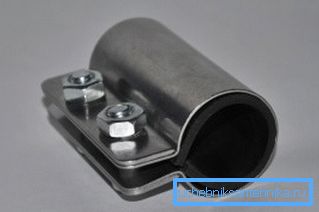
When purchasing, special attention should be paid to the size of sanitary pipe clamps - the wrong size will make the purchase in vain. The diameter of the pipe is determined by a caliper or in the absence thereof, it is possible to simply measure the external section of the pipe.
It is also important to have a rubber gasket - it is not always included in the basic package. If there is a choice between products with a seal and without, then you should give your preference to the first option, even if its price is an order of magnitude higher - the gasket significantly increases the technical characteristics of the mount.
Mounting hardware
- The marking of the path of the future pipeline is carried out, the location of the fixings is marked. The distance between fastenings is determined depending on the length and weight of the pipe - in standard situations it is of the order of one - two meters;
- At the place of the future fastening, a hole is drilled into which a plastic dowel is inserted, and a threaded pin at the end. The clamp is twisted on the stud in the opened state - it should be turned all the way, but you should not be too zealous not to deform the shell of the product;
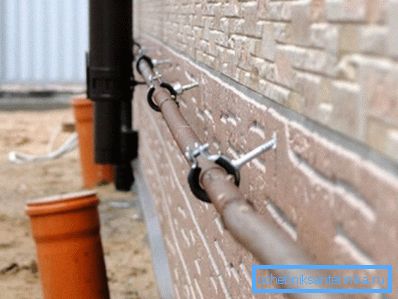
- The pipe is inserted and the clamp is clamped. Here it is important to create a floating clamp and not overdo it - it should not be too tight to compensate for the thermal expansion / contraction of the material;
Note! In this case it means the installation of ventilation, chimney and other light items - heavy large metal pipes filled with water in this way cannot be fixed.
Elimination of leaks
- Before you put the clamp on the pipe, it is desirable to turn off the water supply in the system. If this is not possible, installation is also possible, but you will have to get pretty wet;
- The clamp is worn on the burst point so that the crack / cavity is approximately in the middle of the rubber gasket. The rubber seal should lie flat, without folds. Clamps tighten as tightly as possible to avoid leakage;
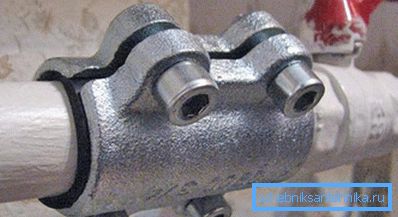
- The junction is wiped dry, the water supply is resumed and the pipe clamp is visible for leaks. If this is the case, then the mount is additionally tightened;
Tube insert
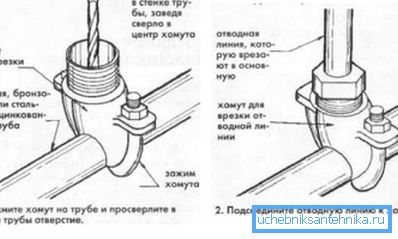
First, a hole of the required diameter is drilled, then an adapter is put on it. The main thing that the sealing gasket lay without bends. After tightening the clamps, the connection is ready for installation of an additional water supply line.
Note! During operation. This type of compound cannot be pressurized, as this can cause flow or deformation of the clamp.
Self-made hose clamps
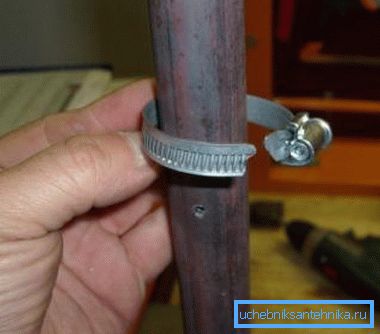
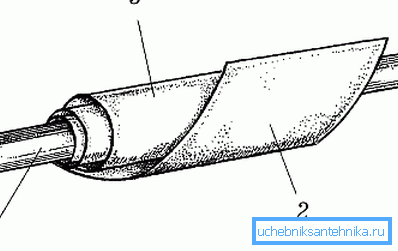
If you have a pipe burst, and you do not have the necessary hose clamps, you can temporarily eliminate the leak with improvised means. The answer to the question of how to make a pipe clamp is quite simple - you will need ordinary clamps, any design and a piece of thick rubber that will act as a gasket.
Place the leak tightly bandaged with rubber, after which clamps are worn at both ends - there should be at least two of them. In the absence of such, it is possible to use ordinary wire, by means of which the joint is tugged on both sides. It should be noted - despite the fact that such a “repair” may last for several years - this solution is temporary.
Total
Pipe clamps make it possible to quickly carry out minor repairs and securely fix the communications. More information on this topic can be obtained by viewing the video in this article.