A stove for a cauldron from the pipe do it yourself: simple
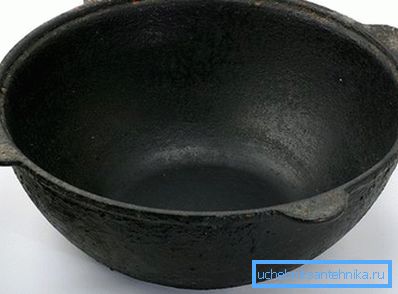
Extremely fashionable Asian dishes require not only the recipe, but also the use of proper dishes. First of all - it wok and cauldron.
It is especially convenient to apply them in the country, where cooking in the open air turns into a pleasant ritual. Cookware convenient for cooking, but here it will need a special oven.
Moreover, you can make an accessory yourself, from scrap materials with a stove made of a pipe for a cauldron with your own hands - this is what should be devoted to one of the days off.
Features of cauldron
People use cauldron for more than one century. Long before gas and electric stoves appeared (see also the article How to equip a stove for a bath from a pipe without any help).
Therefore, dishes require live fire and the most simple, but functional hearth.
- The cauldron has thick walls and a spherical bottom. Naturally, do not expect stability on a flat surface.
- Round shape means a ring-shaped stand. Do not attempt to install it on a regular grill grate, or on a barbeque grill outside.
- If the flat bottom boiler heats up from the bottom faster than along the walls, then the heat spreads evenly throughout the cauldron. Moreover, as the material for its manufacture is thick steel or cast iron.
Note! You will not get the right pilaf in a saucepan or pot with a flat, and the more thin bottom. Only the cauldron is able to please you with an exotic and amazingly delicious oriental dish.
A simple stove for an Asian boiler in the country
- Under the cauldron it is possible to make a stationary construction of a brick smeared with clay. Such foci are often found in Central Asia.
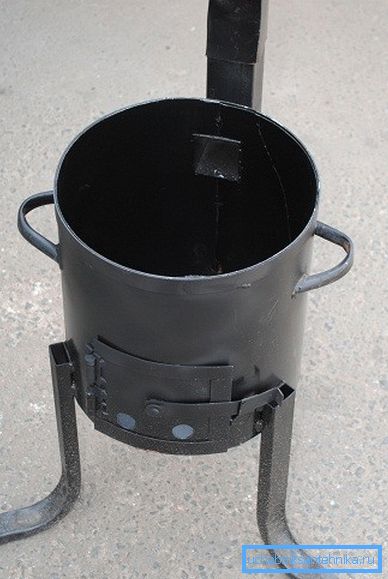
- The second, not less widespread option - a mobile metal support for cooking. It is usually made of an iron barrel or a length of pipe that is suitable for the diameter.
- The portable type can, if desired, be transported throughout the site, or taken in the trunk for a picnic.
Making fixtures
Further, the process of manufacturing the stove in detail.
Tools and materials
- Electric drill.
- Bulgarian.
- Welding machine.
- Hammer.
- Level and plummet
- A piece of large diameter pipe.
- Section of pipe with a diameter of 10-15 cm (for the chimney).
- Iron corners for legs.
- Metal grill or piece of metal (for the bottom).
Note! It is clear that the price of materials is almost zero, everything can be found even for free. But not everyone has the tools, but it’s realistic to borrow, if you wish.
Measurement
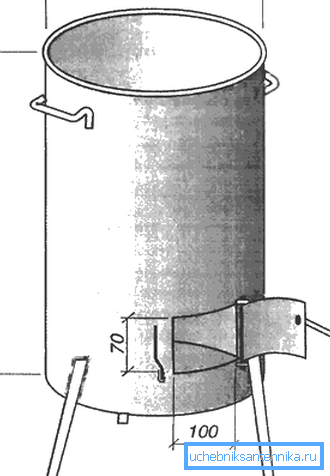
- Initially, you will have to solve the problem of what to choose, a pipe for a cauldron or a cauldron for a pipe. So that the dishes did not fall through, or did not protrude beyond the norm, you will have to work hard.
- The cauldron should be lowered into the circumference of the furnace either completely (except for the top border and “ears”) or - by 3/4 of its height. A very “shallow fit” will not allow the dishes to warm up. As a result, it will take a lot of wood and time for cooking.
- Keep in mind that the furnace under the cauldron from the pipe with his own hands is made convenient for the owner. On this basis, select the height of the rack. If the legs are not planned, the segment can be made longer.
- A very high base is not rational, the heat will not reach the bottom of the dish. The optimal distance from the fire to the boiler is 20–30 cm.
- The design without legs will be placed directly on the ground. The fire in this case is bred right on the ground. If you are going to mount the legs, it means that the bottom of the grill or sheet of metal will have to be welded to the bottom of the pipe. In this case, the fire will be raised above the ground.
The working process
After the preparatory work, you can proceed to the most important - cutting and welding.
- The grinder cuts a piece along the marked lines.
Note! Check finished cut for skews. Horizontally, the base is controlled by the level, vertically - by a plumb line.
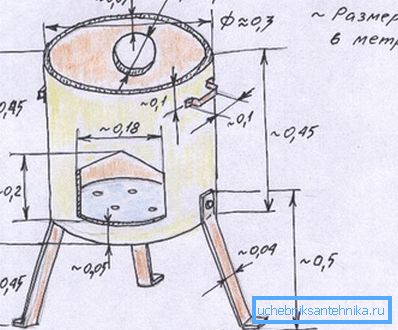
- At the bottom of the pipe is cut a rectangular or semi-circular (at your discretion) hole for the firebox. Do not throw out the resulting piece, it can be used as a furnace door or flap.
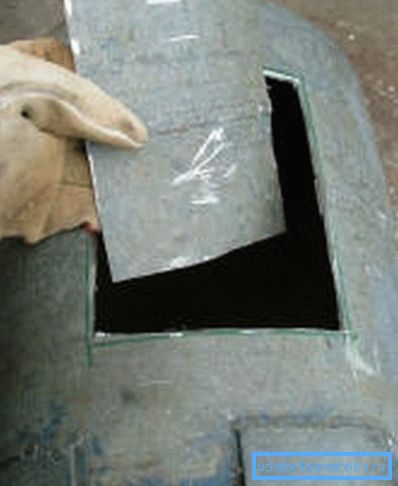
- On the opposite side of the firebox, about 10 cm from the top, make a hole under the chimney. It should coincide with the diameter of the outlet.
- For oxygen access, it is desirable to make 3-5 small (1-3 cm) holes in the back and sides.
- Some craftsmen prefer to make slots for the chimney around the entire upper circumference. The option is inconvenient in that acrid smoke will be dumped in different directions, including on you. In addition, you can burn the heat, coming too close.
- Weld the chimney from two pieces of pipe at an angle of 90 ?.
- Weld this pipe to a pre-prepared hole.
- The legs are welded on four sides, at equal distance.
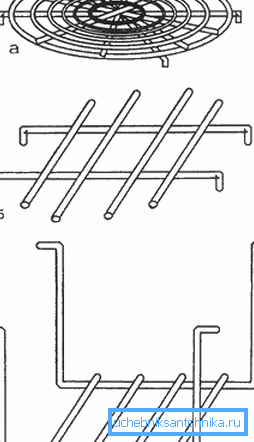
- The bottom is made out by a lattice or a round metal sheet.
- It is advisable to attach handles to the sides of the base; it is convenient to hold the oven for them when moving.
- The door for the firebox is mounted on self-made loops-rings of steel wire. Don't forget the pen for her.
- The ready brazier is cleaned from burrs and finally corrected along the planes.
- Painting with stove varnish or heat-resistant paint will help to give an attractive appearance and protect against corrosion.
Design with useful additions
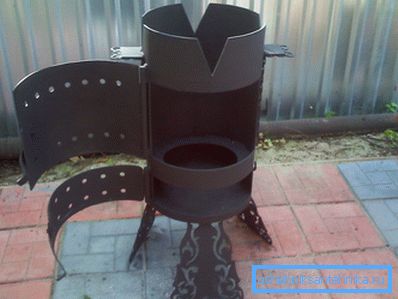
Improve the furnace if desired in the manufacturing process. If you are confident in your abilities, you can make a "tuned" installation. The basic principle is similar to that described above.
And this is what will give the furnace more amenities.
- A metal ring is welded onto the upper rim of the pipe.about. Its external diameter should coincide with the diameter of the pipe, and the internal diameter should be 5–15 cm smaller. Then you can install on the circumference a series of rings for a standard wood-burning stove – stove. Now it is possible to adjust the size of any cauldron by removing or adding rings.
- It is quite possible to make a stove with a grate and a blower.. The grille is mounted inside, between the upper and lower fireboxes. Now the crumbled ash is removed from the bottom, and a fire is set on the grate. The legs in this case are not needed, you get a solid cylinder, but with two doors.
The furnace of the old gas cylinder
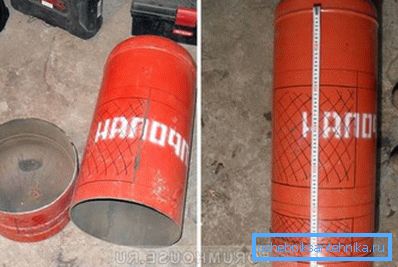
At many summer residents in the storerooms you can find a used gas cylinder. In fact, this is the same pipe, only with the top and bottom.
That bottom is just useful, and the top will have to be carefully cut.
Note! The instruction warns about the careful handling of such items. Be sure to make sure that there is no gas in the cylinder by turning off the tap and holding the container in the air for at least several days.
- Mark the line of cut and grinder saw off the top.
- Cut the firebox.
- On the sides of the top you can make several cuts. It will be easier to fit the cauldron in this case. Just turn down the "petals" until the cauldron is firmly seated at the desired depth.
- If desired, it does not hurt to provide the oven with handles, legs and accessories to your taste.
- The design can not even be painted, but it is desirable to burn, having laid the wood and calcined the inner surface. Then all smells will leave, and the old painting layer will burn out.
Tips and tricks
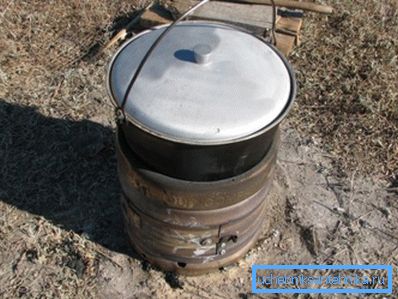
- It will not be superfluous to make a stand for a cauldron in the course of work. Then you can move it from fire to any flat surface. Cut a low cylinder out of the iron pipe. Check in advance; the height of the ring should be such that the inserted cauldron does not reach down to the table a couple of centimeters.
- Households will appreciate the useful stand, because without it the dishes will just turn over. All tasty contents will be on the floor, and you risk getting burned.
- It is recommended to wash the cauldron inside with fine sand or an abrasive washcloth. You can get rid of scale outside by lightly tapping it with a chisel. Burned black fat plates will fall off, their remnants can be removed with emery cloth.
Conclusion
Just a few hours is enough to turn an unnecessary pipe into a practical thing in capable hands. Now you can brag to the guests also the ability to skillfully prepare exotic dishes (see also the article The Pipe Bender - the features of the instrument and its own production).
After watching the video in this article, you will have fewer questions and doubts.