Correct chimney - pipe outlet through the roof
In houses where the furnace is equipped, there is a need to construct a chimney - a structure that serves as an exhaust system. Many owners of country houses, trying to follow the aesthetic component, forget about the functionality and efficiency of the chimney. In this article we will try to point out the main points that will help you to properly lay the pipe through the roof of your house.

Determination of permissible elevation
Before you properly remove the pipe through the roof, it is necessary to determine the optimum height for it:
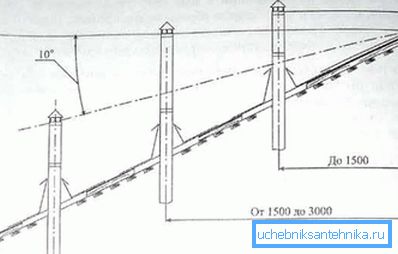
- Elevation of more than a meter adversely affects the external perception of such a structure, which is largely due to the need to install additional anchorage.
- The chimney, located below the level of the ridge, does not have sufficient pitch, which directly depends on the height of the ventilation duct. This is due to the fact that the atmospheric pressure in the area of the combustion chamber exceeds the pressure of the air column above the roof.
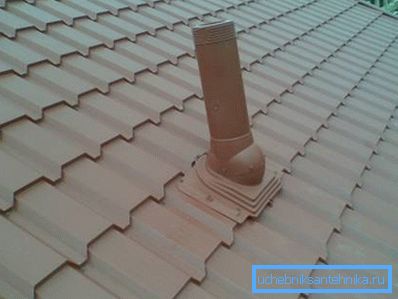
That is, it follows from the previous rule that the higher the pipe, the better the draft will be. But since the first option (high location of the chimney) is not suitable for aesthetic reasons, the conclusion suggests itself - the optimum elevation above the ridge should not exceed half a meter.
Note! It is best to mount the pipe as close as possible to the ridge, thus, it is enough to lift it 14-20 cm in order to achieve the best result. It is not recommended to draw a conclusion directly in the middle of the ridge, as this complicates the installation work.
Workflow - phased technology
You are probably wondering whether it is possible to equip high-quality and reliable ventilation (chimney) with your own hands and at the same time save not only money but also time — our answer is positive. In the sections below, detailed instructions will be described to confirm that this process is possible for self-mastering.
Stage one - preparatory
Initially, you should prepare everything you need for future work:
- Purchase pipe if not available and fire retardant material.
- Fastening materials.
- Tool:
- Building level.
- Welding machine - in the event that the pipe will have to dock.
- Screwdriver.
- Hammer.
- Jigsaw and grinder.
- Wooden beam.
- Finishing material.
Note! The drawing does not have to be professional, the main thing is to indicate in it all the main points: the diameter and height of the chimney, communications that need to be bypassed, etc.
Stage two - roof preparation
Now we turn to the process, where we already need to do our own hands:
- To begin with, on the roof we measure the distance from any truss beam, which is half a meter plus the diameter of the ventilation pipe.
- We are building another beam in the indicated place in order to increase the stability of the roof.
- Using a standard plumb from the center of the measured distance, we measure a point on the floor of the attic or attic.
- Around this point we attach the vertical and horizontal bar so that there is an equal distance from each edge to the pipe (its center is a measured point) from each edge.
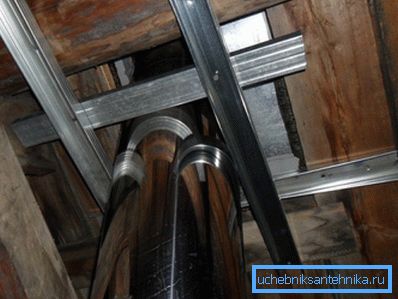
- We drill through a hole in the indicated place so that a hole is formed on the ceiling of the first floor. According to the plan, it should be exactly above the stove or half a meter from this place.
Note! It is better to carry out the vent pipe to the roof vertically, this allows you to withstand the effective pumping of carbon monoxide from the room.
As a result, we should have a reinforced box inside which the chimney will be laid. At the same time, it should be mounted only in the attic-mansard room, in a living room it is enough to elevate the pipe with finishing materials.
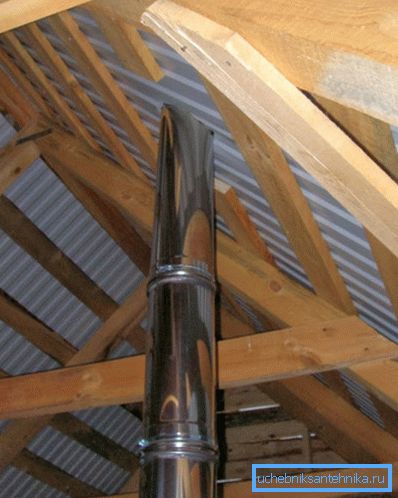
The box is necessary for the safe operation of the ventilation system, which is often heated to critical temperatures - protection for both living in the house and for combustible materials.
Stage Three - Through Hole
We now turn to the preparation of a specific place for the passage of the ventilation pipe in the ceiling of the first floor / floor of the attic:
- In that case, if the overlap is laid out of wood, then you can cut a circle of the required diameter using a chainsaw. We remind you that it is necessary to add 15-20 sms of each side to the diameter of the pipe itself.
- If you have to work with a concrete slab, then this will help you a long auger and perforator - a tool drills a lot of holes in a circle. A very weakened piece of slab is knocked out by a sledgehammer.
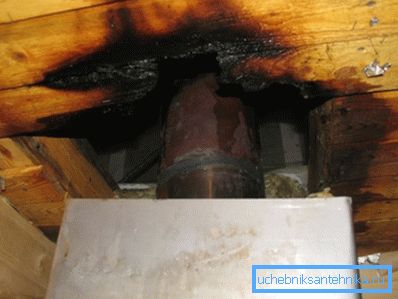
We turn to the opening of the roof. The best option is when the roofing material is not yet laid, but this is possible only if the house is under construction.
We will deal with the installation of the chimney after the commissioning of the object:
- Before taking the pipe out of the corrugated board through the roof, we cut the material in such a way that it can be bent and left in this position for some time.
- If you still have to face the tile, then it remains to produce only partial dismantling in the place where the pipe will go out according to the plan (with a small margin).
- Now that we have a through hole, we can insert the ventilation pipe into the “hole” on the roof.
- Fixing the chimney itself is carried out by installing collapsible clamps, which in turn are attached to the protective box we have erected.
- Hole on the roof, from the attic, closed with asbestos sheet, which will not heat up.
- Now, using steam film, fasten it to the walls of the pipe box with furniture clips.
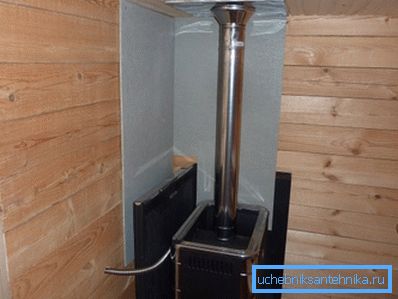
- We connect the free end of the pipe with the furnace, it is better to use a welding machine for this, this method ensures the tightness of the connection. You can use the connecting clamp, but it all depends on the ideal shape of the products - if there are no defects, then the tightness will be decent. (See also the article Metal pipe clamps: features.)
Note! Another necessary element for a quality connection is a casing that is put on over the joint of the pipe and the furnace. It should also be installed at the opposite end of the pipe that rises above the roof.
Installation Features
In this section, we will point out some important aspects of the workflow, which novice builders often forget:
- It is not recommended to use bu pipes with minor damages.. Many experts may argue that there is nothing terrible in minor cracks, but you should not believe it. Such a product will last for a couple of years, but then difficulties may arise and repairs will be required. Therefore, it is better to overcharge the whole and the new pipe, rather than costly dismantling every two to three years.
- Violating the integrity of the roof, be prepared for the fact that at the first cold show low quality tightness of the connection. To avoid this problem, use all available heat insulation materials and sealants.
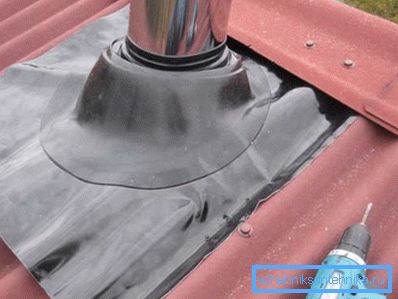
- We recommend to cover the end of the pipe, towering over the ridge of the roof with an “umbrella” that prevents precipitation from entering the chimney.
Conclusion
Now you know how to personally organize the ventilation system in the finished house, which will take out the burning waste on the street. And, as you can see, there is nothing difficult in this, all materials and tools are easy to acquire, and you will spend no more than two or three days on the workflow.
In the presented video in this article you will find additional information on this topic.