Frame made of pipes: various designs and methods of their
The frame of the profile pipe can serve as the basis for a variety of structures and small architectural forms. The versatility of this material is such that it is used almost everywhere, and with the observance of simple rules, even the most experienced master may achieve good results.
Below we describe what you should pay attention to when designing frame structures, and also give a few examples that you can use in self-construction.
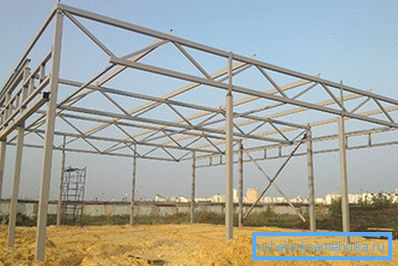
Basics of connecting parts
Before we start building metal frames from a profile pipe, we need to decide how we will connect the parts together.
And here, by and large, there are two options:
- Welded joint.
- Mechanical connection with brackets and bolts.
Each of these technologies has pros and cons, which we put together in a single table:
| Technique | Merits | disadvantages |
| Welding |
|
|
| Fastening with Adapters |
|
|
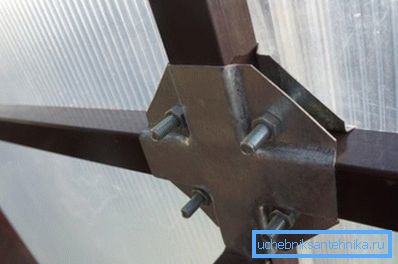
In principle, both methods can be used in the work. And yet it is worth noting that most of the time, it is welding that is most often used to create a frame with their own hands, since the bolted connection requires a very precise fit of parts to size. Such a fitting is usually carried out in the factory: an example is any set of parts for self-assembly of a greenhouse or gazebo.
In capital construction
Country house or barn
Thick profile tubes have a significant margin of safety, which allows them to be used for the construction of structures with significant bearing capacity. If you have a certain knack of such details, you can assemble the foundation for a small house or a shed (learn here how to hide pipes in the bathroom).
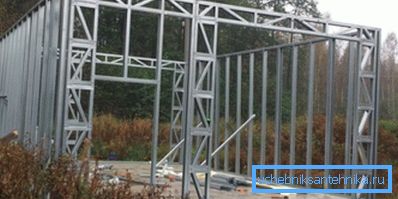
The frame of the house from a profile pipe is built by own hands according to this scheme:
- First, we fill the strip foundation, because even a fairly light construction requires a reliable foundation.
- We lay thick (50x50 and more) shaped pipes on the foundation, which we fix with anchors.
- We connect the bottom strapping with logs in 60 cm steps. To prevent the logs from sagging (and even a 50 mm tube can deform over time), we support them with cranial wooden bars or brick columns.
- At the corners we install racks from blanks 40x40 mm. The height of these racks will determine the height of the ceiling of our house. Angular bearing parts can be fixed with braces.
Tip! To achieve the required rigidity of the rack should be placed not only at the corners, but on all flat sections of the walls with a step of not more than 100 cm.
- From above we weld the same upper strapping pipes on which we install the roof. For rafters, you can use both wood and metal blanks.
- We strengthen the design with transverse elements of thinner pipes or steel corners. At the same stage we form window and door openings.
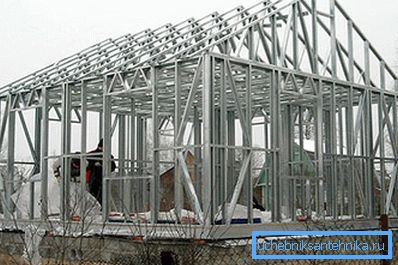
In principle, this work with the metal ends. We can only sheathe the steel frame, not forgetting about the insulation - yet the pipes conduct heat very well.
The base of the shed or summer kitchen is built approximately along the same lines. The main differences here will be in the configuration of the walls and roof, as well as in the decoration: if you plan to keep garden tools in the building, you can insulate it less efficiently.
Greenhouse
The instructions for making the base for the greenhouse will differ somewhat - naturally, in the direction of facilitating the task.
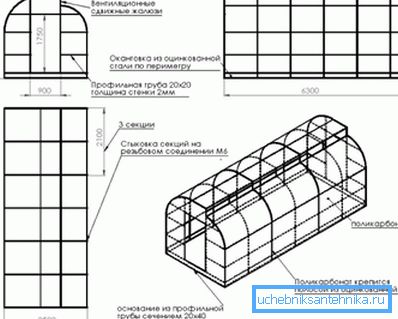
- To begin with, we make several arcs from 30x30 mm blanks, the dimensions of which correspond to the planned dimensions of our greenhouse. Arcs can be solid (then one cannot do without a pipe-bending machine) or teams of several straight-line segments.
- Using welding, we weld the lower part of the frame to each arc.. So we will not only provide the structures with greater stability, but also prevent the deformation of the arc elements.
Note! Instead of a frame, steel pins can be welded to be used for penetration into the ground.
- In the first, front arc, we mount the doorway. Also here you can immediately fix the door frame on metal hinges.
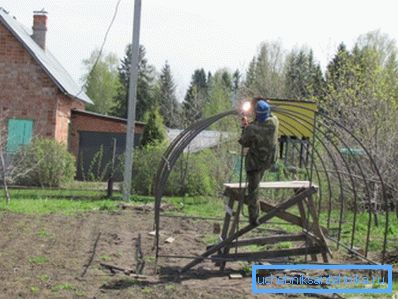
Then you can go in two ways:
- If we need a non-separable structure, then right on the site we weld all the arcs into a single frame, installing longitudinal fittings.
- If it is planned to disassemble and transport the greenhouse, then instead of welding we use steel brackets, which we tighten with the help of bolts.
As in the case of the house, we will only have to finish: to cover the metal frame with polyethylene or to sheathe with polycarbonate panels.
Tip! So that the pipes do not rust in a humid environment, they must be treated with an anti-corrosion compound.
Approximately on the same principle, the frame of the hangar can be assembled from a shaped tube. Naturally, for this task you need to choose thicker (at least 70x70 mm) blanks, and you will not be able to do with improvised tools. But the scheme itself will remain unchanged.
Small constructions
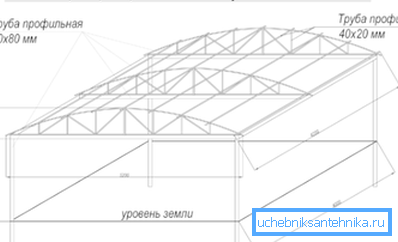
The use of the pipework in the construction of capital structures is quite common. However, much more often the tube frame is used in the construction of small architectural forms - sheds, gazebos, canopies over the porch, etc.
We can assemble the frame of the canopy from the profile pipe with our own hands as follows:
- First, the upper part is made of thin blanks (30x30 mm and less). It can be both pitched and hipped.
Note! Often, hemispherical roofs are also made, but in this case, an accurate calculation of the arc radius is required.
- The top part is attached in welded or mechanical ways to the strapping.
- Then racks are installed on the ground. They can either be buried in the ground with concreting (approximately 40-50 cm), or mounted on the crossings from a steel corner.
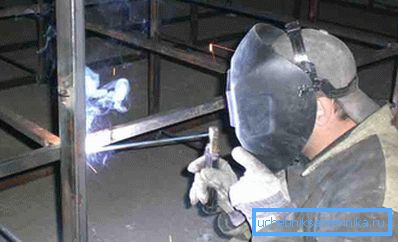
- At the final stage, we lift the upper part and place it on supports. We combine parts, ensuring the stability of the whole structure.
- If we make a canopy over the porch, then we can do without supports at all. In this case, the supporting structures are the brackets rigidly fixed on the wall with anchor bolts.
- After completion of the installation work is finished. As a rule, such structures do not require thermal insulation, therefore we place the moisture protective membrane directly on the frame, and install the roofing material from above.
Note! In some cases, the side surfaces can also be sheathed with translucent plastic, or they can be installed on them with curtains made of polymeric fabric that curtain them: this way the space under the visor or canopy will be protected from the ingress of rain drops in strong winds.
Also a framework for a Christmas tree made of pipes can be considered a rather popular design. It is very simple to install, but it should be remembered that for its manufacture it is better to take a round pipe rather than a profile pipe.
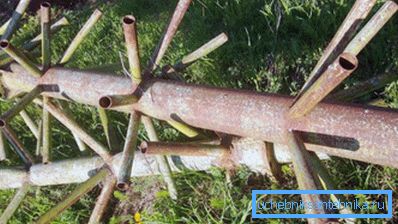
This frame is going to be quite simple:
- The base of the whole structure is made by welding two angles or small channels. It is important to precisely position the parts so that the support is flat.
Note! If the height of the frame is planned to be more than 2 m, then in the details of the base we make in advance the mounting holes for fixing to the ground.
- Then welded to the base of the central pipe with a diameter of 75 mm or more.
- Further, from a pipe of 45-50 mm we cut blanks approximately 25-30 cm long. With the help of welding, we place these blanks on the central axis, arranging them either in a spiral or crosswise.
Using such materials, it is possible to make a device for installing a sufficiently large Christmas tree. In principle, all Christmas-tree frames are made this way, with the only difference being that for a construction more than 5-6 m in height it is necessary to take thicker pipes.
Conclusion
The frame of the shed of the profile pipe or the base for the gazebo can be made in just a few hours. Naturally, such a speed of work without loss of quality is possible only if we are fairly professional in welding skills or prepare all the details for connection with brackets in advance (see also the article Fittings for pipes: main types and features of the application).
In more detail this technique can be studied by viewing the video in this article.