How to close the pipes in the toilet without compromising
In this article we will talk about how to hide pipes in the toilet in accessible ways. The topic of the article is relevant for one obvious reason: water and sewer communications do not fit into the design of the room, the dimensions of which are not large anyway.
When planning a major overhaul in the restroom, we are faced with an intractable problem in the form of pipes, which not only occupy precious space, but also spoil the updated design. Meanwhile, the closure of pipes in the toilet - this is not such a complicated procedure, which you probably can handle on your own.
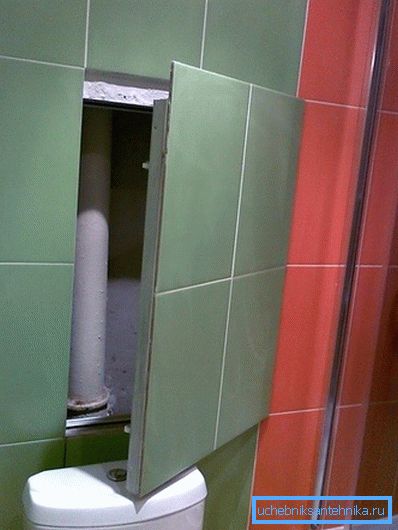
Simple and easy to implement methods.
Instructions for decorating utilities in the restroom largely depends on the type of materials used.
In this article, we will consider the most simple-to-implement methods that can be implemented using such finishing materials as:
- lining;
- plastic wall panels;
- plasterboard;
- roller blinds.
All these materials and structural elements are available on the free market and their price is low, and therefore there will be no problems with their acquisition.
A simple way for residents of the last floors
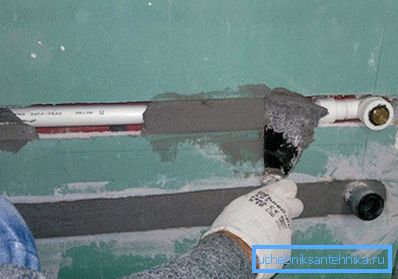
If you live on the last floor and the riser pipe does not pass through the lavatory, the instruction for decorating communications is greatly simplified:
- before applying cladding materials, we make wall grooves on pipes in the wall;
- we put communications into the grooves, fixing them with collars or grabbing them with alabaster solution;
- after the alabaster has dried, we fix a plaster net around the perimeter;
- fill the grooves with plaster mortar, pushing it through the mesh (the mesh will not allow the solution to go cracked along the strob contour);
- after complete drying of the mortar, the surface can be plastered for subsequent painting or proceed with tile laying.
This method, despite the ease of implementation, provides a significant advantage - it saves space, since all pipes will go into the wall, and only a toilet bowl and counters will remain outside.
But there is a drawback - in the event of a pipe failure, you will have to disassemble the wall decoration. That is why, planning to hide communications in the wall, you need to ensure that the pipes are strong and reliable.
The best solution is to replace metal or metal-plastic systems with polypropylene, which is soldered with fittings into a monolithic durable joint.
The use of lining and plastic wall panels
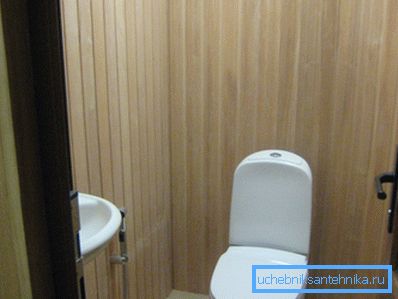
It is also easy to close the pipes in the toilet with plastic panels or clapboard, and therefore you can cope with this task yourself.
Instructions for decorating communications are as follows:
- From a bar of 3 to 3 cm, we assemble a frame along the perimeter of communications. Assembling the frame, we save the maximum space and bring it almost close to the pipes.
Important: Despite the savings in space, the frame should be smooth, and therefore, when it is arranged, we use the water level and, if necessary, place wooden liners under the bars.
- Vertical bars in the frame structure are reinforced with horizontal crossbars.
- At the meter level, we make a frame for the installation of the hatch, which will be needed for the periodic inspection and maintenance of communications. A rectangular frame is fastened from the same bar, which, like a window leaf, is attached by loops to a frame previously made in the frame.
- Once the frame is ready, we begin to sheathe clapboard.
To begin, we fix the corner element, from which we start to fix the wall paneling. Fixing each panel, we check its positioning in space by means of the water level.
Tip: In order not to deform the wall paneling with a hammer, hammer the nails through the spacer (blunt nail, chisel, etc.).
Installation instructions wall panels is not much different from the installation of wall paneling. It is easier to install the panels, since they are many times wider than the wall paneling, and therefore the work is done faster.
Hiding pipes under plasterboard
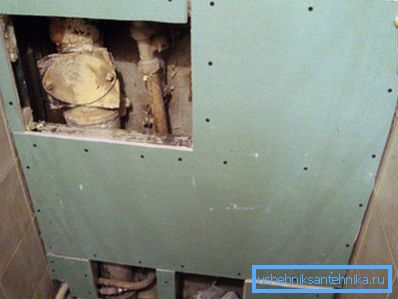
Instructions for using gypsum boards are fundamentally different from the installation of wall panels.
We work as follows:
- At the initial stage we collect the frame.
Special suspensions made of thin tin are attached to the wall with two dowels. Next to the suspensions with screws a special profile is attached.
As a result of the installation of these elements, we must get a metal crate. In order to crate was not a curve, during the installation process we constantly use the water level.
- At the next stage, we fasten sheets to the frame covering the pipes (GVL). For these purposes, we use a moisture-resistant material with a thickness of 12.5 mm. Sheets are fastened with screws, which are screwed in increments of 15-20 cm.
Important: Working with a screwdriver, do not twist the screw, it is better not to twist it a little bit.
- After the frame is sheathed, we mount a plaster net with a cell of 5 to 5 mm over the drywall.. Then we putty and level the entire surface for the subsequent painting.
Decoration of communications by rolling shutters
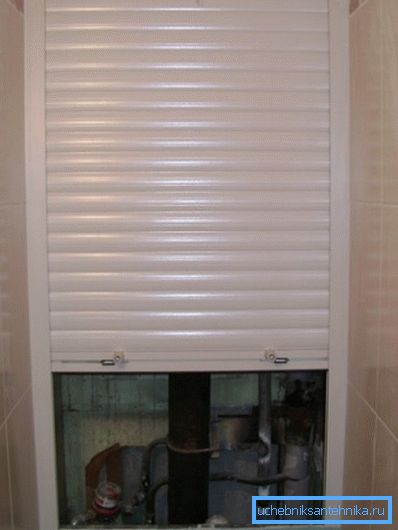
If desired, you can close the pipes in the toilet roller shutters. This method is good because it allows you to close a particular section of the wall and at the same time have constant access to hidden pipes or meters.
Important: Installing the roller blind itself is not difficult. But, as a rule, manufacturers of these devices offer a free installation service.
Choosing rolling shutters, we get plastic modification with the manual drive. Such products are easier to install, have less mechanical stress on the walls and at the same time their price is an order of magnitude lower in comparison with electric versions with electric drive.
At the initial stage of work, we measure the space occupied by the pipes and decide which roller shutter dimensions to order. After the product is ready, we install a guide rail and a box using dowels.
Further the cloth is established and the box finally gathers. As a rule, all self-tapping screws and dowels are already supplied complete with the product, all you need to do is arm yourself with a perforator and a screwdriver and put all the parts together.
Important: Choosing rolling shutters for decorating the toilet, it is better to order the product in the entire wall. In this case, the pipe-free part of the enclosed space can be used for the storage of various accessories, cleaning products and cleaning equipment.
Features of the location of decorative elements
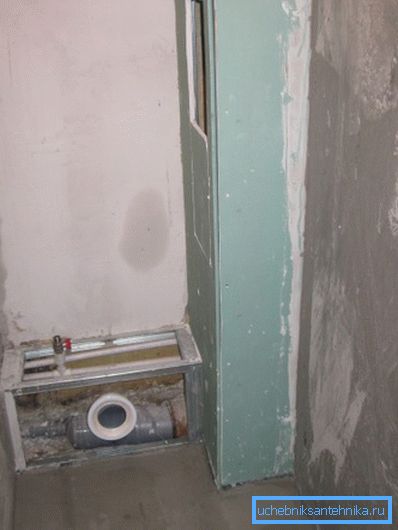
There are several types of arrangement of decorative elements. Location methods are selected in accordance with the sizes and configuration of pipes.
Consider how it is more profitable to decorate pipes:
- False wall - This is the simplest type of arrangement of barrier structures, in particular, if drywall or wall paneling is used for their manufacture. If such a construction, in your opinion, takes up too much space in the toilet, you can use a hanging tank and toilet.
- Square box - This is an effective solution if you need to close not the entire wall, but only the riser in the corner.
- Bias false wall - This is the best option to close the sewer riser and horizontal pipes. This method of location of the fence is equally suitable for all previously listed finishing materials.
Conclusion
Now you know how to cover inconveniently arranged pipes with your own hands. More useful information that will simplify the implementation of the planned work can be found by watching the video in this article.