Piping wiring: installation technology for maximum security
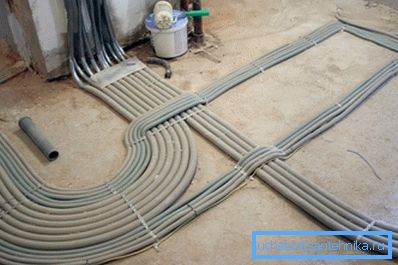
In wooden houses, as well as in buildings, in the construction or decoration of which flammable materials were used, experts recommend installing electrical wiring in pipes.
However, this technology is applicable when repairing brick and concrete buildings, because its study will be useful to masters in any case.
Features of the technique
The advantages of installation in pipes
As we noted in the introduction, electrical wiring in pipes is laid when it is necessary to protect structures from possible ignition.
However, this situation is far from the only one, because this solution has other advantages:
- Firstly, the tubular casing (even the simplest plastic, not to mention steel or copper) well protects the conductors from mechanical damage.. This applies to both wires laid in the thickness of the wall and cables under the floor, ceiling, and behind false partitions.
Note! Very often cables are laid in pipes outside the house, which for one reason or another cannot be removed from the surface under the ground.
- Secondly, the conductor insulation in the pipe does not experience operational loads and is not exposed to aggressive external factors, primarily moisture.. Yes, and from rats, which quite often "organize" closures, this installation protects well.
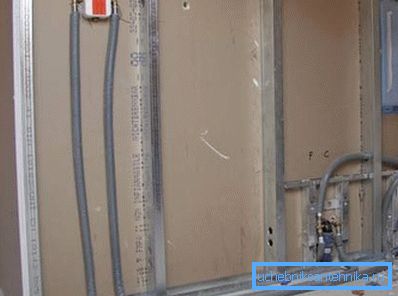
- Finally, the use of hollow tubular channels makes it easy to dismantle and replace damaged conductors.. It does not have to remove the finish and open the thickness of the wall: simply open the nearest junction box.
Naturally, all these advantages can be realized only with the condition of proper selection of pipes and high-quality installation of the entire system.
Material selection
For laying hidden wiring inside the tubular channels can be used a variety of materials. Each of them has both advantages and disadvantages, and we have tried to analyze the main ones in the table below:
| Pipe material | pros | Minuses |
| Plastic (PVC, polyethylene, polypropylene) |
|
|
| Steel |
|
|
| Copper or brass |
|
|
It should be noted that all the above information is valid primarily for ordinary pipes.
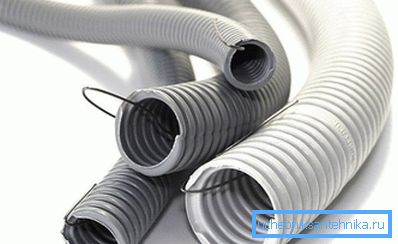
At the same time, corrugated models are actively used for hidden and half-hidden gaskets today:
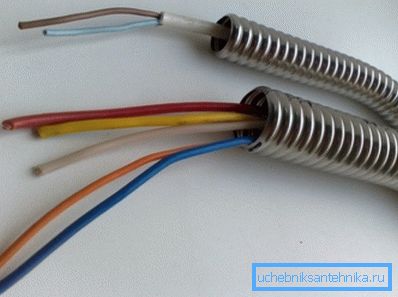
- For plastic varieties, the corrugated shape provides a significant increase in mechanical strength. This is due to the change in the geometry of the cross section - the edges of the corrugated parts act as stiffeners.
- Steel gomoforokanal also have the advantage over solid pipes: the use of walls of a special shape allows you to facilitate the design without compromising the mechanical characteristics by reducing the thickness of the metal.
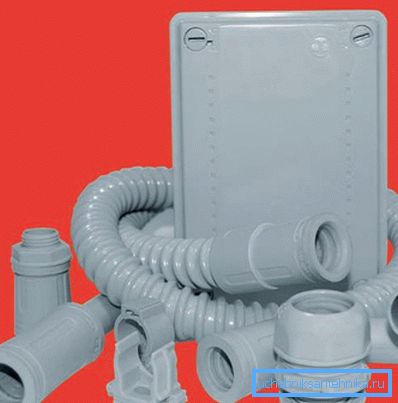
Note! Also, these casings easily bend using a minimum set of tools, which greatly simplifies installation. Yes, and the cost of distributing will decrease, because you do not have to purchase special fittings for cornering.
- The ideal solution in terms of reliability, ease of construction and cost savings are steel corrugated pipes in a protective plastic sheath. Their use makes it possible to mount the wiring in the shortest possible time, while the wires inside the channels will be reliably protected both from damage and moisture.
Strip sequence
Preparatory work
So, all the materials purchased, you can proceed to installation. And here it is worth starting with drawing up a plan.
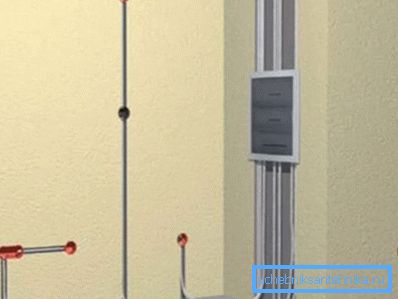
To begin with, we apply the markings on the walls, which will be laying.
It should adhere to a number of rules:
- First, the fewer turns the route will contain, the easier it will be to replace the conductors if necessary.
- Secondly, areas with two or more pipe bends should be made no longer than 5 meters - for the same reasons.
- Maximum angle of rotation - 900. If you make more sharp bends, when you try to pull almost any cable will be stuck.
Tip! Bending is only thin-walled metal and corrugated housings. It is better to connect thick-walled steel as well as plastic pipes using fittings, taking care that no burrs form on the inside, which can cause damage to the insulation.
- So that during the repair we don’t have to look for wires every time by drilling several holes in the walls, it’s better to lay all the horizontal sections on the same level. Or else it is even easier to do this by placing them in the thickness of the floor.
- It is also desirable to arrange the cable channels at a distance from the heating pipes, otherwise the wiring in the copper pipe and the cables in thin-walled steel or brass pipes will heat up.
Wall chipping
Having drawn the main lines on the surfaces and noting the installation locations of the switches / sockets, we proceed to work.
In the case of a wooden building, laboriousness will be small (you can just hide the housings under the skin), but in the brick or concrete walls you will have to cut through the grooves:
- To begin with, we make recesses for the installation of junction boxes, sockets and switches. They must be of sufficient size to mount these parts flush with the wall surface.

Note! The instruction does not allow to hide the covers of distribution blocks under plaster or lining.
- Then, using a punch with a chisel or a special wall chaser, we form channels in the walls for laying pipes.
- At the last stage, we drill holes through which communications will pass from one room to another.
Tip! When working with a perforator or wall chaser, you must follow the rules of safety and labor protection. So the presence of plastic glasses and a respirator for protection against dust is mandatory, and noise insulation headphones will not be superfluous.
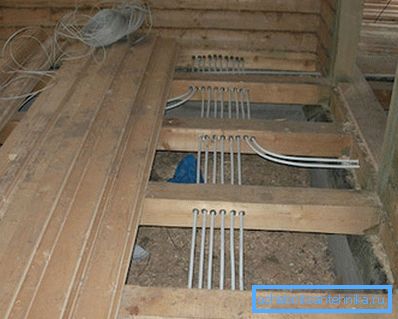
- When laying cables in the thickness of the floor on logs, we provide grooves in the supporting structures, in which then pipes with conductors will be laid.
- Choosing the placement of such slots, we make sure that the elements are not affected by excessive pressure, i.e. we place them below the floor level by at least 10-15 mm.
Equipment installation
After that, proceed to the installation of all parts of our power supply:
- First install junction boxes. It is desirable to take metal, but in some cases it is enough and cheaper plastic - if only their size allowed to place inside all the connections of wires.
- In the same way, we mount podrozetniki and plastic "glasses" for the installation of switches.
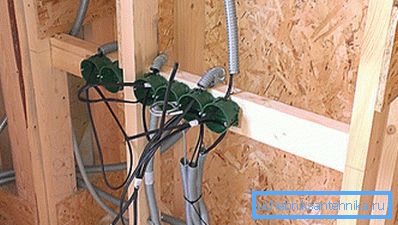
Tip! In all these devices, you must first remove the cover from the special holes for the establishment of wires.
Next, go to the laying of the pipes themselves. As we noted above, you can use different materials, but they must provide sufficient mechanical protection and heat resistance. For example, for steel pipes, the wall thickness should be chosen in accordance with such requirements:
| Wire section, mm2 | Wall thickness mm | |
| Copper | Aluminum | |
| 2.5 and less | 4 or less | any |
| - | 6 | 2.5 |
| 6 | ten | 2.8 |
| 6-10 | 16-25 | 3.2 |
| sixteen | 35-50 | 3.5 |
| 25-35 | 70 | four |
When laying pipes can be used two technologies:
- In the first case, the so-called broach is inserted into the casing - plastic cord or thin steel wire with high elasticity. With the help of these elements we can tighten the conductors we need into the pipe.
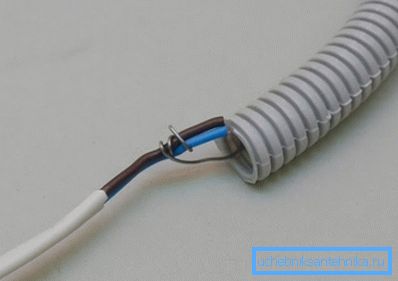
- In the second case, the wire is immediately laid in the pipe, leaving a small margin on the connection in the junction box.
Both techniques are fairly easy to implement with their own hands, because the choice is largely determined by your personal preferences, as well as the specific working situation. However, the first method is still preferable, especially if we plan to conduct several wires of different cross sections.
- Pipes with running broaches or cables are laid in the grooves or placed between the bars obreshetki.
- We fix all parts using either clamps on anchors (for brick and concrete structures) or special metal clips (for wood).
- We attach the ends of the pipes to the distribution boxes, as well as to the bottom and the bases for the switches.
Tip! If the wiring is mounted in a damp room, then all the joints and connections should be sealed to avoid moisture and short-circuit wires.
- We lay a separate pipe for connection to the panel and the meter.
Laying and connection
The most time consuming part of the work ends there.
However, you shouldn’t relax - we’ll have to connect wires as carefully as possible to the housings:
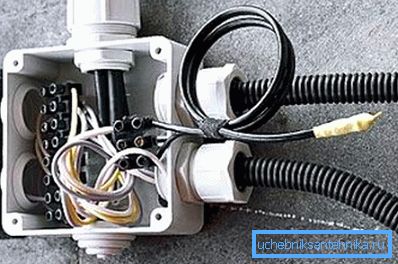
- Using the broach, we lay the cables in the pipes, leading the ends to the junction boxes and podozetniki.
- If necessary, we connect the conductors using twist or (which is safer and more convenient) special terminal blocks. All joints are carefully insulated.
Note! Connection of two wires inside the pipe is strictly prohibited. All contacts should be organized only in areas that are accessible.
- The connected wires are connected to the terminals of the switches and sockets.
- After completion of work, we check the insulation resistance. This is done in order to find out whether its integrity was not violated during the installation of the system.
If metal elements were used in the formation of channels, then in order to ensure electrical safety in the event of insulation breakdown, it is also worth connecting the grounding circuit.
Completion of work
Work is completed on a fairly simple scheme:
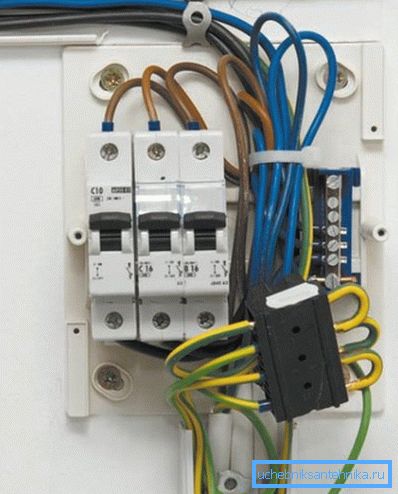
- The wiring is connected to the distribution panel through the protective cutout (RCD).
- Using a multimeter, we check the parameters of the laid cables in search of possible breaks, short circuits and other problems.
- We carry out a test connection of electrical devices to the sockets, check the switches.
If everything is in order, proceed to the finishing works:
- Frame with laid pipes sheathe boards or giprokom.
- The grooves are plastered with cement mortar, after which it is dried, the walls are plastered.
Note! In both cases, the junction boxes should be left free to access for the purpose of auditing and repair.
- We put decorative plates on sockets and switches.
- Fill the floor with padded casings with cement-sand screed.
It is possible to start using such a system even before the completion of finishing, since the pipes will reliably protect the electric wires from any impacts.
Conclusion
The installation of electrical wiring in steel pipes, as well as the use of corrugated housings made of technopolymers for arranging communications, allow us to solve the widest range of tasks. Using this technique, we will not only protect the conductors from mechanical damage, and the walls of the structure from possible ignition, but also significantly ease our lives during repair or modification of the wiring.
The video in this article will help you learn the basics of installing such systems, so that beginners should study it carefully.