What and how to decorate the pipe and radiator in the
In this article we will look at how to decorate the pipe in the kitchen, in the bathroom and how you can beautifully hide the plumbing lines throughout the apartment. As illustrative examples, we take the most popular methods that do not require a large budget and that almost everyone can implement.
Let's start with the most important point.
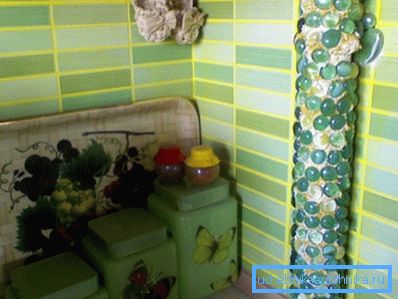
Why decorate communications at all
This is primarily done for beauty. The interior with bare and standard pipes and those that are trimmed with something neatly or simply original painted, looks very different, you will agree.
However, the sheathing of heating or sewage systems can serve not only to improve the visual perception, but also carry purely practical purposes.
For example, if before decorating pipes in the bathroom you find that there is no room for shelves in this room, then why not make these shelves right in the plating box? It turns out that communications will be disguised, and there will be practical benefits.
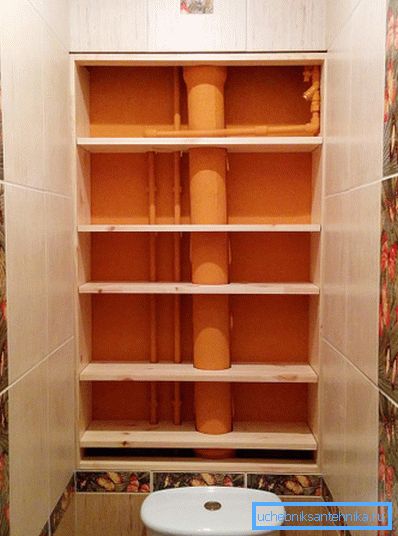
Therefore, whatever one may say, but decorating is worth it to realize. But here it is important to take into account some nuances - and they are individual for each specific type of room. In the kitchen - you need to follow some recommendations, in the living room - others, etc.
Let's look at everything in order and consistently. First, let's get acquainted with how to decorate the heating pipes in the bedroom and in the hall, and in passing we will look into the nuances of this case.
Casing of pipes and radiators
We begin with a brief overview of the methods of hiding radiators (they are also part of the external system), and then we proceed directly to the “tracks”.
To mask the radiator, you can use the following methods:
- The simplest thing is to paint the panels in the same color as the walls in the room. Such a move will make the heating less noticeable, because the battery will seem to merge with the wall.
Note! This design technique is relevant only when the radiator has an elegant, neat shape. If the product is at a great distance from the plane of the walls and is too prominent, then “mask” it in such a way will not work.
- Paint the radiator in a bright, eye-catching color. The technology is optimal in those cases when the walls have a “variegated” color or ornament.
- Radiator closure box with a decorative grille. You can buy ready-made grating - as a rule, there are plenty of them on the market, and you can also make them yourself. For example, from wooden slats.
Please note that if you decide to close the radiator box, you must make holes on the top shelf of the box. This is necessary for the exit of warm air upwards and for heating the near-window space.
Now consider the options directly decor heating line.
Masking pipes in living rooms
In principle, you can apply the same painting methods as for radiators, but this is not always the best option.
At least, because quite often the finishing of pipes is performed after the wallpaper has been glued. This means that the paint can simply simply ruin the plane of the walls.
There are more interesting and practical solutions - consider them on the example of the overview table.
| Way | Features and implementation instructions |
| Masking with a cloth. | This is done simply - the trunk wraps itself in a cloth, which is held either by glue, or thanks to the ropes tied on top. It is better to select fabrics for the texture of curtains. |
| Bamboo trim. | A very original decision, however, and its price is rather big. The essence here is the following: bamboo sticks of the required diameter are taken, a longitudinal incision is made on their plane. After that, these sticks seem to "open" and just put on the pipe. |
| Decorating with ropes. | Painstaking and slow work, but the result is interesting. A twine, rope or hemp cord is taken and wound on the trunk along its entire length. As a "highlight" between the ropes, you can insert twigs or leaves. |
Now how to decorate the gas pipe in the kitchen and plumbing.
Kitchen room
In the case of a room of this type there is one feature that must be taken into account. The idea is that food is prepared in the kitchen, and this implies a splash of fat and droplets on the pipe system, because both the gas and the usual main are usually located close to the stove and the sink.
Therefore, when finishing communications, it is important to decorate them so that the surface can be easily maintained. So the cloth and ropes are definitely not recommended here.
But the paint, bamboo - fit perfectly.
With the principle of mounting bamboo, we figured out earlier, now let's learn how to paint metal and plastic products.
For surfaces made of PVC, nitro paint is excellent in cans. You just need to protect the plane of the wall behind the pipes (film or plywood) and “blow out” the plastic.
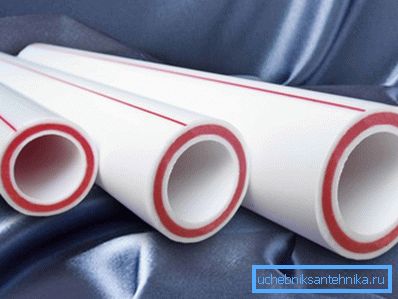
But metal painting is a more painstaking job.
This is done using alkyd enamel on something like this:
- A layer of old paint is removed from the surface of communications with emery.
- The cleaned highway is primed with a special compound for rust treatment.
- A film is laid on the floor, under the pipes. Also, the film closes sections of the wall behind the lines that are to be painted.
- Alkyd enamel is taken and a little of any solvent is added to it. It is necessary to save paint and for easier work with it.
- Next, the elements are painted in the desired color using a regular brush.
After about two days, you can remove the film - in theory the paint should dry out during this time.
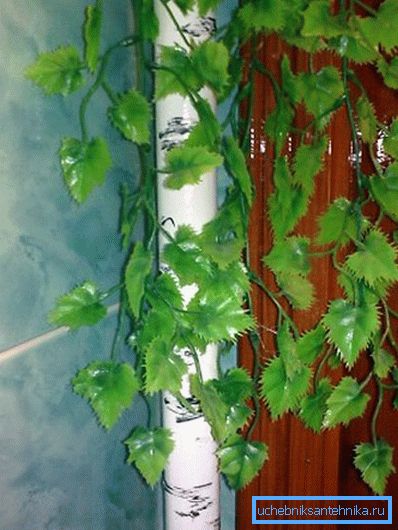
What else can be done is to paint everything not just in one color, but, for example, to make the background white, and apply black stripes to the point - the texture of a birch tree will turn out. From above you can fix artificial leaves, and there will be a wonderful full-fledged imitation of birch.
If you need to decorate horizontal systems, then it is best to use either painting or to mount around them a box of drywall with your own hands.
Please note that in the kitchen, due to the increased level of humidity in the room, it is better to use not ordinary, but moisture-proof drywall. Otherwise the box will not serve for a long time.
The box is assembled according to this principle:
- The guide profile UD is taken and fastened along the entire horizontal line of the system. The guides on the top of the “track” are fixed on the wall plane and on the floor at some distance from the wall plane. If the highway is high from the floor - it does not matter, the box in this case will turn out high and, accordingly, it will have more shelves.
- Now we need to put up vertical racks. To do this, cut pieces of the CD profile, the length of which must be equal to the height from the floor to the upper guide line. Insert the "rack" into the grooves of the guide profile on the floor and fasten them.
- Next, take another guide profile and how to dress it on the rack and fix with screws.
- Now we connect the side profile on the wall and the guide line, which is fixed on top of the racks. Such compounds are made from pieces of the CD profile.
- We sheathe the frame with plasterboard, if necessary we make holes in the top "lid" (it can also serve as a shelf) of the box.
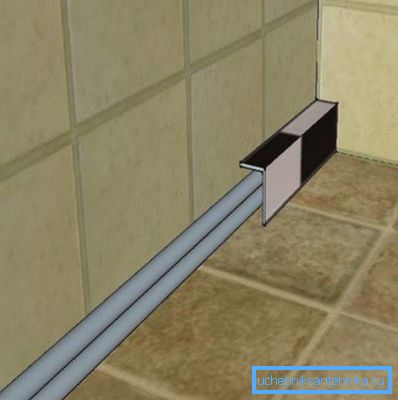
In principle, it remains only to putty the product and paint it.
And it remains to figure out how to decorate the pipes in the bathroom and toilet.
We decorate the bathroom and bathroom
The most important thing to keep in mind when masking communications in these rooms is the constant presence of a very high level of humidity and the need to access important nodes of the system if necessary.
Therefore, if you make a box, then it must be provided for the revision doors - so that you can safely close the valves in an emergency.
As far as humidity is concerned, here again we are faced with restrictions on the material. In the bathroom, it is not recommended to use ropes (as they may weaken due to moisture exposure), ordinary plasterboard and wooden elements.
To seal the pipes in the bathroom, it is best to choose painting with alkyd enamel or mounting the box around the main.
And if we talk about how to decorate the pipes in the toilet, then here we have a slightly different picture. The fact is that most often the communications are as if in a niche and there are usually a lot of them (standpipe, water supply, return flow, etc.). It turns out that even if you paint them, it still will not look very nice.
Plus, painting will not solve the main problem - the sound of water passing through the system will not disappear anywhere.
Therefore, the best way to finish communications in such a room is to install a partition between the toilet itself and the riser.
This is done like this:
- Wooden slats 50 by 50 mm are nailed around the perimeter of the opening.
- The upper part of the opening is sewn with board or plywood.
- In the area of the middle part of the door are made. They are screwed directly to the guide rails.
- The lower part is sewn either completely or the doors are also made (the choice depends on where the taps are located).
- The skin is painted on top or wallpaper is glued to it. Well, or any other decorative material.
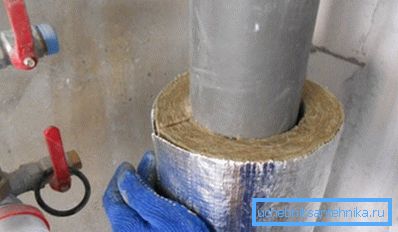
Tip: Wrap the riser with mineral wool to maximize the "noise" from the passage of water. At the same time, cotton wool also needs to be processed from above - wrap it with a film, and then there will be no dust from this heater.
This concludes our review of how to decorate communications with your own hands.
Conclusion
As you can see, the beautiful pipe disguise is quite real and simple. In addition, as you can see for yourself, the budget is also not needed because the most common materials are used and no special tools are required (also learn how to correctly use the socket connection of the pipes).
So, we have provided instructions, we hope that you can put them into practice. Well, if the information seemed to be little, then turn your attention to the video in this article - in the video there is a lot of useful information.