Bathroom faucet repair: professional manual
Most people consider repairing plumbing something too complicated, and in the event of a breakdown, they don’t even try to solve the problem themselves. In fact, minor repairs not related to welding and other plumbing work are not so difficult. To verify this, read our article on how to fix the faucet in the bathroom.

Typical damage and their removal
Leaking or noisy taps

Before you repair the faucet in the bathroom, you should determine the type of its design. Everything is simple here: there are models in two valves or with one lever.
If you have a valve design, then the instruction will look like this:
- Open each of the valves in turn and determine what kind of faucet noise. If it flows from a gander, the source can be identified by the temperature of the water. Then shut off the water and remove the plug from the front of the flywheel (lamb) of the crane;
- Under the plug is a screw. We unscrew it with a screwdriver and remove the lamb;
- Under the lamb is often located decorative cup or lining. It also needs to be removed / unscrewed;
- Under the overlay, we will see the spindle of the crane-box with its upper part, on which there are notches in the form of wrenches. We put on a wrench that fits the size of these faces and unscrew the crane.

Further actions depend on the type of axle box. If it is worm, then the rubber gasket located on the bottom head should be replaced. To eliminate the whistle and buzz on the outer edge of the gasket should be chamfered under 45? 1 to 2 mm deep.
Note! If the bush is ceramic, then it is easier to simply replace it. Although the cause of small leaks may be insufficient pressing of the product with a pressure nut or worn out elastic bands on the lower holes, but most often ceramics become unusable due to dirty water.
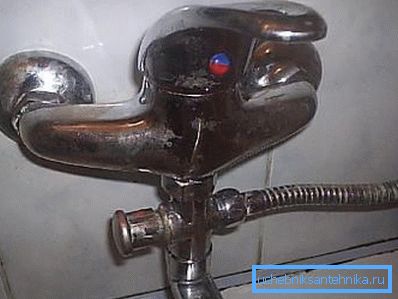
If you own a single-lever tap, then it’s still easier:
- On the handle in front there is a round hot / cold water pointer.. He is also a stub that you need to get with a screwdriver or finger, it is easily removed;

- Under the cap is screw cap. Turn it off slightly, one and a half turn;

- Remove the switch handle;

- Under the handle is a decorative overlay.. Unscrew it with your hand or key;

- Under the overlay we will see the clamping nut. It should also be unscrewed;

- Now you can remove the plastic cartridge with ceramic plates inside. The price of this item is low, so go with him to the store and buy exactly the same;

- We return home and collect the mixer with a new cartridge.

Note! Knowing how to repair the bathroom faucet, you will no longer depend on the work of housing offices and visiting schedules, and will be able to qualitatively eliminate the most frequent problems.
The shower switch does not work well

The shower / gander mode switches also often fail. Most often, they begin to leak or become too tight.
If there is a stock diverter as a switch, it often stops locking the shower when the water is turned off.
There are various options that depend on the design of the switch. In most modern cranes, ceramic crane-boxes are installed, and repairing them with their own hands is similar to the cases described above: we take out the axle box and change it to the same one.

Often a ball valve is used as a switch. To fix it, it is necessary to remove the front cover-cap of the shift knob and unscrew the screw.

After that, take out the handle, unscrewing the sleeve. The handle can be connected to a ball cap or be delivered separately. If the ball is inside, then remove the gander and unscrew the bottom cover. We take care not to damage the thread.
Then remove the ball and inspect it. Most likely, it will be covered with rust or dirt - any plaque must be cleaned to a shine.

After that, unscrew the shower hose and remove the top cover. We clean the inside of the body, especially carefully - plastic conical saddles for the ball.

When all parts are cleaned - the mixer can be assembled. Tighten the nuts so that the switch goes with a little effort, but not too tight. In this repair switch in the bathroom can be considered successfully completed.
Conclusion
Minor repairs of plumbing devices require compliance with the rules for disassembly and assembly of structures, which are set forth in the articles of our website. Any special skills and knowledge are not required here, and you can see specific actions and manipulations using the video in this article.