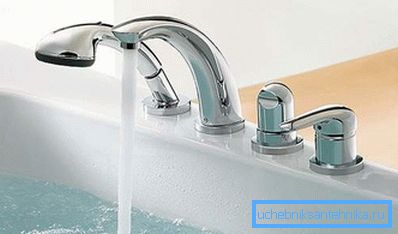
Bathtub with mixer - an original and practical solution.
The mixer built into the side of the bath became popular relatively recently, but the advantages of such a solution were appreciated very quickly. It even goes so far that in bathrooms it is easier to install on a separate faucet on the side and on the wall.

The advantages of this solution
Faucets can be installed on the side of any bath, the material does not play a special role. And you can buy plumbing device already done in it mounting holes for installation.
Even the cheapest bathroom faucet allows you to get a number of advantages compared with a conventional wall-mounted faucet:
- it will fill quickly, gently and much quieter. The flow will flow from a smaller height, therefore the spray is much less;
- From an aesthetic point of view, this faucet perfectly complements the appearance of the bath;
- you can hide the shower hose so that there will only be a shower head over the bath. At the same time, the hose itself will hide under the sanitary equipment.

Note! The disguised shower looks great, but with this approach the load on the hose itself increases. Compared with the usual accommodation option, it will grind much faster.
By the strengths of this method of installation of the mixer can be attributed, and ease of installation work. Even an unprepared plumber will do the job with his own hands.

The disadvantages of taps built into the bath can be attributed to the fact that if you suddenly have to give them up, then you will need to replace the bath. The fact is that the mounting holes can not be masked.
Learn more about bathtub faucets
The principle of operation of such a mixer does not differ from the usual wall counterpart, but there are a number of features. In particular, you need to decide on the place of its installation, the required power, and the type of device for mixing water.
Types of "onboard" mixers
If you try to rank bath mixers, you can put cascade taps in the first place in appearance. Such give out a wide stream reminding miniature falls. The appearance does not go to the detriment of performance, the sanitary equipment is filled fairly quickly. Such devices can be installed not only on the bath itself, but also be slightly raised above it using a small shelf or podium.

If practicality is at the forefront, the shower head can be considered a leader. Such a device will allow you to take a shower and a bath. Hose, as already noted, you can simply hide under the bath.
If we consider the technical side of the issue, we can highlight:
- 2-valve taps, can be used with metal-ceramic Kranbuksuy and normal (with a locking gasket). The price of such a device is minimal, and the appearance is at a height;

Note! Metal-ceramic kranbuksy (disk) are highly sensitive to water quality.
- ball valves - perfectly fit into the strict design of the bathroom. Thanks to the locking part, made in the form of a ball, the adjustment of the flow force and its temperature is performed by turning one handle;

- mixer for acrylic baths (and for any other) can be sensory, with built-in thermostat. In this case, it will be enough for a person to adjust the water temperature only once, in the future this will be handled by automation. The only drawback of such a device can be considered a high cost compared with analogues.
It is possible to classify taps and by the place of their installation on a bathroom.
You can select these types of cranes as:
- Corner - looks great on corner models.
- it can be placed in the center of the side or be shifted to any corner of the sanitary equipment. The main criterion for choosing the location of the faucet on the bathroom is the design of the bathroom and ease of use.

About the placement of the mixer
The main recommendations for placement of sanitary equipment in the bathroom can be found in SNiP 2.08.01-89. We are interested in the distance from the bath to the mixer.
You can focus on the standard value of 80 cm, that is, approximately this distance should be maintained from the bottom of the bath to the mixer.
Much in this matter depends on its location:
- if it is installed on the wall and must serve both the sink and the bath, the distance must be determined from the position of the sink. The tap rises 10-15 cm above it. The spout of the faucet will simply turn to the sink or bathtub;
Note! It is undesirable for the water jet to fall into the wall of the bath; over time, this can damage the material from which it is made.
- if the option combined with the bathroom is used, the height condition is, as a rule, automatically fulfilled. The fact is that, for example, a standard cast-iron bath with a hole for the mixer has a depth of about 60 cm, if you take into account the height of the mixer itself (another 15-20 centimeters), then you’ll get the right height to the bottom;

- When installing both a wall-mounted device and a bathtub combined with a bathroom, it is necessary to take into account that the jet from it should not fall directly into the drain. Over time, a water blockage may start leaching from the water seal, which means that unpleasant odors will appear in the bathroom.
Install mortise mixer
As for how much it costs to put the faucet in the bathroom, it all depends on its design. The cost of the most expensive options may exceed 10,000 rubles. But the standard model, which will require 3 mounting holes, can be purchased for about 3000 - 7000 rubles.

But on the actual installation, you can save money and do all the work yourself. Depending on the arrogance of plumbing, this will save up to 1000 rubles.
If you want to embed the mixer in an already installed bath, then you need to understand that a lot depends on the material. For example, in an acrylic bath it is easy to make mounting holes with a crown cutter, but with a faience or cast iron such a task is much more complicated. As a rule, metal baths are bought with ready-made mounting holes, although there is a cast-iron bath with a hole for the mixer a lot.

In the general case, the installation instructions for the mixer on the side of the bathroom look like this:
- mounting holes are drilled;
- then the mixer itself is installed;

- cold and hot water is connected to it.

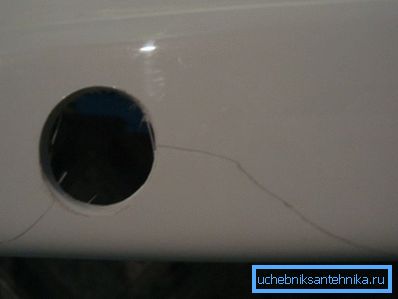
Note! When installing it is necessary to use gaskets under the faucet, as well as under the washers. It is also not recommended to tighten the nuts too much when installing the faucet, the baths are made of brittle material and excessive force can lead to cracks and chipping of the rim.
The main difficulties arise at the drilling stage, and if the drilling of the mounting holes for acrylic baths is quite easy to drill out, then in the case of cast iron you will have to try. When working with an acrylic bath, the most important thing is to ensure that the drill does not “run away” and scratch the inner surface of the sanitary equipment. Otherwise, nothing complicated - it is better to drill at low speeds and using a bit-bit for a drill.

It is necessary to work with the cast-iron sanitary fixture in a slightly different way:
- first you need to carefully go through the layer of enamel, so that the drill does not walk on the surface, you can scratch the hole in the center of the future with an awl, a nail or a drill;
- diamond drill is used, and the drill should work at low speeds. To avoid overheating, it is advisable to water the drilling site with water. You can also use a homemade jig made from a thick piece of plywood.
- after the diamond drill has passed the top layer, it is replaced with a metal drill and the process continues;
- then, gradually expanding the diameter of the drill, you can expand the hole to the desired value so that you can install the details of the bathroom faucet.
Note! It is advisable to coat the bare metal with epoxy to protect against corrosion, cast iron, of course, is slightly exposed to this, but the safety net will not be superfluous.
Summarizing
Installing the faucet on the side of the bathroom is an original and practical solution that allows you to solve several problems at once. In particular, water will be collected quickly and without unnecessary splashes, it will also be possible to mask the shower hose. Of course, there are also disadvantages to such a solution, for example, the need to drill a hole in the rim, but this cannot be called a critical flaw.
The video in this article shows the installation of the mixer on the bath.