How to put the faucet in the bathroom: features and stages
Assembling the bathroom faucet and its subsequent installation is a sufficiently simple task that any adult man can handle. We want to consider the components of the bathroom faucet and describe the rules for their assembly, installation and connection.

Types of mixer designs

In the bathroom, as in other sanitary or household units of any modern housing, hot and cold water is used.
As you know, the temperature of hot water is quite high, but cold water has a very cool temperature, and for most needs, a medium of moderate heating is needed, which will allow for normal hygienic or economic procedures.
To obtain the flow of the required heat mixers are used, which allow you to mix cold and hot water in the right proportions.
We are talking about a bathroom, so we are primarily interested in the opportunity to take a bath or shower, wash hands, wash clothes, etc. This presupposes the presence of a mixer that can provide a sufficiently fine tuning of the crane operation with minimal effort on the part of the user.

In addition, it is necessary to take into account that at least two types of plumbing are possible in the bathroom, as there are almost always two water intake points - a bath / shower and a wash basin. Sometimes, of course, there are devices that serve both of these points at the same time due to the turns of the crane jib, but this is rather an exception and an example of how to do it is not worth it.
So, in the bathroom can be installed mixers of two types:
- Devices for installation on the sink. They have two entrances (hot / cold water) and one outlet (crane gander). Structurally designed for installation on the hole in the side of the bowl sink, less often - for installation on the wall;
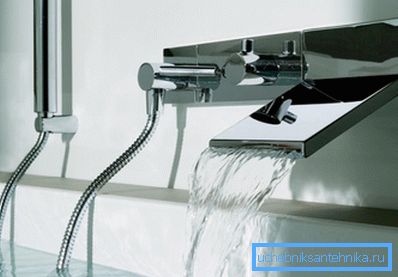
- Devices for installation in the shower or in the bath area. They have two entrances and two exits: one to the crane gander, the other to the shower head. Sometimes, in addition to the tap and shower, there is an additional watering can with a flexible hose. Can be mounted on the wall (most often) or on the side of the bath.

Note! The installation of the faucet on the sink and the side of the bath does not have significant differences, so it makes sense to consider only the installation on the wall and the sink as examples of various works.
It should also be remembered that the mixers within each type are divided into many subspecies, moreover, each manufacturer uses some of its own design know-how and solutions. However, these structures have no fundamental differences, and their installation, respectively, also.

Note! We will consider common models, the assembly and installation of which reflects the general rules of such work.
Assembly work
Wall mounted shower mixer

For the maintenance of the bath and shower most often used wall faucets.
This is due to several advantages and features of this type of installation of plumbing, among which are the following:
- Easy installation, maintenance and replacement. The product is fixed and connected with only two flare nuts, which greatly facilitates its installation and disassembly;
- When connected to the water supply, there are no flexible hoses, which have always been the weak link in any system;
- There are no hard-to-reach areas or hidden communications, which are often observed in the construction of mixers built into the side of the bowl.
Consider what the wall-mounted bath faucet consists of.

In the diagram we see the usual two-valve case, into which the cock-axle box (3) is turned for hot and cold flows with flywheels (4) to control the shut-off valves. Water flows are found in the middle, where there is a diverter switch (8), which directs the total mixed flow either to the gander (7) or to the shower head hose (16).
On the reverse side of the case there are two inlets that are located opposite the sockets for mounting the crane boxes. At the nozzles there are captive nuts with gaskets (1), due to which the product is connected to the water pipes.
Note! The distance between the inlet openings on the body of the device is not adjustable, so the end connections of the pipes must be pre-positioned at the correct distance, which depends on the model of the mixer, but most often is 150 mm.
So, consider how to assemble a faucet for the bathroom with a wall installation do it yourself:
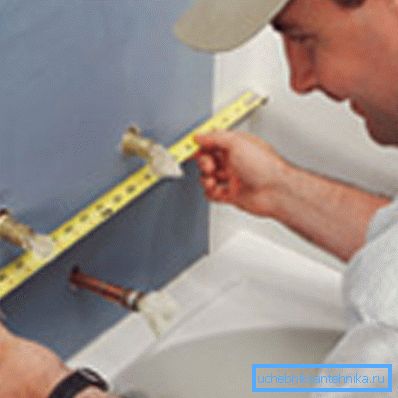
- We check that the water sockets are at the correct distance (we look at the drawing of the bathroom faucet, which we purchased), and were also located on the same level;

- We take the body of the product, twist the cock-axle box with lambs, the diverter and install the gander. All connections must be fitted with rubber or paronite gaskets. For proper assembly, use the manufacturer's instructions;

- We take adapters, eccentrics 1 \ 2 - 3 \ 4? and wind the tow on the thread from the side of the pipe clockwise. Then we apply sealing paste and twist the parts into the pipes, tighten them with a key and expose them by distance;

- We twist the thread eccentrics so-called. reflectors - decorative overlays concealing the place of connection;

- We put the mixer, put on the cap nuts and tighten them first all the way with his hands, then with an adjustable wrench. Tighten without fanaticism, so as not to pass the rubber seal;

- We connect the shower watering can, we fix the shower bracket with the help of dowels;

- Turn on the water and check the operation of the device.

Note! Connections equipped with cap nuts and rubber seals should not be wrapped with tow or FUM tape.
Onboard mixer

Now let's talk about the installation of the onboard model, that is, one that is fixed on board the bathroom or sink. Here are many models that have a very different quality and price, but the installation principle is about the same.
First, it is desirable to assemble the case: install taps and valves (switch handle for single-lever models), and fasten the gander. Then, from the bottom, you need to connect the hoses of the flexible connection hoses and insert the rubber gasket.

Now we pass the hoses into the mounting hole and insert the mixer base into it. On the other side of the shell, wind the fastening nut or bracket, tighten the fastener so that the device is firmly on board.

We connect the return ends of flexible connections to the water pipes. We do not confuse hot and cold water, on imported and most modern Russian taps cold water is on the right, hot water is on the left.

Note! Flexible hose connections should be tightened carefully, not overtightening. Otherwise, gaskets may be pinched and damaged.
Conclusion
Installing a bath or shower faucet is easy. Knowing the rules of installation and stages of work, you can easily cope with this task, and the video in this article will help you not to be mistaken.