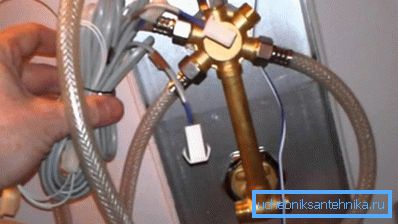
How to remove the mixer on your own in the kitchen and in
Any plumbing needs to be repaired over time, so after several years of using the faucet in the kitchen or in the bathroom, it is the turn of prevention or replacement of the device. At first glance, the work seems to be rather complicated, therefore, without special knowledge, it is not even worth starting. We hurry to say that in fact it is not. And, if you at least once used a wrench, all you get.

Foreword
Our article is divided into several blocks:
- kitchen faucet replacement;
- replacement of bathroom faucet;
- how to choose the right mixer.
After reading you will not have gaps associated with these works.
How to replace the faucet in the kitchen
The process instruction consists of several stages.
Remove the crane:
- Turn off the water to the old mixer. It can be cranes near it or the general crane to the apartment (house).
- Open the valve on the mixer and make sure that the water does not flow.
- Carefully loosen the nuts with which the hoses are attached to the pipes.
- Unscrew the fittings from the mixer.
- Unscrew the nut on the rod with which it was attached to the sink.
- Remove the old plumbing fixture.

Install a new one:
- Screw the one-piece fitting with the sealing gasket into the new mixer.
- Install the O-ring on the threaded part of the valve.
- Pass the flexible liner into the hole in the sink.
- Twist the fitting of the second flexible connection hose at the bottom.
- Install the rubber ring on the bottom of the valve body.
- Tighten the nut to the sink. Do it with your own hands, while the case of the device must be securely fastened without twisting.
- Screw the connection nuts on the water pipes.

Tip: when using rubber seals do not tighten the fitting or nut with great force, otherwise they may become unusable. First wrap them with your hand, and then hold them up with a key.
- Slightly open the water supply taps, and check the mixer for leakage and proper operation of the elements.
Change the mixer in the bathroom
- Turn off the water in the pipes.
- In this case, the crane is fastened with the help of cap nuts or couplings, which need to be unscrewed with an adjustable wrench, slightly shaking it in order not to disrupt the thread.
Tip: You can use light tapping with a hammer on the nut or clutch to facilitate unscrewing. Do not use too much force, otherwise you may damage the pipes.

- Remove the old mixer and unscrew the eccentrics. Do this carefully, otherwise the brass may crack.
Tip: if the adapter breaks, take the hacksaw blade for metal and cut the rest of the pipe into 3-4 pieces.

- Clean the internal thread of the pipe from rust, build up windings and lime deposits.
- Lubricate the new eccentrics and drive them a couple of times along the thread, then they will twist without effort. Use to improve the tightness of the joints hemp or fum-tape, then wrap them in pipes. Adjust the center-to-center and horizontal distance of the eccentrics as precisely as possible.
- Install the rubber sleeves and tighten the couplings or nuts to mount the mixer to the pipes. Wrap two layers of electrical tape clutches or nuts to protect them from scratches and dents.
- Open the water, check the connections for leaks and tighten the nuts if necessary. Note that water should not flow when the mixer is fully opened.

How to choose a mixer
Manufacturers are trying all sorts of tricks to get buyers to pay attention to their model. The market is replete with various forms of devices, colors, design, so let's talk about the nuances that affect the work of plumbing.
| General information |
|
| Mounting methods | The second important factor, which should also be considered when choosing. There are 4 options for:
More details:
|

Tip: if the bathroom has a small area, and the sink is located in the immediate vicinity of the bath bowl, you can purchase a common faucet with a swivel long spout.
Conclusion
The replacement process itself is simple, the main thing is to follow the recommendations mentioned above. Do not forget to also inspect the installed equipment so that defects do not come as a surprise after a while. Remove the mixer can actually anyone who is not afraid to work with plumbing. The video in this article will provide an opportunity to find additional information on the above topic.