Mixer aerator: device and possible repair
Some Internet users are looking for an aerator for a mixer - what it is and why it is needed at all, and we will consider such a device in the light of household plumbing. We can say in advance that such a device helps to save water if it is used in the right cases.
Let's try together to figure out what this device is, and also see a thematic demonstration of the video in this article.
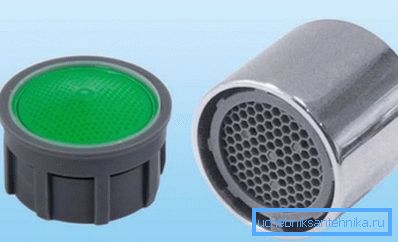
Aerators
Note. Immediately it should be noted that saving water using an aerator is not in any fraud with a water meter, but in its special method of delivery. So this device is completely legal and does not contradict any of the provisions of the Criminal Code and the Constitution of the Russian Federation, moreover, you do not violate any instructions for the repair and installation of plumbing.
What is it for

In order to understand what an aerator in a mixer is, you can conduct a small experiment that takes very little time, but at the same time you will be able to realize the great value of such a small device. For this we need a bank.
With a capacity of 2 liters and the most ordinary faucet in the kitchen or in the bathroom - in this situation we chose the bathroom, the faucet we have is a single lever (joystick), the position of the handle is in the middle. We also need a timer - for this you can use any electronic device and in this case, this is a mobile phone.
So, let's start - we put the jar in the sink under the spout (the joystick knob is in the center position) and set the timer on the mobile phone for 10 seconds. Now we lift the joystick lever upwards and at the same time turn on the timer - the bank is filled within 10 seconds.
At about the eighth second, the water begins to overflow over the edge of the tank (good pressure), that is, during the test, the two-liter tank was filled completely and even more.
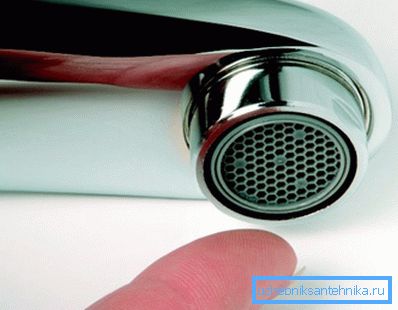
In order to proceed to the second part of the test, we need to remove the net from the spout, which is equipped with any kind of mixer of this type, but most likely you will not be able to do it yourself because of the lime and salt deposits there.
In this case, you need to use a wrench - the screw device will unscrew easily and quickly. After that, clean the spout nose from the small particles of debris that will stay there - miss the water - and screw the aerator in its place - it is not necessary to use the key here - the strength of the hands of an adult man will be enough.
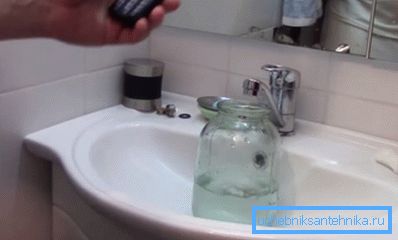
Now we proceed to the final stage of testing and substitute an empty two-liter can under the spout with the aerator, the rotary valve is in a central position, as in the first test.
We set the timer on the phone for the same 10 seconds and start it simultaneously with raising the lever up. For the full time of testing - 10 seconds - less than half of the can of water, about 800 g (almost three times less), manages to accumulate, although the intensity of pressure did not change.
Note. As you can see, the test results are quite eloquent, so it makes no sense to additionally talk about the benefits of the aerator.
Device and possible repair of the aerator
- You can purchase a water-saving tip in almost any store specializing in plumbing trade. Its price may differ by several orders of magnitude, but this, of course, depends on the quality of the products and the brand of the manufacturer.
- Like everything connected with running water, the nozzle on the mixer with aerator clogs with time - Salt, alkali and lime deposits are deposited on the grids, which significantly reduce the intensity of the water flow.
- In order to restore the previous performance, you, of course, have to remove the nozzle from the spout - there are two diametrically opposite planes for an open-end wrench for 22. Note that in this case the threaded connection will be turned upside down, therefore, it should not be unscrewed from right to left, but vice versa.
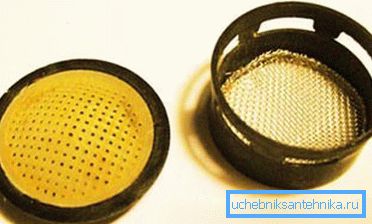
- In order to remove the core (cylinder with grids), press it with your fingers, in the direction opposite to the direction of water flow - so you disconnect the body and core.
- Look at the removed cylinder from the side - you'll see a slot there - you need to insert a flat screwdriver and disconnect the block with coarse screens. But this is not all - now you need to remove the spherical grid from the detached unit - for this, just pry it with a knife blade and it should be dismantled without any problems.

- Also you need to remove all the fine metal mesh., which are in the cylinder body and then the nozzle will be completely disassembled, as shown in the photo above, is ready for cleaning.
- Immediately it should be said that you did not try to remove calcareous, salt and alkaline formations by mechanical means - so you have a chance to break at least one net and, thus, the aerator will come to a malfunction (you can hardly get a repair kit for it in the store - they are simply not on sale).
- To clean all parts, use household chemicals., for example, a gas stove and oven cleaner. Put all the details in a small bowl or plate and cover with this agent for 10-15 minutes.
- After that, drain the fluid and rinse all parts in running water.. Collect the aerator and install it on the mixer - the result will exceed your expectations.
Conclusion
As you can see, this water-saving attachment will bring savings for your family budget. In addition, it can serve as an element of decor - an aerator for a faucet with illumination will shine onto the stream of water, although such a device is not cheap.