Self-replacement of the mixer: repair
In most cases, replacing a faucet mounted on a wall or bolted to a sink (sink) does not cause any particular complications. But for this you need to understand how to properly dismantle and install a new device.
Depending on the installation method (near-wall or delivery note on the sink), the type of repair work will also change, although in one and in the other case everything should go smoothly. We will tell you about how to do this and in addition will demonstrate the video in this article.

Repair work
Types of faucets

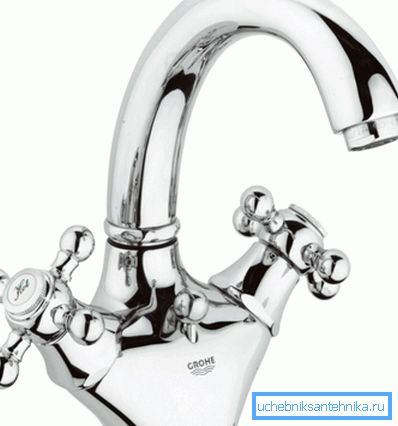
- Depending on how the mixer is arranged, its ability to be installed in one place or another is determined, that is, it can be either a consignment note or a wall version. In this case, in the upper photo, you see a two-valve type device, which is designed for installation on a sink or sink. Similarly, a joystick faucet can be mounted on the sink, if it is made with one installation nipple on the body.

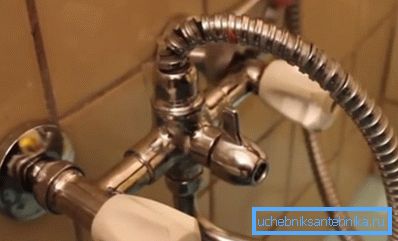
- But the model of this configuration, which you see above, is designed for a near-wall installation and is held at the expense of water fittings, which are installed during pipe installation. This is a single-lever (joystick) device, but the instruction also provides for the installation of two-valve cranes on the wall - the main condition for this is two installation nipples.

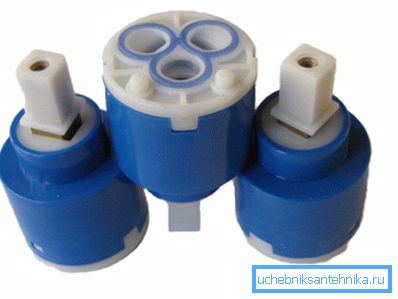
- Depending on the adjustment of the valve, its shut-off valves also change, so if on the instrument of any model the control is carried out by two valves or two levers, it means that there is a crane axle box. In those cases when the half-turn control is performed by a locking mechanism with a ceramic pair, which you see in the upper image on the left, and if there are a lot of revolutions, then this is a worm gear box that you see on the right. By the way, they are very easy to change and repair, so if you are thinking about how to make the mixer so that it does not leak, you can resort to replacing these valves.

- Joystick models of cranes work at the expense of the cartridge or ball locks - one and the other mechanism have three holes, two of which take hot and cold water, and one gives the mixed liquid through the spout. In this situation, if you have a mixer leaking, it is also not necessary to change it with a new one - in most cases it will be enough just to change the mixer cartridge or the ball with its fixings.
But more often, it is the cartridge that is found as a stop valve for such faucets, and not the ball - its price is lower, therefore, the cost of the entire plumbing device decreases and the demand for them is greater.
Note. From a technical point of view, when installing plumbing equipment, there is absolutely no difference what type of stop valves are installed there. This affects solely its operation and repair.
Replacing the tap on the wall

So, let's learn how to unscrew the wall-mounted mixer - this can be a faucet:
- over bath or shower;
- with valves (levers);
- joystick (single lever).
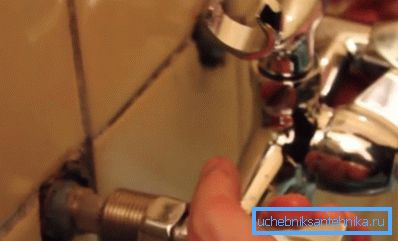
First of all, we will need to unscrew the two nuts with which it is attached to the fittings of cold and hot water, and this can be done either with open-end or adjustable wrench, but best of all, with a gas wrench so as not to fit the size, besides the nut planes can be erased. After removing the nuts, the tap is also removed.
After you unscrew the faucet itself, you need to unscrew the old eccentrics from the fittings, since you can only change the faucet with its dimensional configuration.
That is, the sizes of eccentrics differ from each other, depending on the model, but this is basically not the thread, but their length, although the thread can also vary from the side of the tap, and from the side of the fitting, its diameter remains unchanged - 1/2 inch.

In order to unscrew the old eccentrics, you can use a thin wrench on 12.13 or 14 - between the threads. On a curved neck, there should be two parallel planes to grip.
But in old fittings of this type they are not always found. Therefore, the most reliable option is pliers - stick one sponge inside and turn it counterclockwise. And if the thread is stuck, then between the handles, as a lever, you can insert any key.

Now let's figure out how to put the mixer and for this the whole procedure will need to be done in the reverse order, only here you have to take into account the possibility of leakage.
You wind a half-inch thread of the fitting with a fum-tape (as a last resort, you can tow), and spread the paste on it on top of it or inside the fitting.
This will allow you to adjust the eccentric right-left without the risk of leakage (depending on the thickness of the tape, you need to make 4-8 turns). Screw the eccentrics into the fittings, only here it is better to use the open-end wrench on 12, 13 or 14.

Now we will learn how to fix the mixer to the wall - for which we first wind the fitting on the eccentrics just for fitting and find the most suitable position. Then we remove it back and put on decorative washers that block the mounting holes in the tile.
After that, we again tighten the nuts of the mixer, we only do it gradually, so that there is no misalignment - each nut is alternately 2-3 turns round (there is no need to rewind here, since there are rubber seals there). Tightly clamp the nuts with your hands and then lightly (with 0.5-2.5 turns) hold them down with a key, after which you can open the water for testing.
Note. If you do not just change the taps, and make repairs, then you may be interested in how to make a hole in the tile under the mixer. To do this, mark where there should be a hole, lay the tile on the sand and drill it with a drill using a crown or diamond cutter, or a ballerina.
Replacing the sink tap

Now we will learn how to replace the mixer with our own hands at the sink or sink. You need to start with the dismantling of the hoses, but not with the crane, but with the fittings, since, most likely, you will replace them with new ones.
After that, we look at how the crane is fixed at the bottom of the pedestal - it can be a nut, as in the top photo, or maybe a figured washer, which is pressed using two studs with locknuts - these fasteners need to be removed.
But there may be a problem due to the ingress of water (alkaline, saline and limescale deposit), then you will need to decide how to unscrew the stuck bolt in the mixer. For this, it is best to use a special liquid WD-40, pouring a threaded connection abundantly at it, and leaving it for 10-15 minutes - after this there should be no particular problems.

To install a new device, you first need to fasten the hoses (there is no need to wind there, as there are rubber seals on the needles). Of course, it is better to take other hoses - from corrugated steel or metal-based laminate.
Their price is higher, but at the same time the operational resource is extended. Insert the mixer into the hole of the pedestal and tighten the fastening nut or figure washer from below. Then fasten the hoses to the fittings and open the water for testing.
Conclusion
Now you know how the faucet is disassembled to replace it, but do not forget that before such actions it is necessary to block not only cold but also hot water. It is good to check for leakage with toilet paper - you apply it to the joint, and at the slightest leakage it immediately darkens. Successes!