What is applied to the faucet in the bathroom or kitchen
When connecting plumbing equipment, it is necessary to follow certain rules so that its operation is subsequently convenient and comfortable. You must admit that constantly running taps are not only irritants, but also “throw money away” family money. In this article we will talk about one of the stages of such a connection - the flow of water from the central water supply to the faucet. This can be two options - flexible and rigid eyeliner for the mixer, so we will deal with them in more detail.

General concepts
It is accepted to call pipes or hoses with the help of which it is possible to direct water from the system to the mixer. It is necessary to approach these elements responsibly, as the uninterrupted operation of sanitary equipment will depend on them. The cost of liner depends on the quality of the material from which it is made, and the manufacturer.
Flexible eyeliner
Two or three decades ago no one had heard of this method of connection; mainly, rubber pipes were used to connect valves to pipes, which over time led to breakouts and accidents.

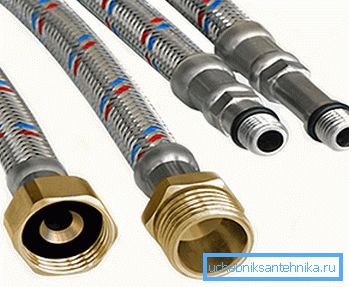
Currently, special plumbing flexible hoses are used for this purpose, which can be:
| Bellows |
|
| Metal braided | 1. Product design:
|

Types of bellows and its characteristics
There are two - the usual and "folding". The first one has a fixed length; in the second one, it can be increased by stretching the corrugated casing to the size required for connection to the mixer.
The bellows has a standard size of 90-150 mm, from 140 to 250 mm and 200 mm -355 mm.
- This type of sanitary equipment performs the function of connecting sanitary equipment with a rigid construction of water supply.
- Working pressure - up to 20 atm, temperature difference -50 - + 250? С, water flow rate should not exceed 36 l / min.
Tip: when purchasing a product, tell the seller that you need an “under the mixer” liner, since the method of its connection will depend on it.

- Equipment resistant to:
- compression in any direction;
- kinks at the ends of the protective sleeve;
- burning and high temperatures;
- embrittlement;
- wear and tear.
- In case of use with low quality of water and in heating systems, it has resistance to oxygen diffusion, prevents breakage of radiators and the occurrence of emergency situations due to loss of tightness.
- This type of connection is considered versatile and has proven itself with other types of pipelines, for example, gas.
- This product from European manufacturers can not lose its margin of safety even for 20-25 years.

Among the shortcomings it is necessary to distinguish noise and humming due to the vibration of the corrugated sleeve. This is especially enhanced when simultaneously turn on several points of water flow.
Tip: You can correct the deficiency by buying a larger diameter hose pipe, for example, replacing a half-inch hose with a three-quarter.
If you get an eyeliner with a plastic corrugated sleeve, this problem does not arise.
Bellows connection
Below offers step by step instructions that allow you to understand the day of the process:
- The connection point must be easily accessible.. This is necessary not only for installation or quick elimination of defects, but also as a preventive measure.
Tip: Inspection of connections should be carried out at least once every 6 months or a year.
- Before starting the installation, inspect carefully the purchased sleeve and sleeve. They must be intact and free from defects. The integrity of the product could be impaired during transport or careless storage.
- Look at the quality of the compression fittings at the end of the hose, especially if you had to purchase the liner unknown manufacturer. Its price will speak for itself, although in appearance it will be difficult to distinguish it from real branded products. Remember only that the quality assurance in this case is very doubtful.
- Read the installation instructions. Most of the required parameters are indicated in the passport of the product, for example, external diameter. The bending radius of the connected eyeliner must be not less than the value of the last multiplied by 6.
Tip: do not twist or tighten the liner either during installation or after installation.

- Be sure to check that only parts that do not have electrochemical metal corrosion are in contact with each other when connecting. For example, they must be of the same material or the connection was between brass and copper parts.
- Check after installation tightness of the connection. If drops are found, tighten the nuts more. Do not exceed the recommended tightening torque - up to 0.4 Nm.
- The end part of the mating part must be smooth and not have sharp edges.
- First screw the nut with your own hands, and then use a wrench.
Advice: do not use gas keys in work, they will surely damage the cap nut due to their method of use.
Hard eyeliner
It differs from the previous version in that the mixer is rigidly attached to the supply pipes. This type of installation is attractive from the point of view of aesthetics, besides installation in this case is quite simple.

Installation process
- Determine the position of the mixer, taking into account the dimensions of the bath. Typically, the bowl has a width of 700 mm, and from the floor, taking into account the legs, the distance is 500-600 mm.
- Select the center point of the mixer, taking into account the size of the bath, for example, dividing the width by 2. Measure from the floor 950-1000 mm and also put a point. At the intersection of these two lines will be the center.
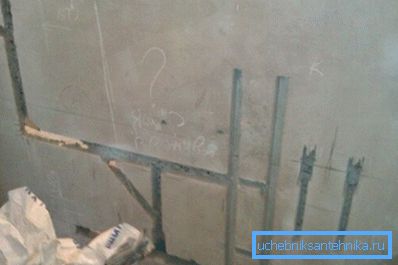
- Prepare a wall for installing pipes. Mark on it the strips where they will pass, and make the strobe using a perforator and a nozzle.

Tip: Do not forget that the system has knees, which should be noted in advance in the drawing.
- Collect all pipes. It is difficult in this nothing, just be careful and consistent.
- Screw eccentrics. The reel at this stage is not yet necessary.
- Install and lock the mixer. Between landing points, the width of all models is the same.

- Align the faucet to the next one, put the pipes and make sure that the system is positioned exactly as you would like.
- Fill the strokes with mortar and level the surface with the cement mixture. In this case, do not forget that you may have another layer of ceramic tiles.
Tip: Pay attention to the fittings, they usually have holes designed to pull out and fix the liner.
- Remove the mixer after the solution has hardened. Finish the surface by putting plastic or tile on it. Finally, install the mixer, remembering to seal the pipe threads with a heel or fum tape.
Conclusion
This article was about two types of water connections from the water pipe to the mixer - flexible and rigid. The bellows version was considered in more detail, since it is the most common today.
Now you know how to connect the mixer to the water pipe yourself using a different type of connection. The video in this article will provide an opportunity to find additional information on the above topic.