What to do if the mixer drips
The situation when water begins to ooze out of the mixer in the kitchen or in the bathroom is quite common, and this is due to a number of factors: from normal wear to poor water quality and lime formation. It is worth noting that this problem can be solved independently, it will save money and speed up repairs, because plumbers often have to wait for a long time.

What is needed for the work
Regardless of the modification of the device, you will need approximately the same set of tools, but consumables may differ significantly:
| Screwdrivers | A cross-shaped and flat screwdriver should be at hand, since it is unknown which slot will be under the plug. In addition, using a flathead screwdriver, you can remove the gaskets and carefully remove the soured elements of the system. The size will suit the average, although small bolts are sometimes found |
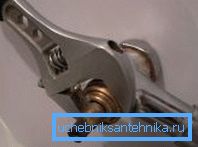
| Plumbing key | Universal tool with which you can unscrew a nut of any size and any configuration. That is why the wrench is so popular among plumbers and in demand in other areas. In the extreme case, you can pick up a regular spanner key of the appropriate size |
| Consumables | This could include new rubber pads, fum-tape and other parts of devices. You can purchase a universal kit or pick up individual seals. If repairs need to be done urgently, but there are no consumables, you can get out of the situation like this: take a piece of rubber or leather and cut a gasket to fit the size of the old ring |
| Rags, etc. | Often it is necessary to clean the internal elements of rust, limescale and accumulated dirt. To do this, you will need rags, and in the most difficult cases - special compositions (sometimes the taps turn sour so that they can be unscrewed only with the help of a liquid key) |

The most common problems
When considering the question of why water from a mixer tap drips, it is necessary first of all to determine its type, it depends on what works will be required. All cranes can be divided into two options - valve and lever, it is their repair, we consider.
Ventilation Products
The most common malfunction is when water drips from under the mixer handle.
You can fix it as follows:

- First, the plug is removed from the valve head and the fixing screw is unscrewed., after that, the element is removed, and we have direct access to the locking unit - crane box.
- The crankshaft turns out counter-clockwise, if it is long standing and stuck to the thread, then you should not use force, as you can damage the case, and this leads to the replacement of the structure as a whole.
- After removing the node in its lower part, the old gasket is removed and a new one is installed.. The size must be exactly the same as that of the old ring, otherwise the quality seal will not be achieved.
- If after replacing the leak is not eliminated, you need to disassemble the valve again and check the condition of the stop part - the seat, it can form a raid, which prevents the elastic gum to fit. The cone cutter will help to solve the problem, the saddle is carefully cleaned with it.
Tip! To avoid work on the replacement of high-wear rubber bands, you can replace the ceramic crane axle box. It is much more durable than rubber, the main thing is to pick up a knot of the appropriate size, it will ideally fit without any alterations and modifications.
Also, water often leaks from the connection of the gander to the body, such a malfunction is also simply eliminated with your own hands.
Instructions for the work is extremely simple:

- The cap nut is unscrewed in the first place, it is usually not clamped very tightly and can be unscrewed even by hand with some force applied.
- Next, you need to carefully examine the sealing ring (in modern models there are usually two, if there are signs of wear, the seals should be replaced.
- If the rubber rings are in good condition, a expandable plastic ring is checked, which prevents water from leaking through the union nut, if it has damage and production, it must also be replaced.
- The assembly is performed in the reverse order; all work is done carefully so as not to damage the pipe threads.
Lever Models
This option is very popular due to ease of operation and ease of adjustment of the pressure and temperature.
Consider how to fix the mixer so as not to drip water:
- First of all, the fixing screw is unscrewed, after which the handle can be removed, if it does not give in, slightly pry it with a screwdriver.

- Next, remove the decorative ring and unscrew the nut, which is located under it. Its size is quite large and it is most convenient to work with a plumbing key; all these operations should be done very carefully so as not to damage the ring.
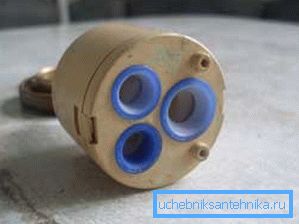
- After unscrewing the lock nut, you can remove the cartridge, it is non-repairable, so you have to replace the entire assembly. When choosing a new part, pay special attention to the location of the releases on the product; they should coincide with the holes in the valve body.

- You should also inspect the inside of the case for the integrity of the rubber seals and the absence of corrosion. If some parts are damaged, the element should be replaced (most often this problem occurs with a gander).
Tip! Whatever type of construction you repair, do not forget to shut off the water supply pipe valves in advance and drain the water from the mixer.
Conclusion
It is possible to eliminate the malfunction of the mixer independently, especially since the price of consumables is low and the work is not difficult. The video in this article will help to understand the peculiarities of the process and to understand its nuances.