Installation of storage tank for sewage
Currently, many different types of sewage cesspools have been developed. What only they do not build. Concrete rings, cinder block, old car tires, metal and plastic containers, ready-made factory septic tanks are used. In general, each person uses everything that is at hand for construction, and install them both at the cottage and in a private house.

In a small country house, with a small number of people living, it is advisable to install a storage tank and connect a sewer to it. Due to the low water consumption, the capacity will be enough for a small sewage system, and it will not be difficult to install it. In this article, let's look at how the installation of storage tanks for sewage.
Types of storage tanks

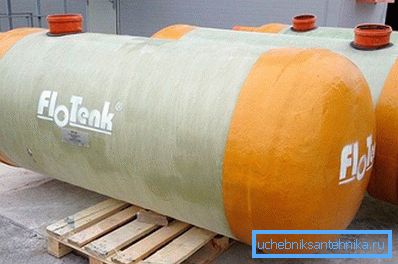
The cumulative tank is designed for the collection and storage of drain water from the sewer system, followed by pumping Basically, metal or plastic barrels are used for these purposes. In the absence of such, the capacity can be built from concrete rings, cinder block, automobile tires. Only in this case it is necessary to perform a good sealing so that the wastewater does not leak into the ground.
Selection of space for capacity

When choosing a place for the installation of a tank, first of all, provide free access for the recovery truck. After all, sooner or later the filled tank will have to be pumped out. It is better to install it below the level of the house from the back side and close to the foundation. The distance should be no more than 5 m. If there is no possibility to put a tank at such a distance, then an additional manhole must be installed on the sewage between the house and the tank. In the house, install a tank filling alarm sensor to pump out in time.
Installation of storage tanks

Installing containers from different materials comes down to one thing: you have to dig a hole. Here are just a little different installation due to the use of different materials:
- To install containers from metal barrels, dig a hole with a diameter slightly larger than a barrel. To increase the volume of the container, the barrel can be vertically welded to each other. And leave the bottom only in the lower barrel. The depth of the pit is measured by the height of all the welded barrels. At the bottom of the pit poured sand pillow 10? 15 cm. As you know, metal tends to rust and rot. Therefore, to protect the structure from the effects of water, before installing the installation cover with bitumen or paint. Install the finished container in the pit. In the side of the barrel, where the sewer pipe will enter, cut a hole along the diameter of the pipe. Insert the pipe into the barrel, and seal the joint with sealant. Now you can fill the gap between the walls of the barrel with the pit. As the soil goes to sleep, tamp down each layer after about 25 cm. Cover the container with a lid with a hatch on top.
- The installation of a container of concrete rings is performed on the pre-concreted bottom of the pit. Concrete rings lowered with a truck crane into the pit and seal all joints with silicone or cement-based sealant. You make a waterproofing of the outer walls of the rings, let down the sewage system, fill the gap between the walls of the tank and the pit with earth. From above you lay a reinforced concrete cover with a hatch. It should protrude above the ground.
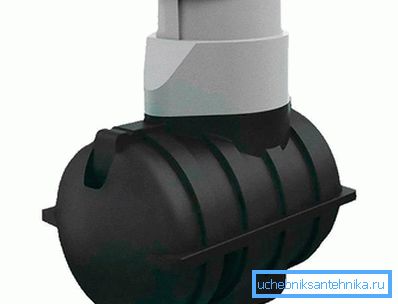
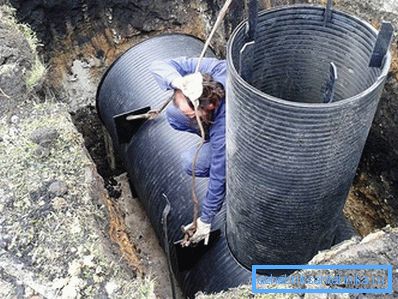
- Installation of plastic containers is carried out on the same principle. Dig a hole with a larger diameter than the tank, about 10–15 cm on each side. You die out to the throat depth. It should be above ground. The bottom of the pit can be made of sand pillows, as mentioned above, but is there one problem? Plastic is a fairly light material, so in the spring, with the rise of groundwater, the tank can push out of the ground. The best floor option for plastic containers can serve as concrete. Concrete the bottom of the pit with anchors. When the concrete hardens, install the container, tying it with straps to the anchors. Connect the sewer and seal the entrance to the pipe. Backfilling is carried out in layers of 20? 30 cm. As you backfill, you fill the container with water so that the pressure of the earth does not crush the soft walls of the plastic. You can fill it with a mixture of sand (6 parts) and cement (1 part), tamping each layer. Put a lid on the neck of the container and the work is done.
- To build a tank of brick or cinder block, dig a hole in the shape of a future tank. Concrete the bottom, and lay out the walls in a checkerboard pattern. Waterproofing walls make hot bitumen both inside and outside. Make a sewer supply, and fill up the gaps with earth. On top of the container can be covered with sheet metal or knocked down shields of wood.
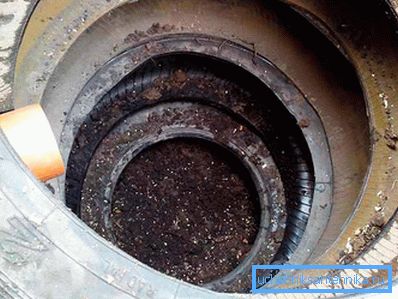
- A small volume of cumulative capacity can be built from old automobile tires. When laying them on top of each other, pour bitumen between them for sealing.

Tip! Currently, there is a lot of interest in horizontal plastic containers. They are equipped inside with partitions with overflow holes. After passing several compartments, the filtered water can be drained into the ground. This type of container is installed in the same way as a regular plastic container, but with obligatory fastening by straps to a concrete slab.

As you can see, the installation of the storage tank is a fairly simple process and every owner of his yard can do it. The best option for installation of the above containers is plastic. It is lightweight, compact, easy to transport, and most importantly, it has the longest service life. Watch the installation video and follow the instructions to get started.
Video
This video shows how the sewage tank was buried and insulated in the area: