Heating cable for drain
In winter, icing of the roof often occurs, and melt water melts and freezes to form hanging icicles. But this does not only threaten accidents, the water frozen in the gutter can destroy it, because the water expands when it freezes. Do not be surprised if you see on your frosty winter morning that your drainage system has burst. In this case, it is necessary to proceed to repair, and this, in turn, will lead to unforeseen wastes.
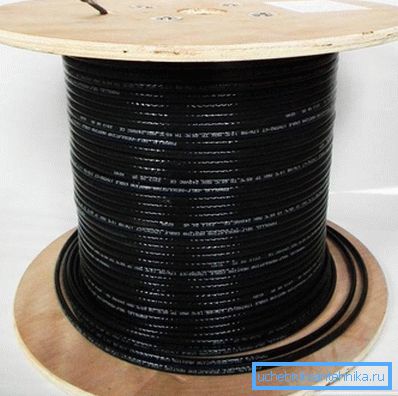
Before the cold winter period begins, care should be taken to ensure that such troubles do not occur. But what can be done so that the liquid in the drainage systems does not freeze and icicles do not form? We'll have to organize the heating drain. This will not only keep it intact, but also protect you and your household from accidents. This will help you heating cable for drainage. Let's find out which cable for drain is better to choose, and how you can do the heating of the entire system with your own hands.
From where frost and icicles appear
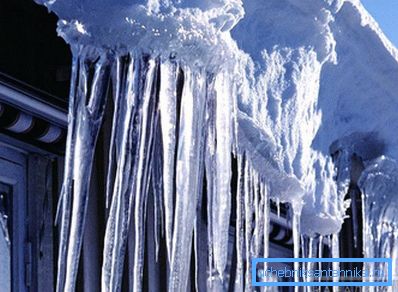
Where does ice on the roof come from, because in the winter time it doesn't rain, and no one pours water on the roof from above. Two factors influence frost formation.
Temperature difference day and night. Especially this factor has its effect in the early period of spring, when during the day the snow is affected by the heat of the sun, and it melts on the roof, gradually flowing into the water drainage system. With the onset of night, the air temperature changes, reaching a point below zero, as a result of which the melt water begins to freeze. This is how ice forms in the gutters and pipes. The same applies to the roof overhang when icicles hang from it. Advice that the entire drain design is not designed to withstand the extra weight. If it does not burst in a certain part of the expansion, it can easily break, unable to bear the weight of ice. In this case, you have to completely change it.
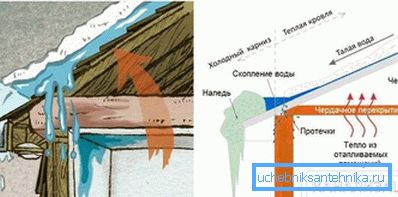
The effect of "warm roof". Often, developers make roofs or warm attic. If the roof is poorly insulated, heat loss may occur. It turns out that even in winter, when the temperature is below zero, the snow begins to melt, as the room is heated and, although a little, the roof cover heats up. Well, then the scheme is the same as in the first case: when flowing down, the water cools, and then freezes again. The consequences are the same. But in this case, the installation of the heating cable in the drainage pipes does not eliminate the problem itself, but only the consequences: the formation of ice and icicles. It is better, of course, to solve the problem itself, and not a symptom, by warming the roof.
To prevent the roof from heating up in the winter, professionals advise making a so-called cold roof when the ventilated attic is not heated inside. Another point is to properly perform the roofing cake, where the insulation is chosen with sufficient thickness and there is a ventilation gap. Nevertheless, it is not a 100% guarantee that the problem will be completely solved. For reliability, it is better to perform heating of the drainage system. But the question arises, which cable is better to choose?
Choosing a heating cable

To prevent the formation of frost on the overhangs and in the drainage system, heating cables are used, which are becoming more and more popular nowadays. But how to choose such a cable so that it effectively performs its task and is economical? To begin with, it should be noted that there are two types of heating cables on the market that are suitable for heating drains:
- Resistive cable. It looks like a simple cable, which consists of a metal conductor covered with insulation. The peculiarity of the cable is that it has a constant resistance, a constant heating temperature during operation and constant power. Heating of the element occurs by connecting the cable to a closed circuit of electricity, that is, it works from the outlet.
- Self-regulating cable. This type has great potential for heating the roof overhang and water drainage system. It is more technological than resistive, and consists of a matrix (a heating self-regulating element), internal and external insulating shells and a shielding braid. The peculiarity of such a cable is that the matrix reacts to the ambient temperature and, when the temperature is lowered or increased, changes the degree of its heating.
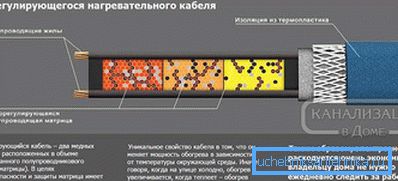
When choosing a cable for heating, you must take into account the specifics of operation, since it will be affected by the external environment and negative temperatures. Pay attention to the outer polymer shell of the product retains its strength and tightness in various conditions. Cables should have the following performance characteristics:
- Work at high humidity. The influence of moisture, which will always be present, should not affect the performance of the entire heating system. You need to carefully insulate cable connections to ensure that they are tight.
- High mechanical strength. An important indicator, because the external protective sheath will be subject to various external influences: this is the heavy weight of the snow cap, hail, birds who want to peck the cable, etc. The shell must withstand all the loads, preserving its integrity.
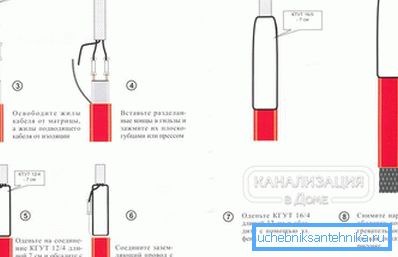
Any of the two types of cables can efficiently perform heating of drains and roof overhangs, because each of them has its own characteristics, advantages and disadvantages. To facilitate the task of selecting a product, let's consider these features.
Resistive or self-regulating
The principle of operation of resistive models is that when it is turned on, electrical energy is converted into thermal energy. The main difference of such cables is their affordable cost and reliability during operation. The fact is that the design of the cable is quite simple. There are models of single-core - lower power and strong - with increased power. Most often, these conductors are made of copper wire. However, so that during work it does not cause electromagnetic radiation, a special shielding shell is provided. It also performs the function of grounding the wire. To protect the wires from external influences and prevent short circuits, an external polymer sheath is provided.
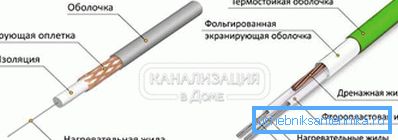
Due to the strength of the electric current that goes through the conductors, the surface of the cable heats up, as a result of which it gives off heat to the external environment, in our case, to the chute and the overhang of the roof to melt the snow. Let's also consider some features of the operation of these heating elements:
- The maximum length of such a cable is about 200 m.
- Cutting the cable, again connecting it, is prohibited, because it may affect its performance. It is recommended to perform all calculations in advance, find out the total footage you need and select the optimal length of the solid cable.
- When buying, it is much more efficient to purchase a complete set at once, in which there is not only the cable itself, but also control devices and fastening.
These cables have some significant drawbacks. One of them is the high consumption of electrical energy, which will affect your utility bills. To ensure good heating, we need models whose nominal power ranges from 100 to 180 W / m. Another significant disadvantage is that the conditions in which different parts of the cable may be located differ. Some area may be in the air, another under the foliage, the third under the snow, etc. But the snag is that the heat transfer from the entire cable is the same. Therefore, to melt the snow you need a certain amount of heat, which will be wasted in other areas that do not require such warming up. It turns out that heating the roof and drain, you are carrying some losses and heating is inefficient.
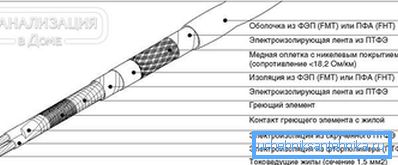
An alternative is a type of such cables with zonal heating of the cable. Due to the design features, the heating of the cable does not occur across its surface, but only in certain areas. Another solution is to choose cables with different resistances.
Tip! The average price of such products mainly depends on their configuration and power. For example, the most common cable without additional equipment can be bought for 100 rubles per 1 m.
A completely different thing is a self-regulating cable. This option is much more economical and more profitable. It is ideal for heating drains, since the main advantage of the cable is that it consumes less energy and regulates the power of the current itself, depending on the ambient temperature. It also consists of two conductive wires, creating a resistive effect. Only these wires are connected by a special matrix, which reacts to temperature fluctuations. The lower the temperature, the more the cable heats up, and vice versa.
But, there is one significant nuance that concerns the heating of the drain with this cable. The main disadvantage of such cables is their high cost, so installing such a cable for drains is very expensive. Why? Because in winter the ambient temperature will always fall below zero. It turns out that the cable will work around the clock at the maximum of its power, and there will be practically no possibility of self-regulation. As a result, in terms of functionality, the effectiveness of such a cable comes down to a traditional resistive cable, but you only paid for it several times more expensive.
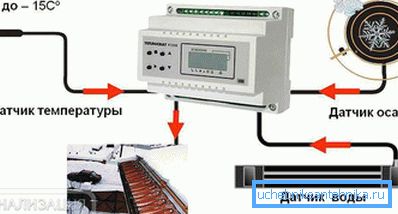
Nevertheless, this can be corrected if you additionally purchase an adjustment unit for the strength of the incoming current. If you switch such a unit with a temperature sensor, then you can adjust the heating power yourself, depending on the outside air temperature, which gives you special possibilities.
Features self-regulating cable:
- great value. Medium models whose power is 15 W / m. will cost you from 210 rubles for 1 mp;
- safety and reliability;
- economy and simplicity;
- Over time, the polymer insert will break down, as it has a certain number of work cycles. After that, the degree of current conduction will significantly decrease.
Considering all the factors listed above, you can decide which heating cable to prefer. It all depends on you and your desire. Professionals recommend combining self-regulating cables with resistive, then the efficiency and quality of heating will increase. For example, resistive cables can be used in the roofing part, which have a constant temperature and efficiently heat the overhang from snow and ice. But self-regulating cables can be mounted in the drain system in the gutters.
Tip! If we talk about the calculation of power and power consumption of cables, then for resistive models the best option are products whose power is 18–22 W / m. When choosing self-regulating cables, pay attention to models 15-30 W / m.
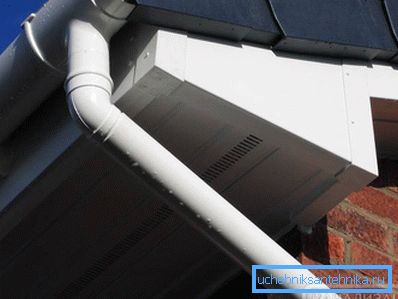
Tip! Consider the fact that if your drainage system is made of polymeric materials, then the maximum power of such cables is 17 W / m. and no more. Otherwise, there is a risk that the drain may be damaged by excessive heat.
All you have to do is calculate the right amount of material and purchase it in the store.
Components of the heating system for drainage
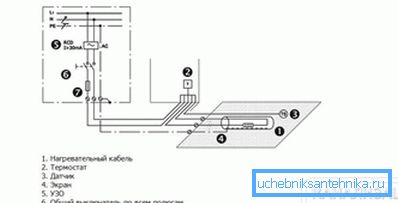
You should know that in addition to directly heating cables, the heating system includes other components:
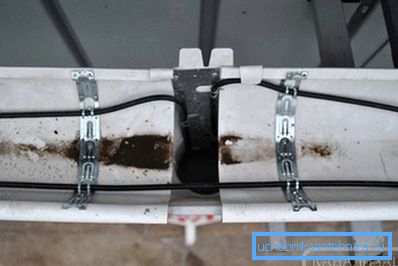
- Fasteners to fix the cables in place.
- Switchboard. This device includes: a three-phase circuit breaker, a protective device for switching off the system with a sensitivity of 30 mA, a four-pole contactor, a single-pole circuit breaker for each phase, a circuit breaker for the thermostat circuit and an alarm lamp.
- Distribution network components: power cables that feed heating cables, signal cables that connect the thermostat sensors to the control panel, wiring boxes and couplings to ensure the tightness of all connections.
- Thermostat To regulate the operation of the entire cable system for heating, you can use two types of devices: a thermostat directly, which powers the system at a given temperature range, and a meteorological station. The difference of the weather station is that in addition to the set temperature range, it can control the presence of precipitation and its melting on the roof. In its composition there is not only a temperature sensor, but also a humidity sensor. Some models have both a humidity sensor and a temperature sensor inside.
The thing is that when a conventional thermostat is used in the cable system, you will have to monitor the situation: if there is precipitation on the roof, start the system manually, and if they are not, turn it off. Thanks to the meteorological station, the entire process of work can be easily automated and the device can be delayed to turn off. But still, if we talk about the price, it is more profitable to buy thermostats and do all the work manually. Now let's learn how to mount such a system personally.
Technology installation of the heating system
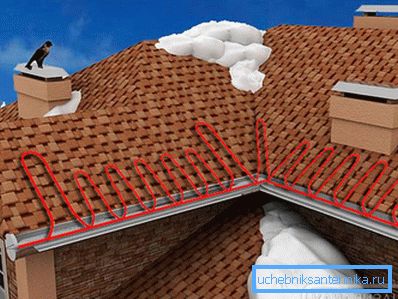
To begin with, let's see into which zones the heating cables for the water drainage system need to be laid. These are mainly places where melt water comes off, and areas where frost is formed. What are these places:
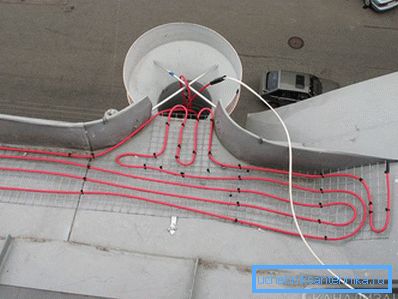
- Gutters. It is obligatory to lay the heating cables in the channels in one or several filaments along the entire length.
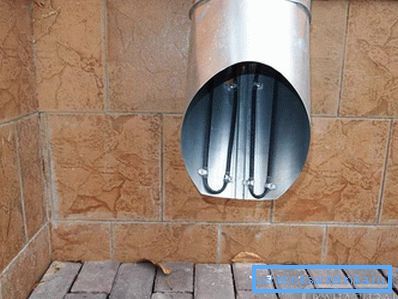
- Drainage pipes, exhaust from the gutters. Additionally, it is necessary to strengthen the craters and the exit of the pipes, where ice is most often formed. Usually, two strands of cable are placed in the pipe itself.
- Endova roofs. The cable is laid up and down. The length is chosen at least 1 m from the start of the overhang, but it is recommended to do this by 2/3 of the total length of the valley.
- To prevent the formation of icicles and ice on the eaves of the roof, the wires are stacked using the “snake” method. This scheme includes laying a heating cable along the edge of the cornice. It should be borne in mind that on hard surfaces the step of a snake depends on the multiplicity of the pattern, and on soft roofs, depending on the power that the cable gives per square meter. The height of such a triangle is chosen so that on the surface that is heated, no cold zone is formed. Otherwise, ice may appear in such places.
- Kapelnik on the line of separation of the liquid. It is necessary to fasten one or two threads, depending on the size and design of the drip.
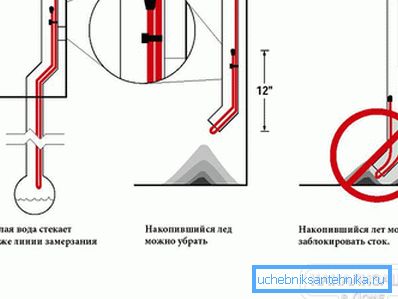
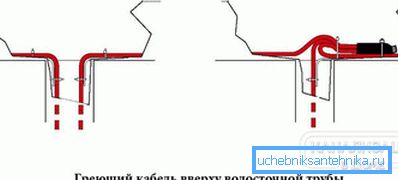
And now let's take a detailed look at how to equip the cable heating system drainage. You must install the system in accordance with the following rules:
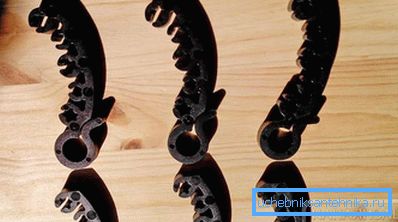
- To fix the heating cable in the gutters, you should use a special mounting tape. The strips of tape, installed across, securely hold the cable on the gutter. The tape mounting step for different cables is different. For example, a self-regulating cable needs to be fixed in increments of 50 cm, and a resistive cable is 25 cm. The tape is fixed on the chute with rivets, and in order not to break the tightness, these places are treated with sealant.
- In drain pipes, cables are fixed with mounting tape or heat shrink tubing. In the case when the height of the pipe is more than 6 m, it is recommended that the cable be additionally connected to a metal cable in an insulating sheath in order to transfer the entire load to it.
- In the funnel and at the end of the pipe, the heating cables are attached using the same mounting tape with rivets.
- In the roofing material, the cable must be fixed with mounting tape on the sealant. There is another option: in a soft roof, fastening occurs due to special SLT-C clips, which are fastened with screws or nails to the roof. But there is a possibility that the roof will start leaking, so everything must be sealed with silicone sealant. In the metal roof such clips are attached to the ribs.
- Before fixing the elements of the heating system, you must inspect all the installation sites. They should not be foreign objects, sharp edges can damage the cable.
- Cable sections should be checked for compliance with their length heating zone.
- If during the test it turns out that the cable is too long or not enough length, the section must be cut, removed or added, muted, expanded and secured.
- After that, it is necessary to install the mounting boxes, ring them up and calculate the insulation resistance of the sections.
- Next is the installation of the thermostat sensors, power and signal cables are laid.
- The next stage is the installation of the control panel.
- Now the resistance is measured and the power and signal cables are ringing.
- For reliability, it is necessary to test whether the protective shutdown device works.
- After that, it remains only to adjust the thermostat to the desired temperature range and perform a test run of the entire system.
That's all, now your drain and the roof overhang is heated, which will allow you to solve the problem of freezing of water in these places, as well as the formation of snow and icicles. Be careful doing all the work at height. Use a reliable stepladder or scaffolding.
Video
How to install the cable PTC for heating the drain, see in the video: