Heating cable for pipes: 3 types of devices for active
Water heating cable for pipes can be an excellent solution in a situation when it is necessary to protect their contents from exposure to low temperatures. Of course, the operation of such systems requires fairly large amounts of electricity, but in some cases such costs are quite justified.
So that you can navigate in all the variety of cable products and correctly apply your chosen models, in the following sections we will provide the most relevant information on this topic.
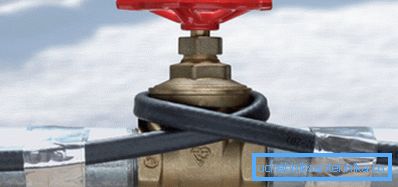
Cold pipe protection
The laying of pipelines in the open air and in unheated premises (in attics, basements, etc.) must be accompanied by measures to protect against low temperatures. The fact is that in the cold the liquid freezes, and this, in turn, can lead to full or partial blockage of the pipe, and sometimes to its rupture.
To prevent such problems are usually used in the following ways:
- You can lay pipes below ground freezing. As a rule, in a temperate zone at a depth of about 1.5 m, the positive temperature is maintained even in severe frost, so there is no need to worry about freezing water.
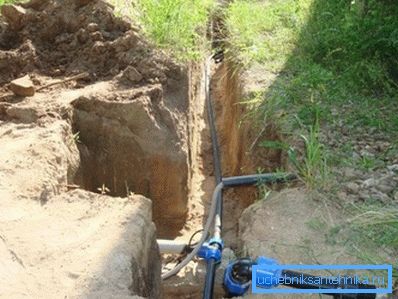
Note! In the northern regions, pipes have to be buried much stronger, and in the permafrost zone this method is generally not applicable.
- With open laying, as well as when placed at a shallow depth of communication wraps insulating materials. Most often, glass wool or mineral wool covers are used for this, but recently foam polystyrene constructions have also become popular.
- Finally, a special cable can be installed on the surface of the pipeline (or inside it) to guarantee frost protection.. With the passage of electric current, this cable heats up, giving a significant part of the heat to the pipe and its contents.
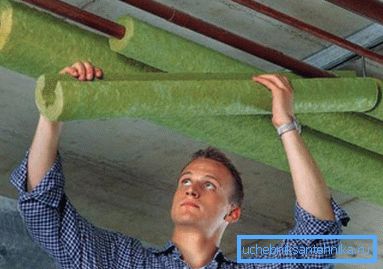
Despite the sufficient complexity in implementation and high costs, the third method is the most effective. For this reason, cable heating pipelines are used where increased demands are placed on the stability of the water supply and sewage systems.
Cable types
Resistive
The simplest system that is used to maintain the optimum temperature of the pipeline is a resistive cable.
Its design includes the following elements:

- Nichrome free conductor with fixed resistance. With the passage of current heats up, being the main source of heat.
Note! Depending on the number of such conductors, single-core and two-core models are distinguished.
- Photopolymer insulation that protects the conductor from the circuit and provides heat transfer to the braid.
- A braid made of copper wire that performs the function of uniform distribution of the selected conductive residential heat. It may also be a shielding layer.
- External insulation with good thermal conductivity. Prevents corrosion of copper and nichrome parts, reliably protecting them from moisture and weathering.
A key feature of a resistive cable is that it is turned on and off using a separate thermostat. The functions of this device are regulated in automatic mode according to the readings of the installed temperature sensors.
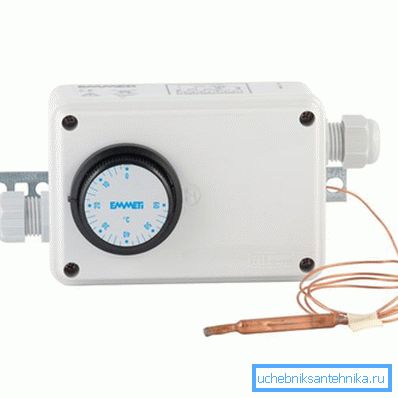
The presence of a thermostat and temperature indicators makes the system quite vulnerable. When at least one of these nodes is disconnected or fails, the cable goes into continuous operation mode, and as a result, it quickly fails due to overheating.
Self-regulating
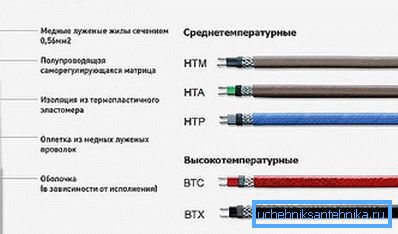
The above-described drawbacks are devoid of self-regulating systems for heating pipes:
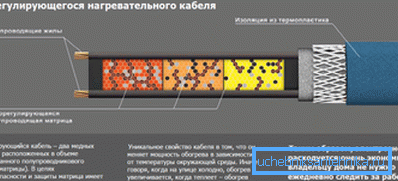
- As with resistive cables, the source of heating are conductive wires of nichrome or similar alloys.
- The veins are placed in the insulation channels of polymers with high thermal conductivity.
- A semiconductor matrix is located between the channels, depending on temperature: the more it is heated, the less conductive paths are formed in it.
- Thus, the adjustment of the cable is carried out automatically: when the pipe cools down, the matrix intensively conducts current, and the conductors heat up more. The higher the temperature rises, the lower the conductor properties of the cable will be, so the risk of overheating and melting of the conductors is minimized.
Note! An additional pole of such a system is the absence of a thermostat and sensors.
The key disadvantage of self-regulating heaters is their relatively high price (about 200 rubles per linear meter). However, the reliability of the system usually compensates for such costs.
Internal
A separate group of devices consists of internal cables.
Unlike the more popular outdoor ones, they are mounted directly in the cavity of the pipe, and are characterized by much greater efficiency due to the minimization of heat losses.
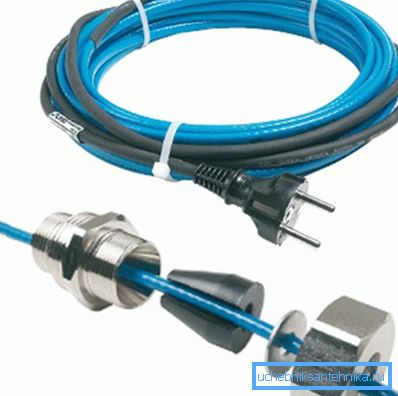
- As the main source of heat, a special self-regulating heating cable is usually used for installation inside the pipe. Such models are equipped with more dense insulation with good moisture-proof properties, which allows them to protect metal conductors and dies from the circuit.
- Resistive models can also be used for indoor installation, but this is the exception rather than the rule.
- In addition to the cable itself, special couplings and glands for installation on the pipeline are usually included in the heating system kit.
- The device is powered from 220V mains. Sometimes the instruction recommends connecting the conductors through an uninterruptible power supply in order to maintain them in working condition during a power outage.
Installation techniques
Outdoor installation
Both external and internal conductors can be installed by hand.
In fact, the installation does not present any particular difficulties - you just need to follow some simple rules:
- For private houses we choose a model with a power of 30 to 60 W / m - in the temperate zone, it is simply not necessary anymore.
- Clean the pipe from dirt, dust and rust. For the most efficient heat transfer, we need the conductor to fit tightly to the metal or plastic.
Tip! If the polymer pipeline is heated, then before installing the heat transfer elements, the pipe should be wrapped with foiled material. So heat will be distributed more evenly, and the risk of melting PVC or polypropylene will be reduced to a minimum.
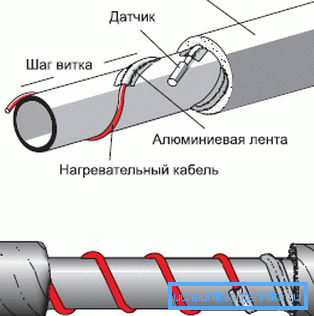
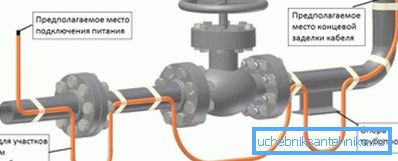
- We lay the cable along the pipe (with a straight or wavy line) or wind a spiral from it in increments of up to 40 cm. When using resistive models, in no case do we allow the conductors to intersect: they will blow out very quickly at the point of contact.
- Every 20 cm we fix the conductor with the help of metallized adhesive tape or a special heat-resistant bandage.
- To reduce heat loss, we glue the cable on top with an aluminum tape on a polymer base, after which we overlap it with a heat-insulating jacket.
Indoor installation
The internal installation is somewhat more complicated:
- We select a model whose length corresponds to the length of the heated pipe segment. Here it is necessary to take into account that the conductor should not pass through the valves, and plan the installation with this fact in mind.
Tip! Such systems can only be used in pipelines with an internal diameter of 20 mm and more.
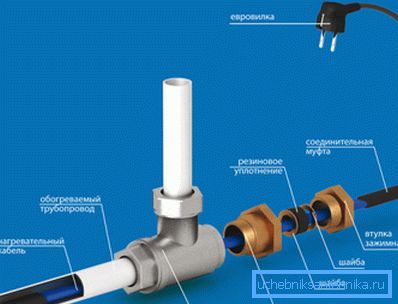
- We cut the tee of a suitable cross section into the pipe at the cable entry point.
- We get the conductor into the pipe, making sure that the heating part is completely hidden in the lumen.
- Fix the device in the tee using the included fittings and adapters.
- We connect the heater to the mains using a plug or switchboard.
If a self-regulating cable was used, the test run can be performed in any situation. But it is desirable to test resistive models and use them only when filling all pipes with water, otherwise the risk of overheating increases significantly.
Conclusion
Applying a heating cord for pipes (as it is sometimes called a heating cable), we prevent water from freezing in winter. And this means that neither the reduction in pressure, nor the gusts of water supply and sewage will not be terrible for us even in the most severe frost. You can learn more about the principle of operation and the method of installation of the described devices in the video in this article.