How to close the pipes in the bathroom
Pipes that age with time, wear out and lose a more or less attractive appearance, do not add beauty to the bathroom and are not a designer decoration.
To make the bathroom more presentable, pipes need to be closed with decorative structures. Then we will discuss how to close the pipes in the bathroom so that this room is not inferior in its aesthetics to other rooms of the house or apartment.
Hidden gasket
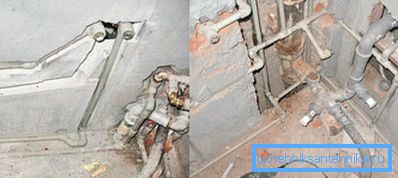
To mount pipes in the walls is how to hide the pipes in the bathroom so that they are completely invisible. This option is good because after the work done, the useful area of the room, which is not distinguished by the presence of extra square meters, does not decrease in overall dimensions. In order to lay pipes in the wall, it is necessary to knock out the grooves of a certain size in its surface in the direction of the wiring. The case is not easy, as it requires considerable physical effort. It requires the presence of a punch, sledgehammer and chisel. If the wall is concrete or built of modern brick, it is difficult to make a wall in the wall, but it is possible. If the walls of the house were built more than a century ago, due to the high quality of brick products, it is even more difficult to knock out a recess. The easiest way to hide the pipes in the walls, lined with foam or aerated concrete. Thick blocks are easily amenable to shock force punch or sledgehammer.
- First, the contours of the future groove, which should be slightly wider and deeper than the pipe diameter, are applied to the wall of the above material with a pencil, nail or other sharp object under a flat rail or level.
- Then the grinder needs to walk along the lines drawn to simplify the subsequent work.
- With the help of a sledgehammer and a sharp chisel or perforator, the grooves of the intended size are knocked out.
- Pipes that need to be pre-insulated with special insulation from heat loss in systems with hot water carrier or condensation in cold water supply pipelines are mounted using plastic or metal arc-shaped fixtures with self-tapping screws.
- In order to fit the water separating and regulating valves, as well as the water measuring unit, a strobe of the required size is made at the installation site.
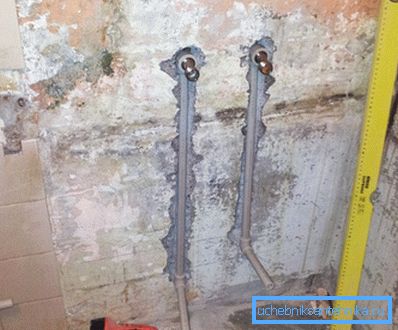
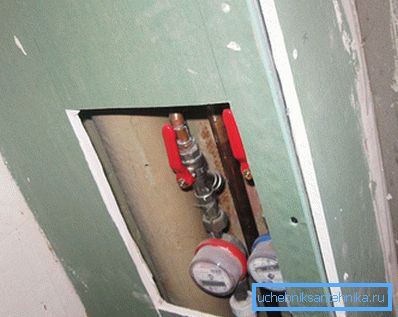
After installation of the pipelines, the wall is veneered, and a locker, a removable tile or rolling shutters can be installed at the place of the water meter and valves that block access of water to the apartment.
Tile
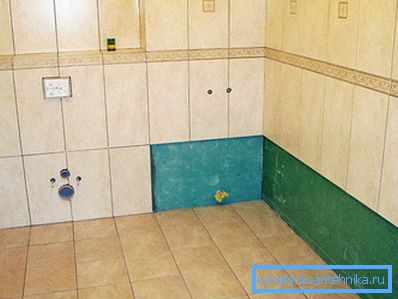
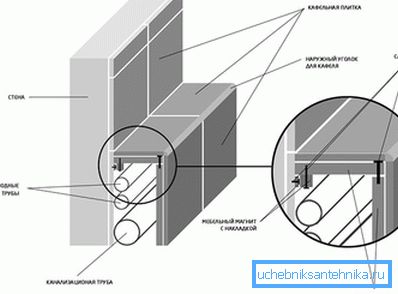
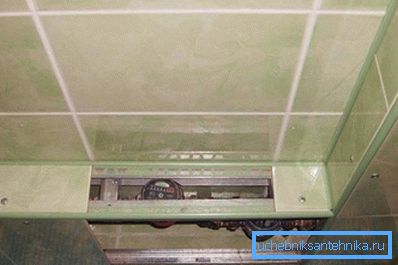
One of the effective ways to hide pipes in the bathroom is the option of using tile. It is mounted in the same way as when facing walls, only installation takes place on a pre-assembled frame made of a metal profile. For the production of the required profiles, metal, tile, drill with special drills, plastic corners, a hacksaw for metal or tile cutter and screws.
- First, a frame construction is assembled from metal profiles, which is a skeleton for tiling.
- Under the size of the frame structure is selected and, if necessary, tile is cut.
- In the tile under the screws special drills with the help of a drill holes are made with the expectation that they coincide with the same in the frame.
- The tiles are fixed with self-tapping screws on the construction of metal profiles, after which the corner sections are sealed with plastic corners.
Tip! The tile at the installation site of the water meter must be removed in order to record the flow rates.
Drywall
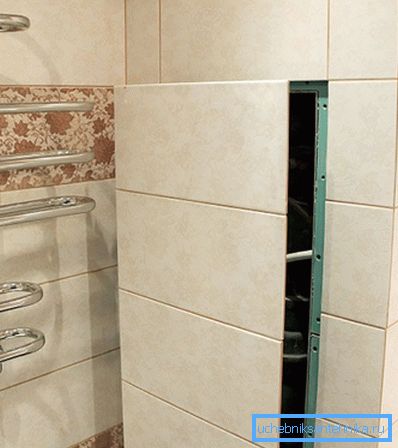
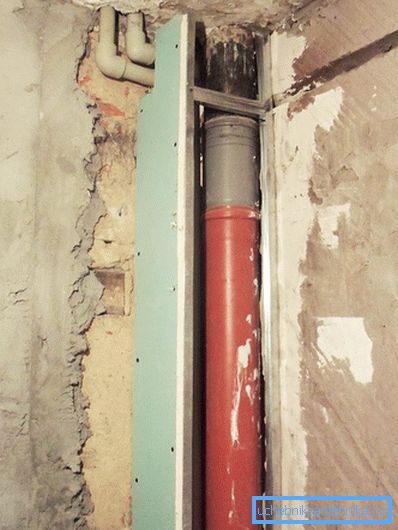
The most popular method of closing pipes in the bathroom today is the stitching of the plasterboard system. When using this material, you need to remember that the bathroom is always high humidity. This means that only moisture-resistant drywall is suitable for this purpose.
In addition, in the store building materials you need to buy pipe insulation. Before purchasing insulating material, which can be of different sizes, you need to carry out work on measuring the working dimensions of pipes. It is necessary to remove the outer diameters of both water and sewer pipes, as well as determine the length of the pipeline sections. The shape of the insulation material is tubular. The inner diameter of such a product must match the outer diameter of the pipe. The heat-insulating product is cut along, after which it is put on the pipe and secured with a simple construction tape.
- For the installation of drywall it is necessary to build a frame structure in the same way as for the tile, which you could read about above.
- In the bathroom with high humidity, it is desirable to use metal profiles. Moisture and temperature differences have the least effect on them. In addition, metal profiles are easily mounted. With each other, the frame elements are fastened only with screws, the profile can be attached to the wall using dowels or screws.
- Then, gypsum plasterboards are installed on the frame structure. Professionals practicing the lubrication of drywall on the inside with two layers of linseed oil. This procedure increases the repulsion of moisture material.
- In order to attach the plasterboard sheets to the framework, self-tapping screws are used, which must be at least 0.25 m apart. After the plasterboard is completely covered with plasterboard, the surface of the material is primed for final facing works, such as wallpapering, painting or installing tiles.
Tip! This type of work on masking pipes in the bathroom is considered the most simple and quite effective.
Plastic
Plastic panels are easy to install. The choice of colors of PVC panels is very wide, so plastic panels are most interesting to customers with an exquisite design taste. In addition, the plastic does not affect the excess moisture in the room. If this material has approached the consumer according to its characteristics, you can proceed to closing the pipes in the bathroom with plastic panels.
- The first construction is metal or wooden frame construction.
- For mounting a wooden structure, the markings on the surface of the wall are made in the vertical direction for fixing the slats. To prevent the plastic panel from bending, the distance between the slats should be up to 0.4 m. Special brackets for fastening operations are attached to the wall surface, the vertical spacing between which should be about 0.5 m. Then the strap is mounted in the same vertical direction to mounting brackets 2.5 cm long screws
- The frame structure of metal is constructed using a CD profile, which is often used to install gypsum boards. The installation work goes through the same steps as when installing with the use of a wooden bar, but the metal frame is fixed to the fixing brackets by small screw-bolts. At installation of a level or a lateral profile there is no opportunity to fasten it from a side. In this regard, the following operation is done: the metal profile is screwed on the side from which it can be done without difficulty, and on the problem side, the brace is bent over the structure and clings to the front.
- Since the wood does not perceive the effects of moisture, the wooden frame is treated with special impregnations to prevent the material from becoming covered with mold fungus, blackening and eventually rotting. In this regard, the metal frame compares favorably with the wooden one. Although a metal profile is more expensive than wood, it is less susceptible to moisture. This means that the metal frame is economically preferred.
- The frame elements are installed in different directions. Depending on the design, they can be both perpendicular and parallel to the panels. The latter are attached to the transverse elements at a distance of up to 0.4 m. Different parts of the transverse profile must be at the same height.
- After installing the frame, it is the turn of fixing the panels with screws. The work begins with the installation of the guide element, which gives the joints with the walls a more aesthetic look. For cutting plastic panels used well-sharpened knife.
- At the final stage, inspection hatches are installed, which allow access to the pipes. The hatch must be the required size.
Without a qualification builder, any engineer, football player or lawyer will be able to close the pipes in the bathroom with their own hands. It is only necessary to have the desire, as well as apply perseverance and ingenuity.
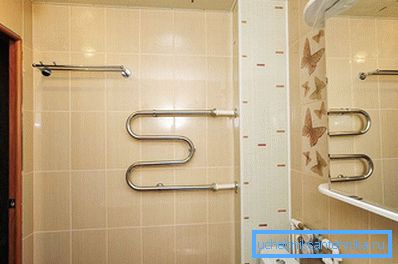
A photo
Video
This video shows a solution to the problem of masking pipes in the bathroom: