How to cook a pipe electric welding
The most common method of connecting pipes both on highways and on various secondary branches of pipes with low or high pressure in industrial, industrial and domestic conditions is a welded joint. This is due to the fact that it is able to provide a high sealing of the joint and strength comparable to the strength of the walls of the whole pipe section. This type of connection is not separable and therefore is used on branches, inset, bends, pipe joints in places where constant maintenance is not required by technical staff. In this article we will talk about how to weld electric pipes.
Advantages and disadvantages of electric welding
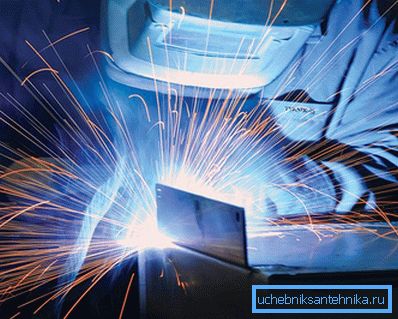
The following advantages of welded joints can be highlighted:
- The possibility of obtaining compounds of large sizes.
- No changes in external and internal dimensions due to the connecting seam.
- Use for welding material similar to the material of the pipe, thereby retaining all the properties of the pipeline.
- Cheapness and simplicity of the method.
Disadvantages of welded joints are mainly caused by low qualifications of the welder due to his inexperience, non-compliance with the rules and requirements of the technology, which led to incomplete welding, cracking, displacement and residual stresses in the weld area due to underheating or overheating. Another disadvantage is the difficulty in adjusting the arc to ensure the same conditions for the formation of the joint, since the electrode in the arc constantly melts and moves unevenly along the surface of the pipe. In addition, to determine the quality of the connection without the use of special devices, as well as to assess the structure of the modified metal is possible only by external signs.
Process basics
The process of electric arc welding consists in that an electric arc is formed between the metal material being welded and the electrode, under the influence of which a specific pipe section and an electrode are heated, as a result of which they melt and the two compounds are mixed. The magnitude of the melting depends largely on the diameter of the electrode, the pipe material, welding mode, the speed of movement of the arc on the surface.
The electrode has a special coating, which during melting creates special conditions in the arc that prevent the interaction of metal with air and the formation of a protective film. At the same time, the pipe material and the molten electrode material, while in the arc, contribute to the creation of the weld when the arc is removed and cooled. Slag is formed on the surface of the welded joint, which is subsequently required to be removed.
What tool you need for welding
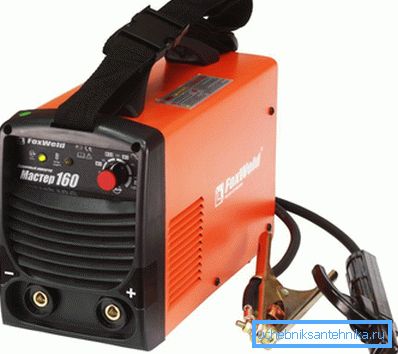
For electric welding, you first need a welding machine. Today there are two types of such devices:
- Devices made on the basis of a step-down transformer, in which the welding current is controlled by changing the magnetic gap, the position of the rheostat or other regulators. It is already obsolete and practically not used, since it has considerable weight, and its transportation can be difficult.
- Inverters operating at high frequencies. They used a smaller transformer, due to which the device became easier and more transportable. It is possible to adjust the welding mode in it with a sufficiently high accuracy. However, they are less reliable in operation and require the appropriate qualification from the welder.
Tip! Welding machines can be powered from a network of 220 V or 380 V, there are also combined options. Calculated at 380, more suitable for a network in which there are no power surges or subsidence. For weak power grids, modern inverters will be the optimal choice.
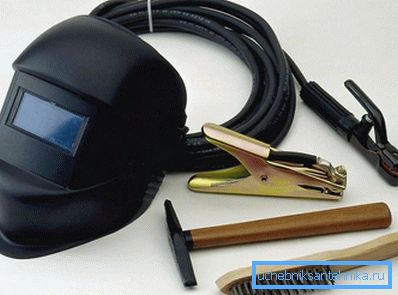
In addition to the welding machine, you will need the following auxiliary equipment:
- It is necessary to have a mask with a special filter so that you can see the place of welding, and the face and eyes are protected from sparks and molten metal. In addition, you will need overalls that completely protect the body parts and thick gloves made of suede so that the clip with the electrode is held securely in your hand.
- Brush on metal for cleaning the place before welding and for descaling.
- Electrodes suitable for specific conditions.
- Chipping hammer.
How to pick up the electrode?
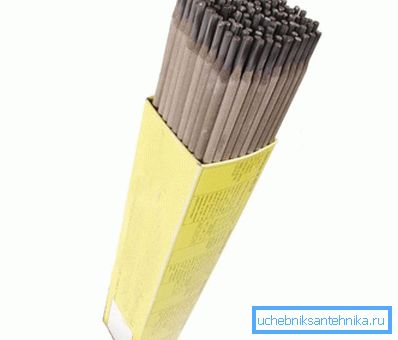
Before boiling pipes by electric welding, it is necessary to choose a suitable electrode, since the quality of the seam and, accordingly, the duration of the pipeline operation largely depends on its choice. It is a metal rod coated with a special layer for welding. The electrodes differ in the thickness of the rod and the amount of plastering. For pipes used rods with a thickness of 2 to 5 mm. The coating may be from 3 to 20% of the total mass.
Tip! Since the creation of the arc requires a special atmosphere that prevents the ingress of air, therefore, rods with a thicker coating will be better. However, their size should be the same along the entire length of the rod, not have shells and cracks or any other defects.
But the more plastering, the more slag is formed, which is a non-metallic compound that significantly loses its strength properties after cooling, so you need to find some compromise in the choice.
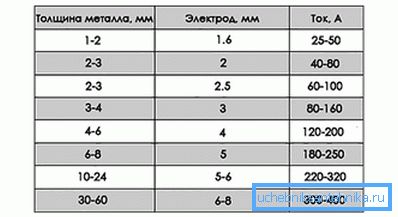
Depending on the thickness of the pipe, the electrodes are chosen as follows:
- When the wall thickness of the pipes being welded is less than 5 mm, an electrode with a thickness of 3 mm is selected.
- When the thickness is more than 5 mm, an electrode of 4 or 5 mm is selected depending on the required thickness of the seam and degree of welding.
- In the multilayer weld formation method, 4 mm electrodes are usually used.
Tip! To choose the thickness of the electrode can be experimentally. Since the current is directly proportional to the thickness of the rod, then, accordingly, the electric arc will increase, and the pipe will melt faster. At the same time, there is a minimum current value, below which the quality of welding deteriorates markedly.
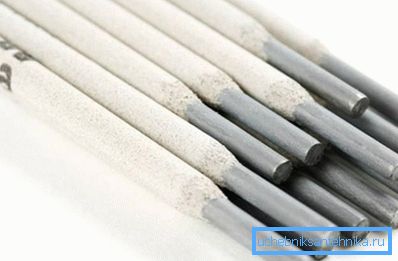
Therefore, you need to know how to choose the right electrode, which provides sufficient current flow. A reference point can serve as a dry crackling of the arc without additional noise.
Preparation for the process
Before starting welding, make sure that there are no flammable and explosive substances and materials near it. If there are any, then it is better to shield them with some non-combustible material and place a container with water near it just in case. The edges and surfaces of pipes near the weld must be cleaned. After that, it is necessary to secure the grounding and check the integrity of the cable. The required current is set on the transformer of the welding machine in accordance with the thickness of the pipes being welded. Then the arc should be ignited by moving the electrode slowly at a distance of 5 mm from the surface of the pipe at about an angle of 600, as a result of which sparks should appear. After that, the electrode must be transferred to the welding site, keeping it at the same distance from the pipe.
Tip! Since the electrode will shrink during welding, it should be brought closer as necessary so that the distance does not change. If the arc does not ignite, the current should be increased until sparks appear. If after that you can not ignite the arc, then you should take the electrode thicker.
Usually for rotary joints, the current on the welding machine with a electrode thickness of 3 mm and pipes up to 5 mm should be in the range from 100 to 250 A, and non-rotary - 80-120 A.
Description of the procedure for welding pipes
After achieving a constant arc, you can proceed directly to welding. During welding, the arc is moved as follows:
- progressively along the weld, so that the arc will be stable;
- lengthwise to create a thin seam with a height that depends on the speed of movement of the electrode along the surface;
- transversely to provide the required thickness of the seam by moving the rod with oscillating movements.
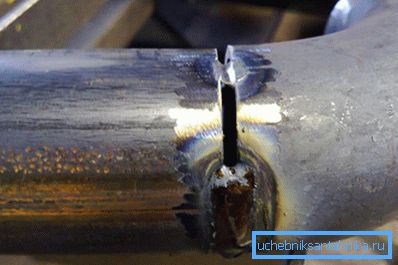
Pipes with a small diameter and wall thickness are welded with a continuous seam, while pipes with thick walls are intermittent. Welding of joints should be carried out before the joint is completely welded without interruptions. When welding joints with a wall thickness of up to 6 mm, two weld layers are made, with a thickness of up to 7 mm - in three layers, and with thicker walls - in four.
Tip! Each weld layer must be cleaned before welding the next layer in order to ensure uniformity of the weld.
The first layers are usually welded in steps, starting from the edges of the pipes with melting, and the subsequent layers are uniformly continuous. The stepped version is applied when the pipes are thicker than 8 mm: the base layer is applied by dividing the surface of the pipes into certain zones with a small area and welding through one area, and then the leaked ones are dovar. After the first layer is welded, it is inspected for the presence of cracks, since the quality of the entire weld depends on it. If there are any, they are smelted and re-welded.
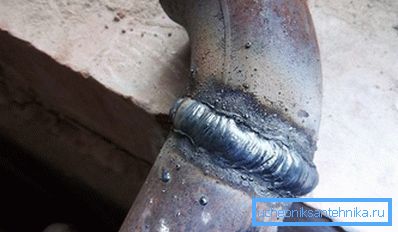
Subsequent layers are welded by turning the pipe or evenly moving the electrode along the surface of the seam, with the starting point of the welding offset relative to the end approximately by 20? 30 mm relative to the previous layer and changing the direction of movement of the electrode to the opposite. The last seam is made with a smooth surface and a smooth transition to the size of the pipe diameter. If pipes with square section are welded, then their ends must be firmly fastened so that the metal does not lead and the pipe is not deformed. After the end of the weld, the surfaces are cleared of slag.
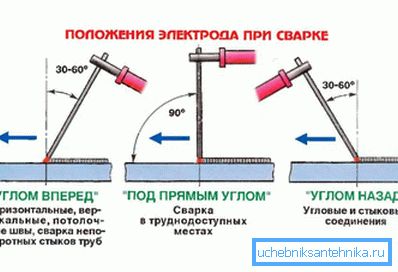
Welding pipes by electric welding process is simple, but responsible, requiring care and adherence to the sequence of actions performed.