How to install pipes in the bathroom: technology works
If we talk about multi-storey residential buildings, the laying of pipes in the bathroom practically includes all the plumbing fixtures in the apartment - there is only a kitchen, but there also the water supply and sewage are removed from the bathroom. Perhaps you have a separate bathroom, but this does not change anything, unless you have to make additional openings in the partition, so we will take the joint sanitary unit in its standard form as a basis.
Wiring can be done in two versions - inside the wall and on top of it, which we will now consider and show you the video in this article.
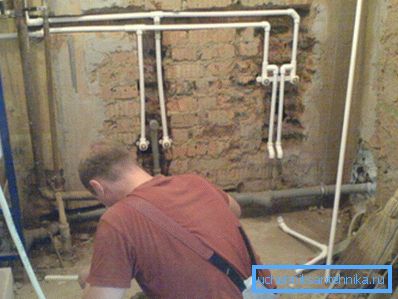
Plumbing plumbing
Note. In the question of how to hold pipes in the bathroom, we will focus on modern technologies and choose polyvinyl chloride (PVC) for sewage and polypropylene (PP or PPR) for plumbing. Of course, there is still metal and metal-plastic, but today these materials are used very rarely.
Materials
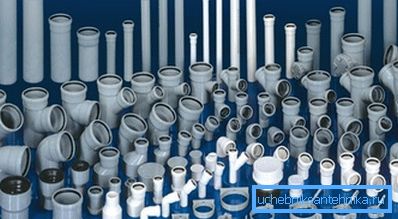
- For distributing sewer pipes, we will need PVC pipes with a diameter of 100 mm and 50 mm, In addition, in some situations a 32 mm section is used for a washing machine and / or dishwasher. Various fittings are used for joining such pipes: couplings, angles, tees and PVC reductions, and in addition, the reduction can be rubber, for example, to change from a 50 mm bell to a diameter of 32 mm. For joining a unique cross-section, rubber seals are used, which are supplied with the pipes.
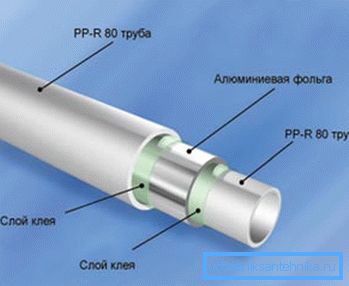
- Polypropylene pipes for water supply can have a diameter of from 16 to 125 mm, but in this situation we are only interested in 20-mm samples, and even if the riser in the apartment has 32 mm, then a transition reduction should be screwed onto it with a 20 mm output. But besides the PPR section, walls may differ and there are some designations here, these are RN10, RN16, RN20 and RN25, but in this case we are interested in RN16 (wall without reinforcement) and RN20 (reinforced with aluminum foil in the middle of the wall). RN16 has too thin walls, and RN25 is reinforced at the very top and for its soldering you need a shiver to remove the foil, besides the price of such a pipe is quite large and it is used mostly for centralized heating.
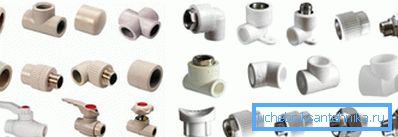
- For PPR docking, fittings made from a homogeneous material are also used - these are couplings, angles (32 ?, 45 ?, 90?), Tees, reductions, bypasses, and threaded pipe fittings for switching to metal. Given the fact that the operating life of polypropylene is much higher than that of a metal, the instruction recommends using trunk cranes also better to install from PP.
Sewage
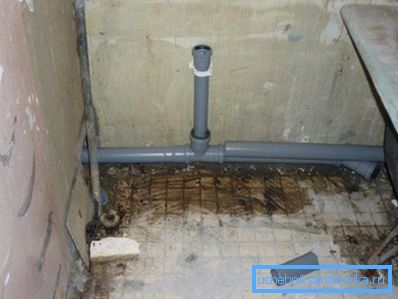
To install the sewage system in the bathroom, you need to start distributing from the riser (the riser can also be replaced) - there is a quadrangular bump in there with a lead to the toilet (100 mm) and a lead to the rest of the circuit (50 mm).
The wiring itself can be done along the wall, fixing the pipe to the brackets, as in the photo above, but you can also drown it into the wall by making grinders and a perforator for this. Try to clearly mark the location of the bathrooms, so that the embedded tees correspond to the position of the bath siphon, sink, or sink.
The slope of a 50-mm pipe should ideally be 3 cm per linear meter, but if necessary it can be slightly increased, but you should not do less. If you use PPR with a 32 mm cross section for draining from a washing machine or dishwasher, then there is no need to follow the slope, as there is a forced drain.
Water supply
Note. Despite the fact that the tubular junction scheme in the bathroom implies cold and hot water, that is, using PPR PN16 and PPR PN20, many plumbers refuse cold PN16 and all wiring is done using PN25, especially if the circuit is covered with plaster / plaster or drywall.
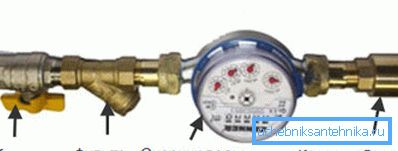
We continue to look at how to lay pipes in the bathroom and begin with the installation of a water meter, which is usually packaged in close proximity to a water riser in a vertical or horizontal position (does not matter).
Pay attention to the sequence of the package - immediately after the crane there is a screen filter, then the water meter itself, and after it the check valve, only on all these details there is an arrow by which you can determine the direction of the water. If your house is connected to the DHW, then in this case, water meters will have to install two - on cold and hot water.
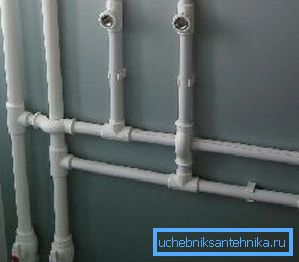
Wiring can be done on top of the wall, or you can heat pipes into pre-made grooves in order to close them with plaster so you can save a few centimeters of usable space, which is very important in small apartments. In typical apartments, the location of the bathrooms occurs in the following order: toilet, sink, bath (shower or box) and output to the kitchen sink - the washing machine can be both in the kitchen and in the bathroom.
It is in this order that the cold water wiring is done, and then, parallel to the cold circuit, hot water is supplied, which is powered by hot water supply, an electric boiler or a gas column (you can cut the cold water supply to the boiler or column anywhere, depending on their location).
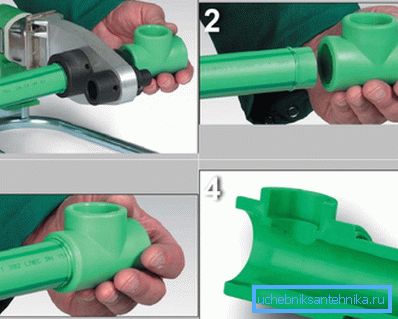
PPR welding is carried out in three stages: first, a pipe with a fitting is heated in the nozzle (for a diameter of 20 mm, the hold is 5-6 seconds), then they are simultaneously released, joined and held for another 2-3 seconds until it cools. The fitting depth of a 20-mm pipe to the fitting should be 14-17 mm, therefore, it should be heated to the same distance.
Conclusion
Do not forget that the eyeliner pipes to the faucet in the bathroom with their own hands must end at a certain distance - the centers of the fittings are 150 mm apart from each other. In order to make it easier to install them, a special soldering socket is used, where these fittings are located on the bar.