How to make a box for pipes
Communication is the main component of any housing. But often these benefits of civilization spoil the whole look of the room, and therefore it is worthwhile to hide the pipes so that they are not visible, while the room will become more aesthetic.
Today you can use two more profitable, both in the finishing plan and in the organizational issue, options:
- Hide pipes with built-in furniture.
- To build a box with the subsequent finishing.
Tip! When choosing an option, it is important to think about all the nuances of maintenance before starting work so that later you can carry out repairs without hindrance. Considering the specifics of the location of highways, it is possible to make collapsible structures or to provide special windows at the connection points for accessing and replacing cranes.
The box construction option is more profitable, as they can reliably hide any communications. Plasterboard is usually used for plating, which is easily mounted on a frame, and any finishing material can be laid on its surface.
Before you make a box for pipes in the bathroom, you need to decide which option from the two below will suit you.
- In the first embodiment, you can close only the pipelines, while making small protrusions that can be used as shelves.
- In the second case, you can completely close the entire wall. This option, of course, steals precious meters of small spaces. But in some cases it is only possible to hide the pipes. But, as a rule, when installing the box in the whole wall, the interior is used as additional cabinets for bathroom accessories.
Preparation for work
Before starting work, it is necessary to conduct a comprehensive survey of the premises, and to plan a plan for future work.
- To start inspect the pipeline. It must be free from visible defects and damage. It will be much easier to make a reliable frame with subsequent finishing, if the pipelines in the work site have a minimum of connections.
- All pipes must be airtight. If the inspection reveals a gap or a small leak appears, they must be eliminated.
- Before starting work, think over and draw a plan in which you need to draw a detailed outline of the box installation and mark the location of the hatches to access fittings and other connections.
Tip! If in a bathroom old iron pipes, then they are not recommended to be “sewn up” in a box. Experts recommend first replacing the entire pipeline with a new one.
Mounting construction
After you have carried out all the necessary activities, you can proceed directly to the installation. All work is carried out in several stages.
- Determining the size of the structure and calculation of the material.
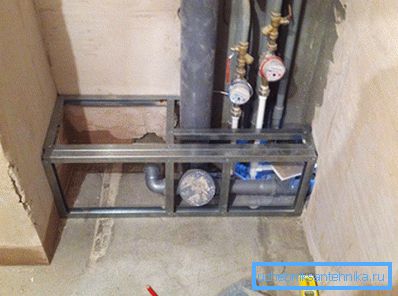
- Mounting frame for subsequent plating.
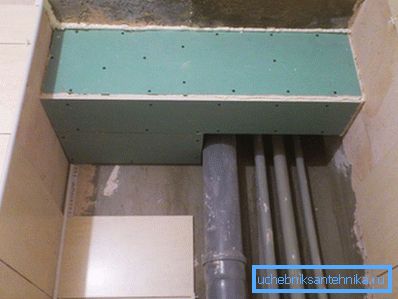
- Sheathing frame.
We carry out measurements
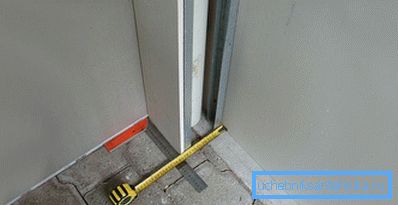
First, the plan is laid out the place of construction of the frame. If you have made a plan in advance, then half the work has already been done. It is important to recall that the distance from the pipeline to the walls should not be less than 3 cm. When marking, do not forget about the thickness of the material and take this into account when measuring.
Having defined the outline of the structure, use a plumb line to mark the attachment points for vertical profiles.

The calculation of the material is carried out according to size. We summarize the height and width of the structure and obtain the required size, plus we add 10–15% to the possible defect during the work.
Frame assembly

To build the structure it is better to use a galvanized profile. If you decide to use for this wooden beam, then first it must be treated with antiseptics. This will protect it from moisture.
To fasten the frame connections you need with screws or sifters. The main thing is to consider what material you will make the frame and, accordingly, use screws for the intended purpose.
The frame elements are attached to the wall with dowels or euron-screws. Mark the places in advance, taking into account that the material used in the finishing should not adhere to the pipeline.
Frame Assembly Instructions
- Initially, the bearing profile is attached to the walls.
- Then, external profiles are installed, which form the front face. Depending on the design chosen, they may be several or one. Attach them with suspensions.
- After that, installation of guides to the floor and ceiling is carried out. Convenient and reliable fastening is carried out with the help of sifters. When mounting racks with a length of more than 1.5 m or a frame width of more than 30 cm, connecting jumpers must be provided between the horizontal and vertical racks. The distance between them can be made no more than 1 m.
Tip! When used for the construction of the frame of wooden bars, cut the place of cutting with mastic. This helps protect the tree from deformation and deterioration during operation when the temperature inside the room fluctuates.
We sheathe frame

To make a reliable box of plasterboard, it is important to carry out a competent cutting of the material, namely, to try to make more solid elements and as little as possible to use small pieces and connections.
Tip! Paint the material in such a way that the edge of the material does not protrude beyond the frame profile and is flush with it or slightly smaller. Small defects in the subsequent close the finishing.
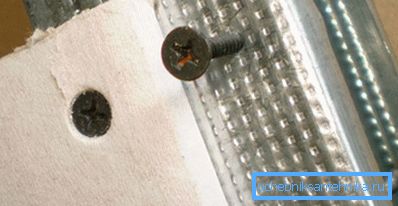
Cutting elements for the front of the box, they need to be fixed to the frame. This is done with screws, the distance between each should be at least 3-4 cm. This will be enough to give the box strength.

When attaching drywall to vertical profiles with a distance of 3–4 cm between the screws, it is not necessary to fix the sheets to the transverse lintels.
Tip! If you have previously designated a place for control over internal joints, then it is better to cut them out on an unattached sheet. To do this, first mark the size of the window and cut it with a jigsaw. It is necessary to install decorative doors after finishing works.
Finishing work
For finishing work it is necessary to sheathe the entire frame completely so that it does not have large gaps. In those places where it will not be possible to seal the area with one sheet, it is necessary to refine the place by cutting out the relevant details. But better try to minimize the presence of small parts, use them only in an emergency.
At the end of the work, the plasterboard box can be finished with any material, plastered for painting or put tile on it. Before finishing finishing necessarily do all the preparatory work.