How to make a sandwich pipe for the chimney: device and
If we talk about ease of installation and safety of operation, the sandwich pipe for the chimney - built with your own hands, will be the best option for your country house or cottage. Chimneys of this type have a number of advantages, it is the almost complete absence of soot on the walls, and, consequently, increased fire safety.
In addition, there is not going to condensate and it is very easy to maintain. Due to its characteristics, such a device is ideal for wooden buildings, such as baths, which will be discussed below. And as an additional material, we will show you the video in this article.
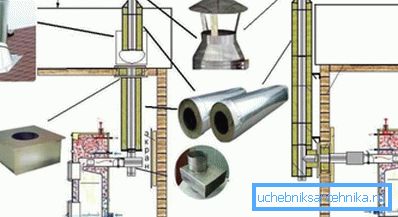
Installation steps
Note. The installation of a sandwich pipe involves the use of heat-resistant hermetic for docking so that air does not leak. Otherwise, this will lead to a decrease in thrust and heat transfer quality of the furnace itself.
Pipe device
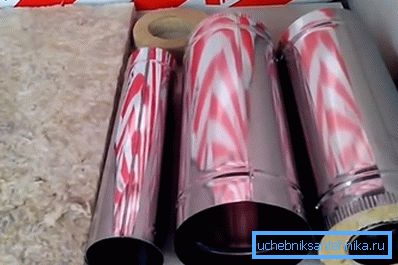
- In the upper photo you see a chimney device made from a sandwich of pipes, more precisely, the pipe itself is (from left to right) basalt wool (from melts of volcanic formations), which serves as a gasket, then the inner cylinder and sleeve, and in the background is a cap. The cylinders are made of heat-resistant stainless steel without the addition of additives M 430 (not austenitic) - this is the cheapest alloy of all quality grades and it fully corresponds to the loads that will be placed on it in the future.
- Also for chimneys of this type austenitic steel can be used, but at the same time the price of the structure grows, about one and a half times, but along with it the corrosion resistance also grows. In addition, the brand will affect the cost of a chimney made from a sandwich pipe, but it should be noted that the brand has no direct relation to the quality of products, therefore, first of all, attention should be paid to the metal, and not to the brand inscription.
- The outer cylinder (metal thickness 0.5 mm) can be used for both sandwich and gas chimneys, and the sheet metal is converted into a cylinder using roller welding. The inner sleeve (sheet thickness 0.8-1.0 mm) is welded with an uncoated electrode (wire) and, depending on the circumstances, it can be argon or arc welding.
Note. As a manufacturer of sandwich pipe for the chimney manufacturers usually use the basalt wool type PAROC. The advantage of this material is that in its manufacture, resinous binders are not used, which are destroyed when heated and the mat turns into sand.
Installation over the wall
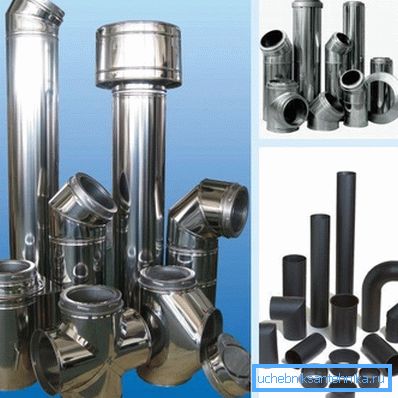
There are also many reasons for installing chimney sandwich pipes through the wall, and not through the ceiling, and in this situation you will be helped by various adapters for assembling the structure. You can see these elements in the upper photo - corner adapters, feed-through couplings, tees and quadrangles for pipes.
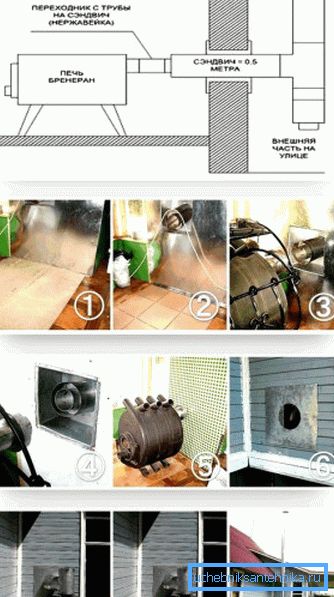
First of all, to assemble the pipe, you will need to disassemble the wall and strengthen the perimeter of the passage, as well as sheathe it with galvanized sheet steel for fire safety. After this, assemble the outer bracket and attach two corners to it as runners for the free slip of the tee.
To observe the same fire safety in the immediate vicinity of the pipe, you need to close the wall itself and you can use 10 mm plywood or OSB of the same thickness to do this, and fasten a sheet of asbestos over the whole area over it.
A galvanized sheet metal is fastened on top of the asbestos (sheets usually have 20001200 mm in the perimeter). The sheet will also need to cut a square hole for the tunneller, and the tunneller itself will be opened with varnish on metal to protect against corrosion.
Note. When installing a metal chimney through a wall, a method called a rebate is used. This means the space that must be left between the pipe and the wall.
Rooftop installation
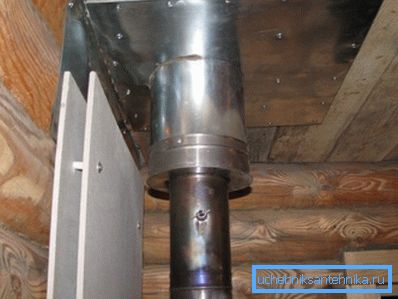
Like many devices of this type, the installation of a chimney made of sandwich pipes is done by hand from the bottom up, that is, from a heating device (stove) through the ceiling or through a wall. When assembling a structure, pay attention to the ends of the cylinders - on the one hand, they are necessarily narrowed, which makes it possible to mount the structure by inserting pipes one into the other, which in practice looks very easy.
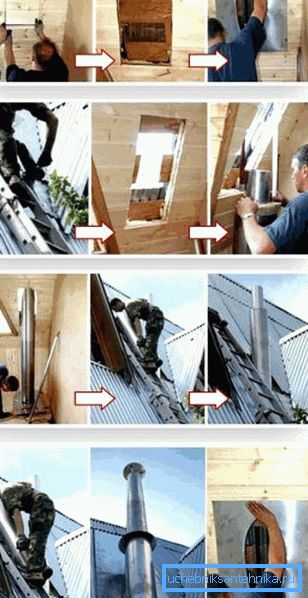
In the roof (ceiling and roof), just like in the wall, you need to make a hole close it with a sheet of galvanized metal, having previously placed asbestos under it to comply with the fire safety of the structure. Outside, galvanizing (depending on the roofing material) you either bend over the front of the roof, or make ends under it, but in any case you must (after installing the pipe) secure the sheet with self-tapping screws.
If you are building a bath, then the roof there is often flat (lean-to) and the chimney height must be at least a meter from the top of the ramp, and for a dual-slope roof you need to rise at least 30 cm above the ridge.
When the chimney has a height of more than a meter, this is very good - as the thrust increases, but at the same time its windage increases, consequently, the resistance to wind decreases. In such cases, the pipe strengthened with braces that are attached to the clamp at the top of the chimney.
To increase traction, a deflector is mounted on the upper end of the chimney, but if the front roof is made of combustible materials, such as shingles, the deflector is equipped with an arrestor. This is such a small steel mesh that does not allow burning particles of fuel to fly out.
Fastener
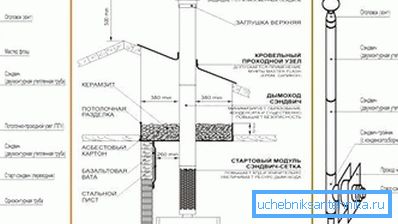
The total length of the chimney from the grate to the deflector should not exceed 5-6m. For docking, be sure to use heat-resistant sealant (at least 1000? C), and after assembly, do not forget to remove the protective film.
In order to maximally facilitate the maintenance of the pipe during its operation, a revision crashes into it - this is a passable tee with a side door through which later it will be possible to carry out cleaning.
The support bracket for the chimney can be made independently - for this you will need steel corners of 5030 mm, a grinder and a drill for drilling bolt holes. Bracket frame can be assembled with M10 bolts or fastened with electric welding.
Conclusion
In the presence of all the necessary material to make the installation of a sandwich chimney with your own hands is quite simple if you follow all the instructions from the manufacturer. Much more labor costs will be spent on making holes in the ceiling or wall and covering them with protective materials (see also the article Polyethylene pressure pipes - we study all their features).