How to solder polypropylene pipes - a detailed guide
When installing a plumbing and heating system, a simple socket connection is not enough. In order to ensure acceptable tightness of the joints and the durability of the pipeline, it is necessary to use welding.
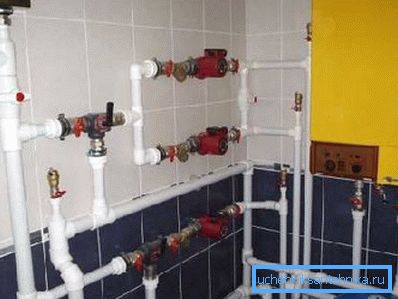
Features of the installation of PP pipeline
When it comes to the installation of the pipeline, a person will definitely face the question of how to solder polypropylene pipes.
In general terms, this process can be divided into 2 phases:
- Both plastic elements are heated;
- While the material is cold, the end of the pipe is inserted into the socket. After cooling, the tightness of the joint is guaranteed by soldering the material.
However, in this simple matter there are some subtleties. Welding technology depends on whether the pipeline is reinforced or not.
- Reinforced PP pipes are mainly used for hot water supply and heating systems. Aluminum foil (or fiberglass) is placed between two layers of plastic and prevents excessive linear expansion when heated. The PN25 marking says about the reinforcement with foil, and the reinforcement with glass fiber is found with the marking PN20; ordinary pipes are also produced with the same marking;
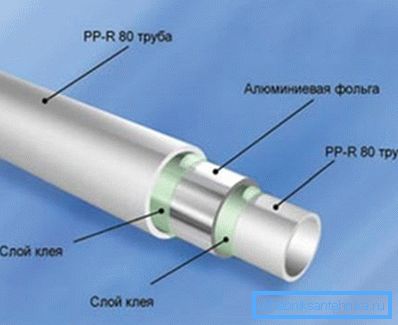
- When it comes to how to solder polypropylene pipes for cold water, you can use a regular non-reinforced pipeline.
Features of the reinforced pipeline
The wall structure of the reinforced PP pipe imposes certain restrictions on the welding process. But how to solder polypropylene pipes with a reinforcing layer? The main task here is that the coolant is not in contact with the reinforcing material (fiberglass or foil).
If you try without additional preparation to solder polypropylene reinforced pipes, the heat carrier will affect not only the layer of polypropylene (the end of the tube), but also the layer of glue between the foil and polypropylene. Sooner or later, the adhesive will not withstand the effects of high temperature and pressure of the liquid, so the probability of delamination is high.
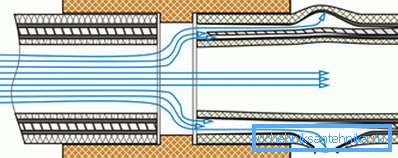
As a result, water begins to fall into the space between the top layer of polypropylene and the reinforcing material. As a result, bloating occurs on the surface of the pipeline and leakage - the cost of improperly preparing the pipe is very high.
Soldering PP pipes in stages
In general, you can select the following welding steps:
- pipeline preparation;
- heating of the iron (soldering apparatus);
- Polypropylene heating and pipeline connection.
The main difference of technology, due to the reinforcement of polypropylene, affect the preparatory stage.
Welding preparation
Instructions for preparing pipeline segments for welding are as follows:
- the required pipeline length is cut;
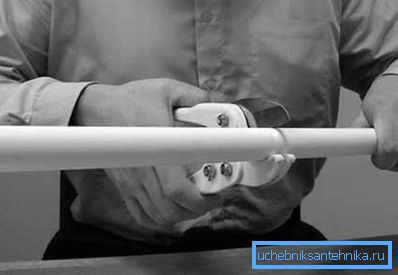
- the butt is thoroughly cleaned from burrs and dirt;
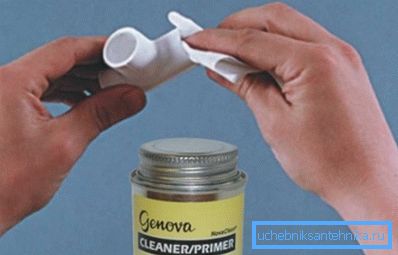
- it is desirable to remove the chamfer, the outer one - from the pipe, the inner one - from the inner surface of the socket. The internal chamfer can be removed even with a knife, if there is no special pickup.
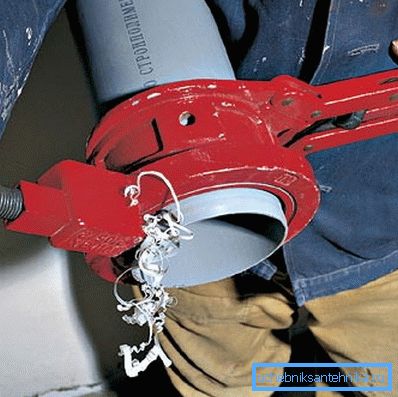
Note! If the chamfer is not removed, the soft plastic can simply pull up when the pipe is inserted into the socket. As a result, the softened material may interfere with the free flow of fluid.
As for the reinforced pipeline, here it is also necessary to eliminate the possibility of the contact of the reinforcing material with a liquid.
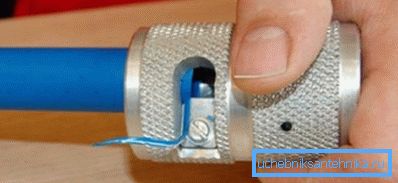
- if the reinforcement is external, then you just need to clean off the aluminum layer with a shaver. To speed up the process, you can use special nozzles for drills;
- in the case of internal reinforcement, it is better to remove the top layer of plastic and aluminum layer.
Note! Some of the welding simply scraped out the reinforcing layer with a tweezer, and the layers of polypropylene fuse with each other during soldering. Such an approach has the right to exist, but practice shows that this compound is also subject to delamination.
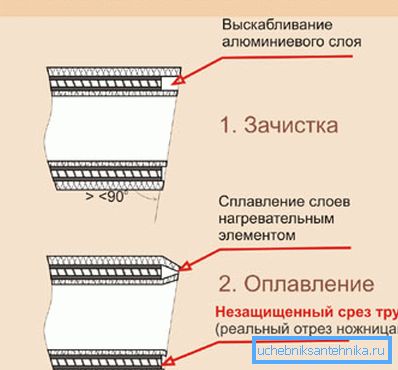
When solving the problem, how to solder the polypropylene pipes with internal reinforcement, you will have to use a shaver. This is a fairly simple tool, and it looks like a cylinder with a cutting edge inside. In the process, the shaver is put on the pipe and is twisted with effort, the duration of the operation depends on the thickness of the layer being removed.
The knife itself is fixed with a bolt, so when it is necessary to remove a thick layer of material, it is better to do it in layers, removing thin chips. If necessary, the position of the knife can be adjusted manually.
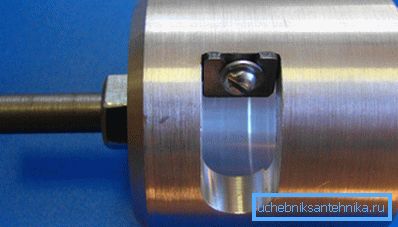
As for the cost, then buying an expensive shaver only makes sense to professionals who are professionally involved in the installation of heating and plumbing. The difference between the cheaper option is only in the durability of the cutting edge, such a knife is made of a less durable material.
Welding tool
The design of the "welding machine" is quite simple:
- housing with temperature controller and on / off indicator;
- the sole (mandrel), its shape resembles an iron. Holes for heating sleeves of different diameters are provided in the mandrel;
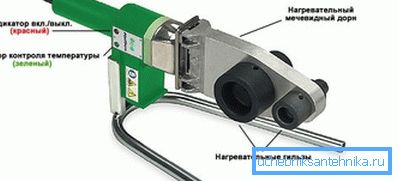
Note! The sleeves themselves have a Teflon coating, so it is strictly forbidden to scratch them with metal objects.
To weld a PP pipeline, it is necessary that the surface of the sleeves be heated to 260 ° C. After that, the pipe is inserted into the sleeve, and the socket is put on the other end. When heating the device, it is necessary to navigate to the heating indicator, as soon as the temperature of the mandrel reaches the desired value, the light will go out.
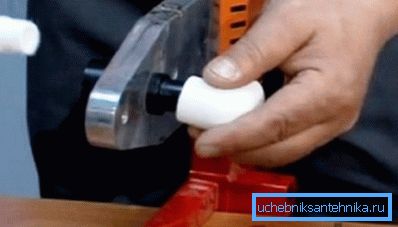
Note! It is important not to overheat the material, the result of overheating may be that the plastic will partially overlap the internal cross-section when connected. You can judge the overheating by changing the color of polypropylene.
Warming up time depends on the diameter, you can navigate to the values given in the table.
| Outer diameter, mm | sixteen | 25 | 40 | 63 | 90 |
| Duration of heating, with | five | 7 | 12 | 24 | 40 |
| Maximum pause, with | four | four | 6 | eight | eight |
| Cooling time | 2 | 2 | four | 6 | eight |
Pipe connection
After heating the pipeline, you can go directly to how to solder polypropylene pipes. At the same time, part of the plastic will be squeezed out at the joint, this is normal and only confirms that the welding has been performed correctly.
When connecting PVC pipe, the pipes are rotated about half a turn in the socket. This is done to achieve greater tightness. In the case of propylene, this is absolutely contraindicated, the softened material is deformed and becomes unsuitable for use.
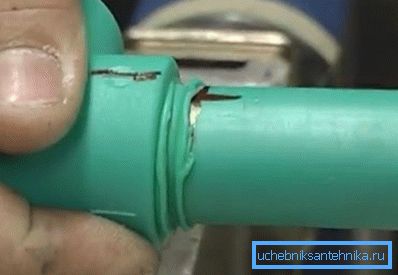
In order for the polypropylene to harden, it is better to simply put aside a fresh compound for a couple of minutes. The final tightness of the joints is checked after installation of the entire heating (plumbing) system, by letting water under pressure.
After completion of work, be sure to wipe the surface of the sleeve with a soft cloth. Despite the Teflon coating, some plastic may remain on its surface. If scratches appear on the surface of the sleeve, it will definitely affect the quality of welding, such a defect cannot be fixed with your own hands.
Summarizing
Installation of heating systems and plumbing using modern polypropylene pipeline is impossible without the welding process (soldering). This process has nothing to do with the welding of metals, polypropylene soldering is much easier. Thanks to this, even a novice plumber can handle the task of joining a polypropylene pipeline.
The video in this article shows an example of proper soldering of polypropylene pipes.