How to weld electric pipes: step by step instructions
The use of electric welding is one of the available methods for connecting metal pipes. Through the use of this method, it is possible to obtain a tight and durable connection of elements into a system that is capable of performing its functions for a long time. However, in order for this to be the case, the welding seam must be of the highest quality. The success of the work depends on a number of factors, including the quality of the pipes themselves, the right choice of electrodes and the qualification of the welder.
Job Description

First of all, it is necessary in general to determine the essence of the upcoming work. Electric arc welding is called the process of joining metal products together, due to the local heating of metals to the melting point. The essence of the method is as follows:
- The welding machine is connected to the power supply.
- After the current is converted, it goes to the electrode.
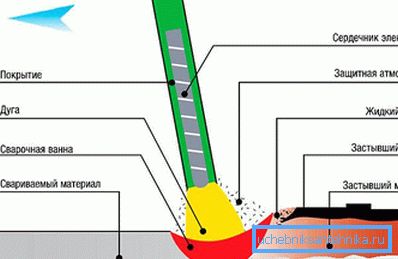
- When the electrode approaches the element being welded, an electric arc arises, the temperature of which is about 7000? C, which exceeds the melting point of most metals.
- Under the influence of an electric arc, the metal of the parts to be welded and the metal that is part of the electrode begin to melt.
- A so-called weld pool is formed in which the molten parts of the materials are mixed, and the slag that appears during the melting floats.
- As the point of impact of the electric arc cools down, a weld is formed.
With regard to the embodiments of the considered process, we can distinguish the manual, semi-automatic and automatic method.
Of considerable importance is the correct choice of electrodes depending on the wall thickness of the elements being welded and, to some extent, the width of the seam. Here it must be said that in order to determine this parameter, it is worth knowing that an O 2–3 mm electrode will be suitable for welding a pipe with a wall thickness of 1.5 mm.
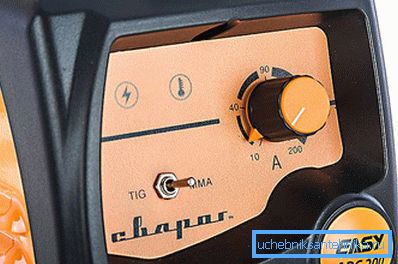
And it would also be useful to mention that, depending on the chosen electrode diameter, the current to be supplied to it should also be chosen. For example, if the diameter is 2.5 mm, then it is necessary to create a current of at least 80 amperes. If the diameter is 3 mm, then the current should be 110 amperes. If the conditions are broken down, i.e., if a current of sufficient strength is not supplied, the electrode will not melt, which means no welding will occur. If we apply a current greater than the required force, then the electrode rod will begin to melt faster, which will entail an increased consumption of material and will create certain inconveniences in the work.
Types of welding seams
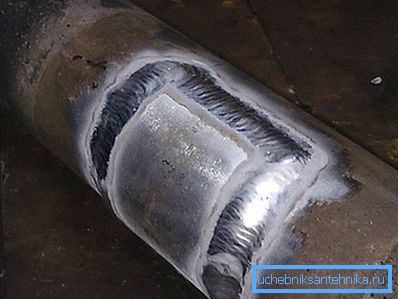
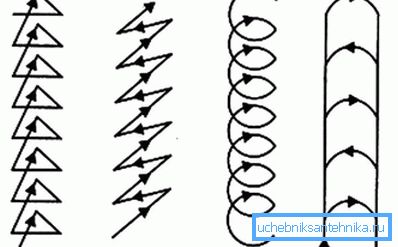
The quality of the weld depends on the direction and size of the arc. Too long arc will cause the metal to spray on the surface of the pipe, and the seam will be porous. Such a seam is not suitable for plumbing or heating, as water will flow through the pores formed. During welding, there are three arc directions. Let's consider how to choose them correctly:
- The first method is aimed at the translational motion of the electrode along the axis. In this situation, the arc between the tube and the electrode performs optimal conditions for high-quality weld. The lit electrode must have a constant arc length and move along the axis.
- In the longitudinal movement of the electrode on the weld, a tubercle is formed in the form of a cord around the pipe. The width of the seam is 3 mm larger than the diameter of the electrode, and the thickness is directly proportional to the speed of movement of the electrode. But this narrow type of seam is not very strong, therefore, during welding, the electrode must be led horizontally, adding a transverse seam.
- The transverse seam is obtained during the movement of the electrode across the welded pipe butt, in the form of oscillatory movements. The width of the seam is determined individually for each joint. The cross seam from electric welding can be 5 times larger than the diameter of the electrode used.
When joining the two edges must be edges. During welding, the edge is melted, and a strong seam is obtained.
Work
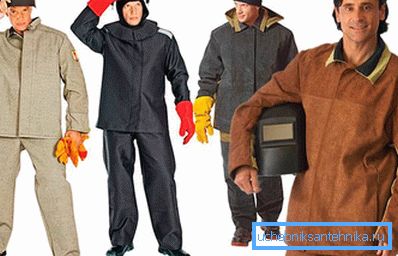
Before starting welding, you need to wear protective clothing, prepare a welding mask and gloves. Prepare a place for welding. Remove all flammable objects. You will need a brush on the metal for stripping the surface of the pipe and a hammer to beat the slag. And, of course, the welding machine itself, and properly selected electrodes.
During the purchase of electrodes, read the instructions on the package. The manufacturer indicates on his product the rules of operation and the purpose of this type of electrodes. The diameter of the electrode and the strength of the current is selected by calculation. For each 1 mm of electrode thickness, a current of 30 to 40 amperes is required. As for inverter welding machines, in this case, for a 3 mm electrode, the required current will be 80 A. These parameters are suitable for welding metal, and for its cutting it is necessary to increase the current to 100 A.
It is necessary to begin work with fixing both pipes in order to avoid displacement of the seam. With the electrode inserted into the holder, ignite the arc and try to boil a short section. The electrode must have a tilt angle of 70? in relation to the welded surface and a gap of about 2–4 mm. Immediately it is necessary to make a reservation that these indicators are very approximate in nature and the optimum values in a particular case will be prompted only by experience.
Tip! During the work, it is impossible to allow the electrode to touch the surface of the pipes, otherwise it will adhere.
Before you decide to work, you need to prepare as much as possible. Here it will not be superfluous to study the theoretical side of the issue, not to watch the relevant videos, nor to consult in person with specialists.