Installation of chimney sandwich pipes
The “sandwich” type chimney is currently the most used one, because it is known for its practical properties and immense functionality. Let's talk about how the installation of the chimney sandwich pipe.
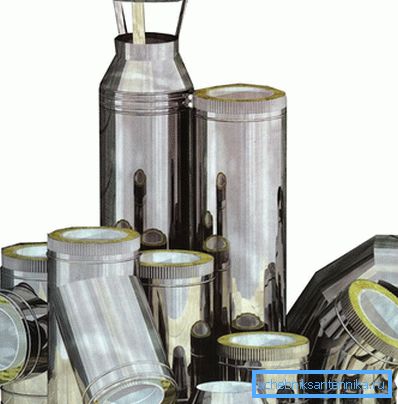
The advantages of this design include the following properties:
- almost complete absence of condensate
- there is no soot on the walls,
- negligible possibility of fire,
- chimneys are easy to maintain and, if necessary, repair.
Sandwich pipes are excellent as a material for chimneys in buildings made of wood, for example, in baths and other wooden buildings.
How to assemble a chimney
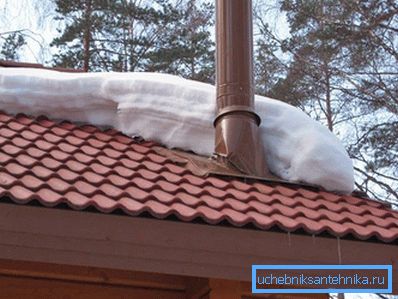
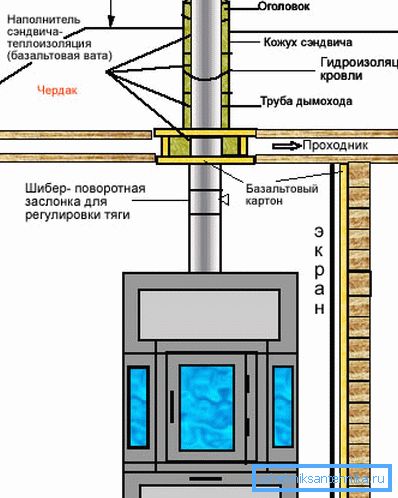
Manufactured chimney consists of parts with a length of 1 m, where each is inserted into the other. In order to better understand how the installation process is performed, it is necessary to clarify exactly how the chimney scheme in the house is presented. Everything is very simple: one product consists of outer and inner pipes, their diameter is different and creates a gap in which the insulation layer is placed. The pipe located inside is usually made of stainless steel, and the external one that does not need thermal stability can be made of both copper and brass.
Tip! Galvanization, if used as a material for pipes, will not be able to behave normally during the operation of the pipe, since during heating, as well as during cooling, it will constantly change its diameter.
The listed defects are not possessed by stainless steel. In addition, when using solid fuels, you can use stainless steel having heat-resistant properties.
Warming chimney
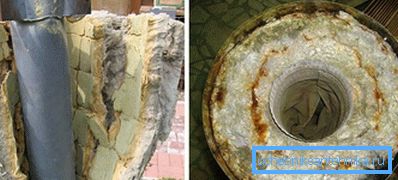
During the installation of the chimney sandwich, special basalt mineral wool is used as a material for insulation. With a thickness of 24-60 mm, it is used as an internal insulation for expanded clay and polyurethane pipes. However, work on its installation is often required to carry out manually, which requires special care.
Pipe connection methods
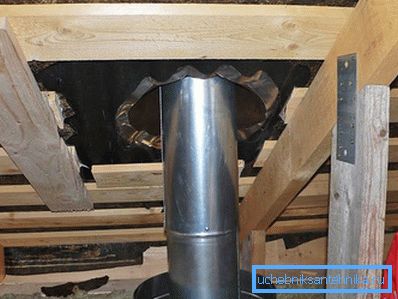
There are several ways to connect:
- flange;
- bayonet
- and the so-called “cold bridge”, “condensate”, “smoke”.
Each method has its own distinctive properties. For example, the “smoke” option is designed so that products emitted by carbon monoxide do not get inside the room (usually baths). The method, which takes into account the formation of condensate, is aimed at preventing condensate formations from flowing down the pipe.
The flange installation method implies that the smoke passing through the chimney does not encounter anything in front of it that would prevent it from leaving the chimney. There are, of course, its drawbacks that are associated with carelessness during assembly. If the assembly is not carried out with sufficient quality, condensate may get into the cracks formed, as a result of which the insulation will be damaged.
Unlike the flange one, the bayonet method completely eliminates any ingress of moisture, since here the inner tube in the chimney goes straight into the socket of the lower sandwich, but there is a possibility of smoke coming out.
Tip! So that the smoke does not harm health, and the condensate does not spoil the insulation, you just need to seal all joints well, and this operation is necessary regardless of the method chosen.
In this case, the internal pipes are assembled “by condensate”, and the insulation should be present in those places where the chimney comes in contact with the wooden elements of the roof. In addition, the sandwich is not suitable for direct connection with the pipe.
Assembly process
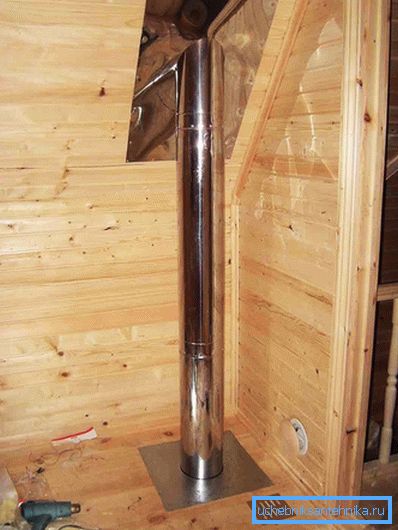
It should be noted that the installation itself is not difficult, because in order to connect the sandwich pipe does not require special construction skills. How does work begin? The main thing to remember is that the installation should always begin at the bottom, and end at the top, while the outer tube should be put on the inner one.
First, it is necessary to connect all the elements that make up the chimney. Starting to install it, you need to consider that one end of the pipe is somewhat narrowed; he is inserted into the lower tube. Since the chimney does not accumulate soot, it is fairly easy to remove condensate from it. This can be done by installing special tees.
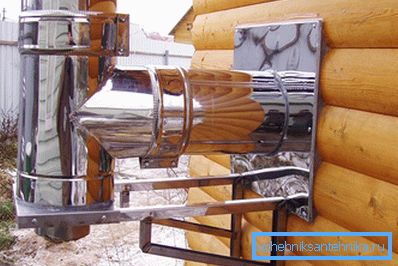
Secondly, you need to hold the chimney upstairs, in the first case, consider the option through the wall. To do this, it makes a hole under the pipe, the pipe is held, and the seams are closed with foam. Mounts under the bracket are mounted outside, after which it is installed. The above-mentioned tees are mounted on the corners attached to the bracket, on which they can move. Outside, the wall can be sewn with a sheet of plywood (about 1 cm thick) or metal. The bracket itself must be painted or varnished to protect against corrosion.
A hole of the required length is drilled in the adapter, after which the sandwich itself is put on it. Sometimes a assignment is used, that is, a space specially left between the wall of the building and the smoke channel.
If you hold a chimney in the roof, then you first need to bring the pipe, and only after that mount the sheet of the roof to the crate.
Tip! With a chimney height of more than 1.2 m, it is necessary to fasten the structure with cables-braces with crimping clamps, otherwise the chimney will collapse under the influence of strong gusty wind.
If the roof is made of flammable materials, then it should be protected from possible fire. To do this, on the chimney pipe, towering above the metal tile or slate, you need to install a deflector with a grid for extinguishing sparks (small cells must be made).
Chimney mount: what you need to know
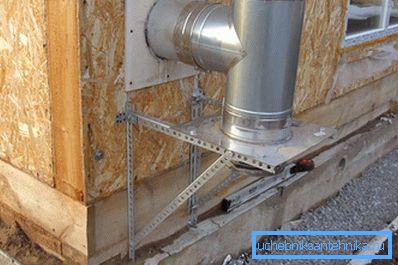
Next you need as much as possible to secure the chimney. All tees and knees, as well as other components are held together with hose clamps, and the tee itself is reinforced with a bracket. If suddenly the uppermost part of the chimney is poorly or not fixed at all - it is better to strengthen it just in case and thereby insure yourself. Usually in this case the braces are used, set at an angle of 120 °.
If it is not clear how the docking joints are fastened, you can learn more about this below. Sandwich pipe, as mentioned earlier, are inserted into each other. After the end of the docking, when you are convinced that there are no gaps and everything is in order, this connection is sealed with a compression clip. If the pipe is held together with some other element, then the clamps must be used on both sides.
By the way, the support bracket can be made by hand. For its construction will need a couple of corners (30, 50 mm). These corners are cut into necessary segments by a grinder, a hole is drilled for the M10 and M8 bolts with a drill, then everything is assembled. Completely the whole process can be found and seen on video on the Internet.
So, we have disassembled how to assemble the pipe in the right way, what and how to connect, how to install the pipe in the stove, how to pass through the wall and the roof and how to fix it. Now, in fact, you can talk about the end of installation.
Completing the installation of the chimney sandwich pipe
There is a small and inconspicuous nuance that people either don’t know or forget about - you need to remove the film from the pipes. It was specially glued to protect the pipes from scratches and dirt, but now that the chimney is assembled and installed, there is no need for it. Moreover, if you forget to take it off, later it will start to slazit under the influence of weather conditions, and will give an untidy look to the chimney.
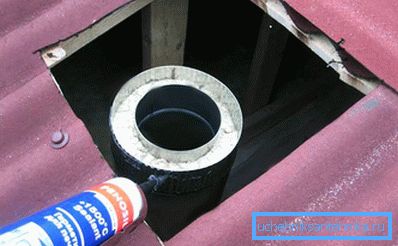
The normal length of the finished chimney should be about 5 m, a maximum of 6 m. This distance is considered to be from the furnace's grate to the top. The entire structure must be checked, each joint or unnoticed clearance must be sealed. Regular sealant will not work, you only need heat-resistant, it can withstand temperatures up to 1000 ° C. Such a sealant is applied to the outer surface of both internal pipes and external ones. If there is a transition from a single-wall pipe to a double-wall pipe, then the outer circle is covered with a sealant. When this part of the work is done, finally it is necessary to check the potentially dangerous places where the pipe can heat up the most. Advice on what the temperature is there.
Would you like to subsequently clean the chimney was easy and simple? Make sure to revise it beforehand. What it is? So called a small removable part, specially arranged in the wall of the chimney. It may look like a hole with a door.
Video
The chimney is assembled using condensate as follows: